How to add custom images and photos to Minecraft: Education Edition
One of the first activities teachers often ask of students in Minecraft: Education Edition, is to open a new world and create a house.
It’s not long before students have created a wide variety of dwellings with all sorts of swimming pools and farm animals around the place – but here’s how you can put your own image onto the wall of the house – well, on anything.
Importing a custom image or photo into Minecraft: Education Edition can seem technical at first – but after you have done it a couple of times you’ll see how easy it is.
As a teacher you can easily create worlds containing numerous custom images for students to explore – recreate art galleries; graffiti examples; billboards; fancy world signage; guides – anything.
Here are the steps to follow to import images and photos into a Minecraft: Education Edition world
1 – Download free – Image Map 3
Image Map 3 is a free app to turn your custom image into inventory items for placing in your Minecraft world.
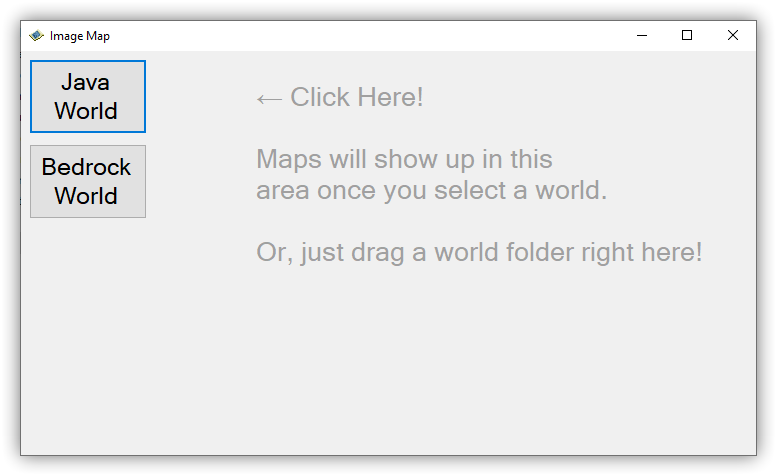
Download the ZIP file, extract and run Image Map 3.exe and you will see the app open like the image below:
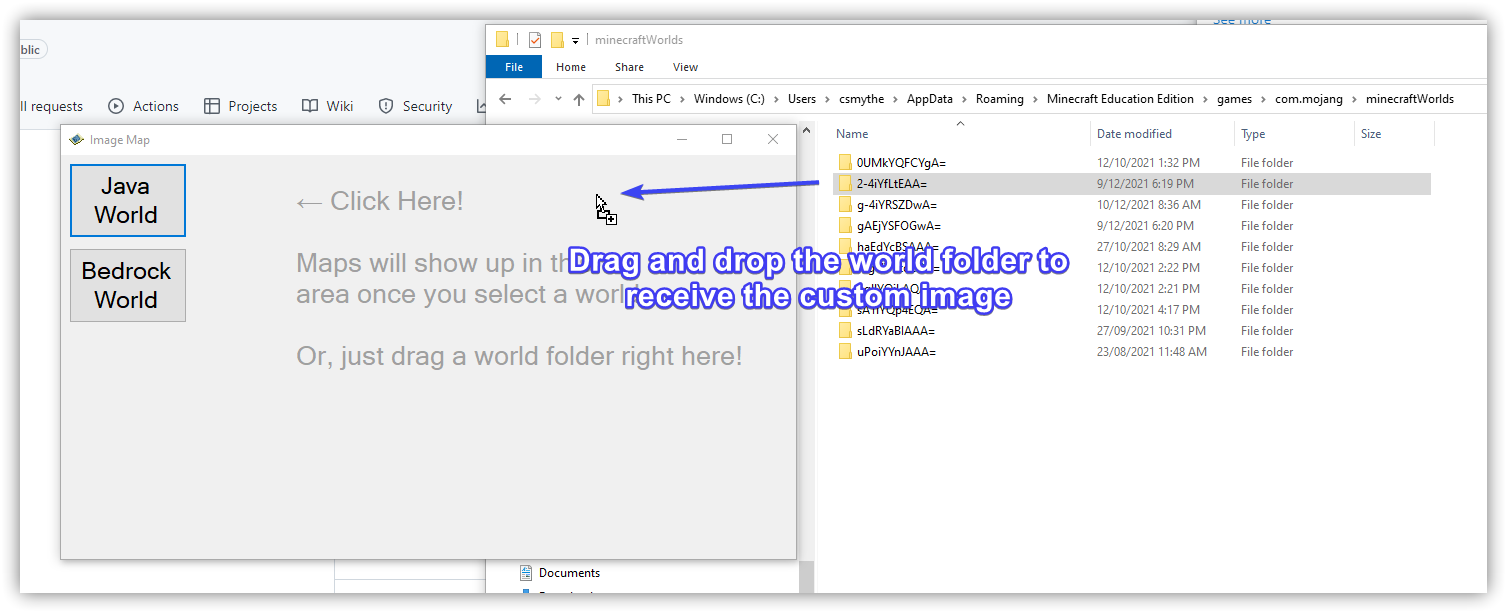
2 – Drag and Drop your Minecraft: Education Edition world folder onto Image map 3 so it learns your Minecraft worlds location
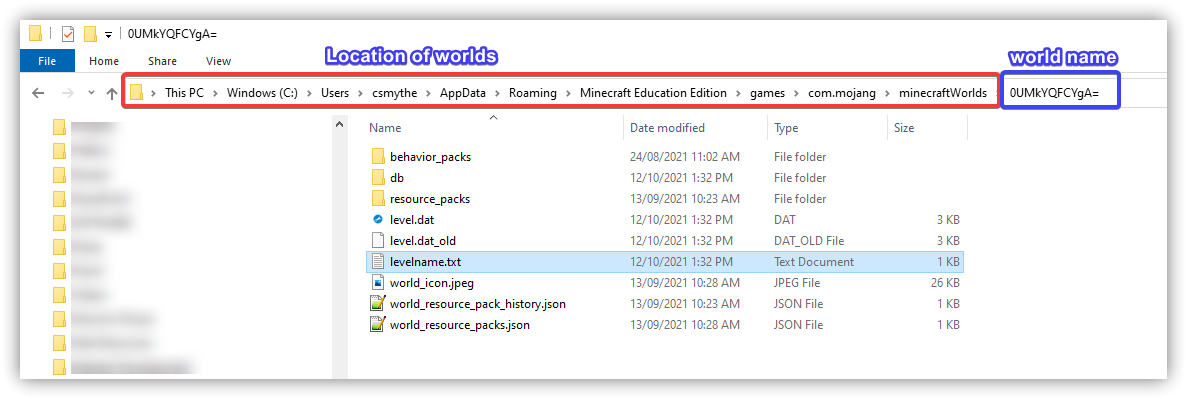
On a PC your worlds folder will be located here: C:\Users\[USERNAME]\AppData\Roaming\Minecraft Education Edition\games\com.mojang\minecraftWorlds
On a Mac your worlds folder will be located here: HD > Users > [USERNAME] > Library > Application support > Minecraftpe > Games > com.mojang
To identify the world before you drag and drop it – navigate using Finder or File Explorer to your Minecraft world folder following the paths above for PC or Mac (you will need to enable viewing Hidden Files), open the folder and then open the file – levelname.txt to confirm the world you want to place the custom image into. If you have lots of worlds just open the world you want to use, then in File Explorer sort by date last modified – the most recently opened world will be at the top of the list.
After identifying the correct world drag and drop the folder to Image Map 3 – this wont move it, it is only learning the location of your world so it can copy the image files into your Inventory in Minecraft.
3 – Drag the custom image or photo you want in your world to the Image Map 3 window
Browse your PC to the location of the custom image or photo and drag it onto the Image Map 3 window. Modify the Width and height settings to your preferred scale. The preview window shows how many blocks will be used in your world. In my Stormtrooper image I went with 2 by 5 to make it bigger and in proportion. Click Confirm
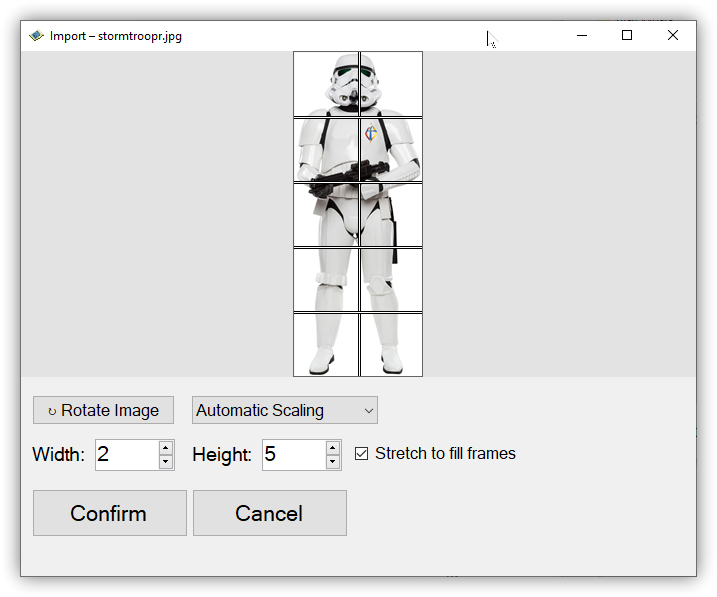
Image map 3 will now create individual inventory items which you can place to rebuild your custom image in Minecraft: Education Edition
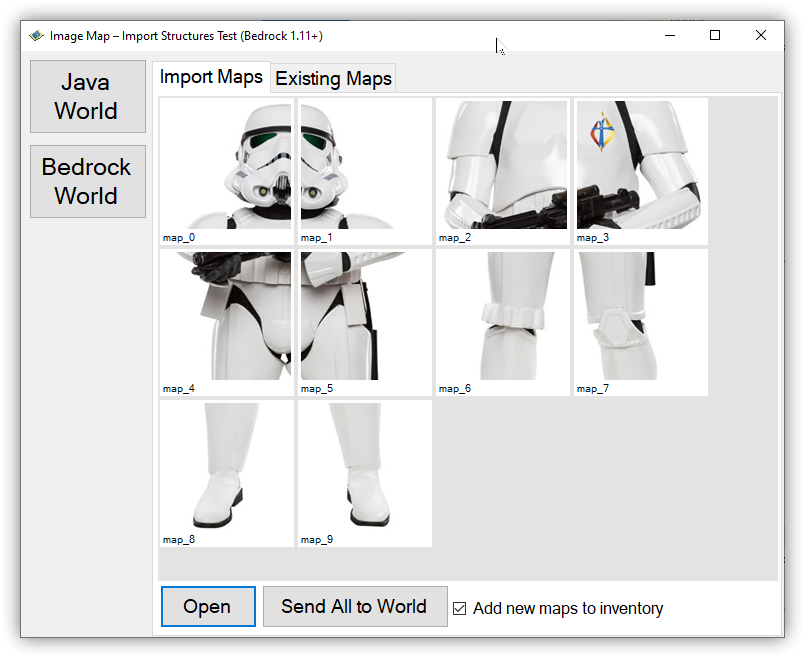
4 – Check the box – Add new maps to inventory then click Send All to World.
That’s it.
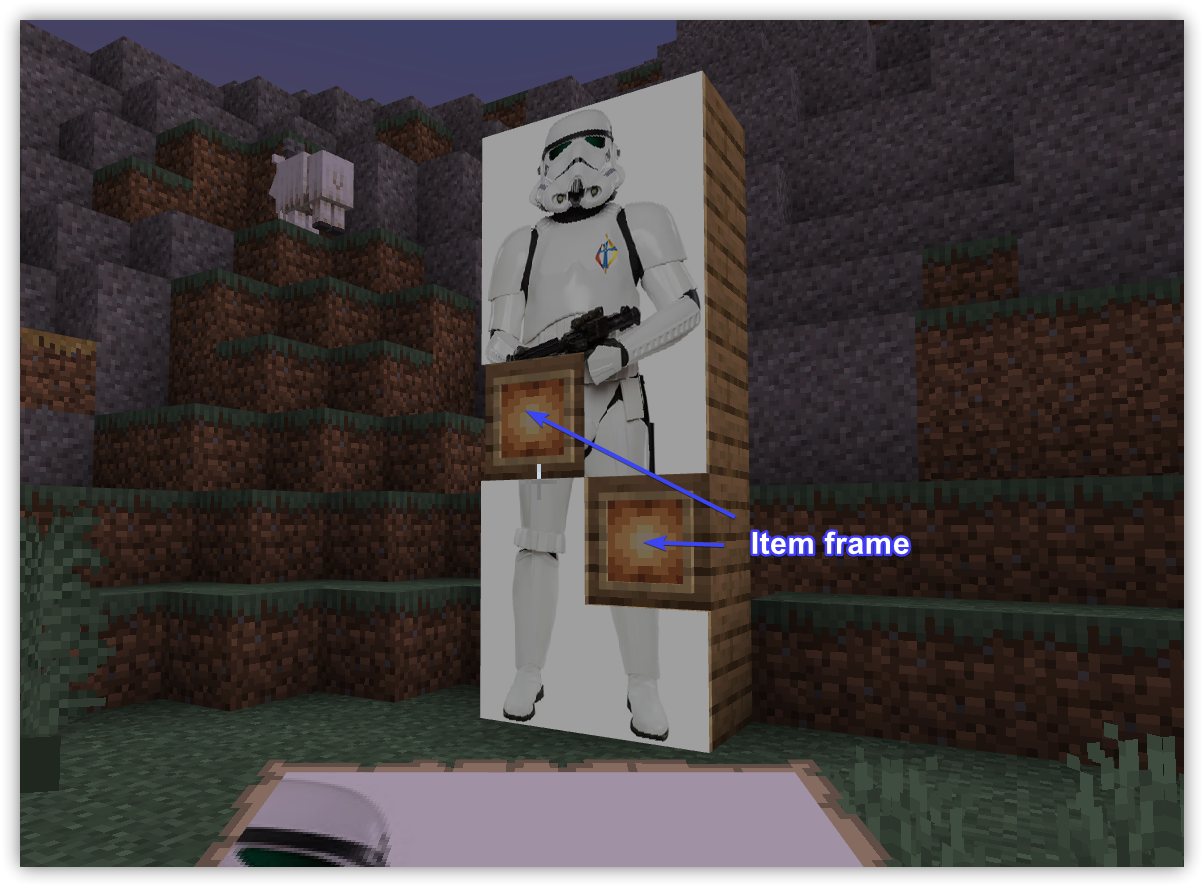
Just open your Minecraft: Education Edition world and the Image map items will now be in your inventory. They will need to be placed on an Item Frame to be viewed (add these to your Inventory as well) so just place some blocks, add enough Item Frames required to display your image then place the individual map images onto the item frames in the right order!