YouTube Hacks for Teachers and Students 2021

YouTube Hacks for Teachers and Students 2021

Educators use YouTube so much to provide training, information or thinking challenges to their students. Here are some YouTube Hacks which you may not know which could make your use of YouTube content “next level”.


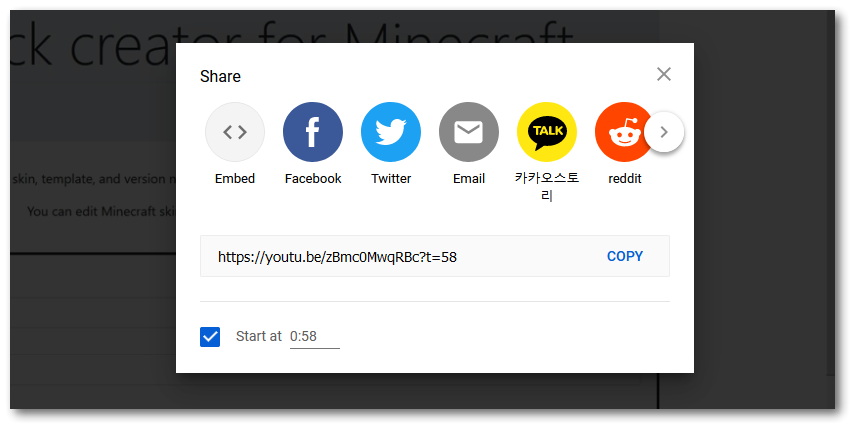
YouTube Hack 1 – Create a Link so the Video Starts at a Specific Point

This hack is great – share a link to a video which contains the time in the video that you want it to start at when your students click the link.

  • Open the YouTube video you want to Share
  • Move the timeline to the point that you want the video to start at (or maybe 5 seconds before…)
  • click Share
  • then click the Start at link – your link will open the YouTube video at that point of Play

YouTube Hacks for teachers


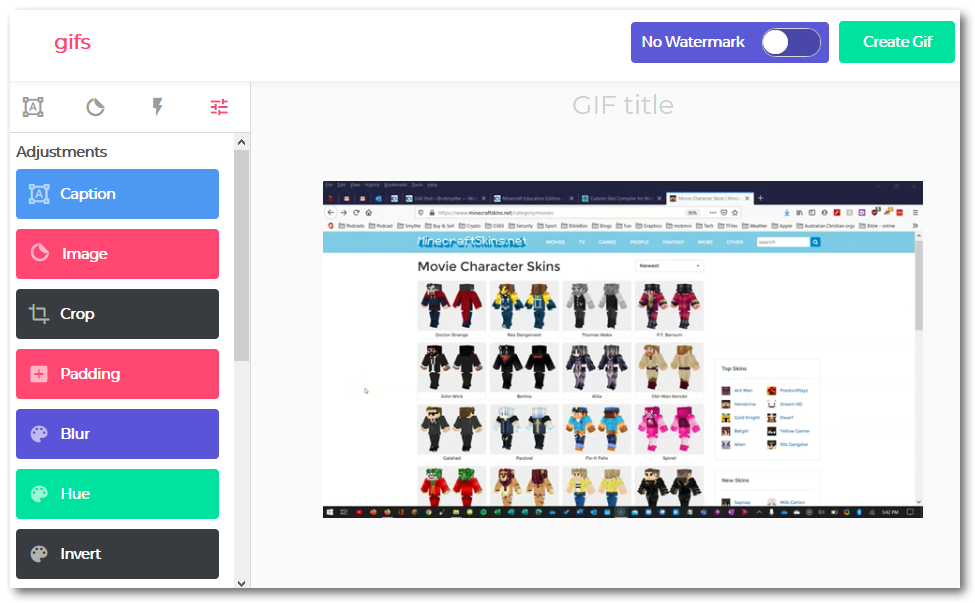
YouTube Hack 2 – Create a GIF from a YouTube Video

This hack is so simple – sometimes you might want a repeating animated GIF in a presentation rather than a YouTube Video

  • Open the YouTube video you want to create a GIF from
  • In the URL (address) for the video, add the word GIF, before the word youtube
  • So – https://www.youtube.com/watch?v=zBmc0MwqRBc becomes https://www.gifyoutube.com/watch?v=zBmc0MwqRBc
  • The GIF editor will load allowing you to make all kinds of changes and additions to your animated GIF

Youtube Hacks for teachers video to GIF


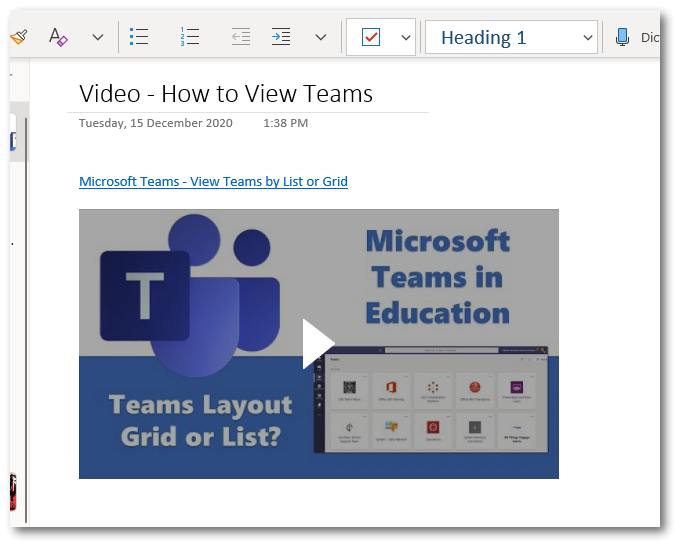
YouTube Hack 3 – Paste your Video into a OneNote notebook

I use this hack all the time. When you copy and paste a YouTube URL into OneNote, that video can be played from within OneNote without your students having to leave the notebook.

OneNote will just play the video you have pasted at the size you make it, without all the rest of the page content that is seen on YouTube – which to be honest can be distracting for some students (and staff!)

  • Open the YouTube video you want to copy to OneNote
  • Copy the URL from the web browser address bar
  • Paste the copied URL into your chosen OneNote page

YouTube hacks for teachers - paste to onenote to remove distractions


YouTube Hack 4 – Blur out an area from one of your videos

OK so you have created a YouTube video for your class, but then discovered you have to blur out a section of the video which has information you don’t want them to see. Here’s how to blur out a section of video.

  • Open YouTube and click your Profile Photo to access the YouTube Studio link –  to access your uploaded videos
  • click the Video you want to add the blurred section to
  • position the blur section on the video
  • drag the start and end points of the blue blur bar for the duration you need the blurred section to be there for

blur part of youtube video youtube hacks for teachers


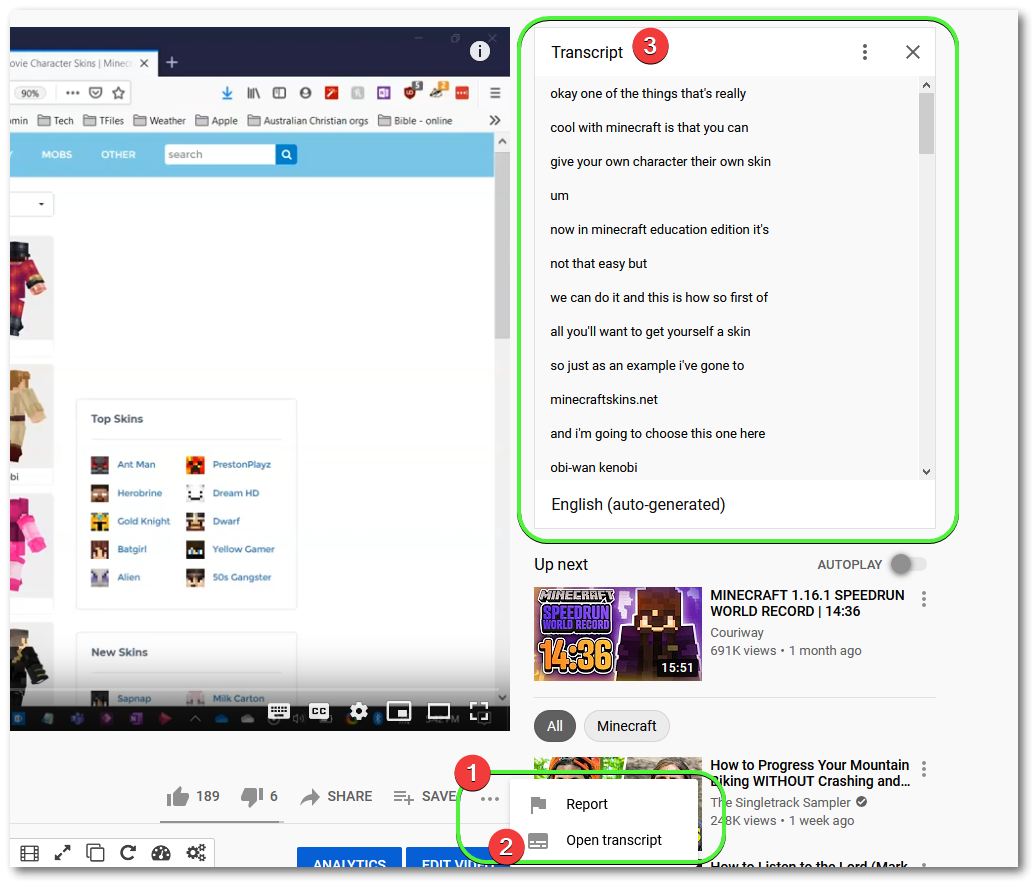
YouTube Hack 5 – Copy the Transcript of the Video

This is useful where you are wanting text from the commentary or speech from the video.

  • open the video and click the 3 dots (More Options icon) below the video
  • choose Open Transcript
  • the Transcript will open next to the video, where you can toggle the timestamps off and copy the text.

Youtube hacks get transcript


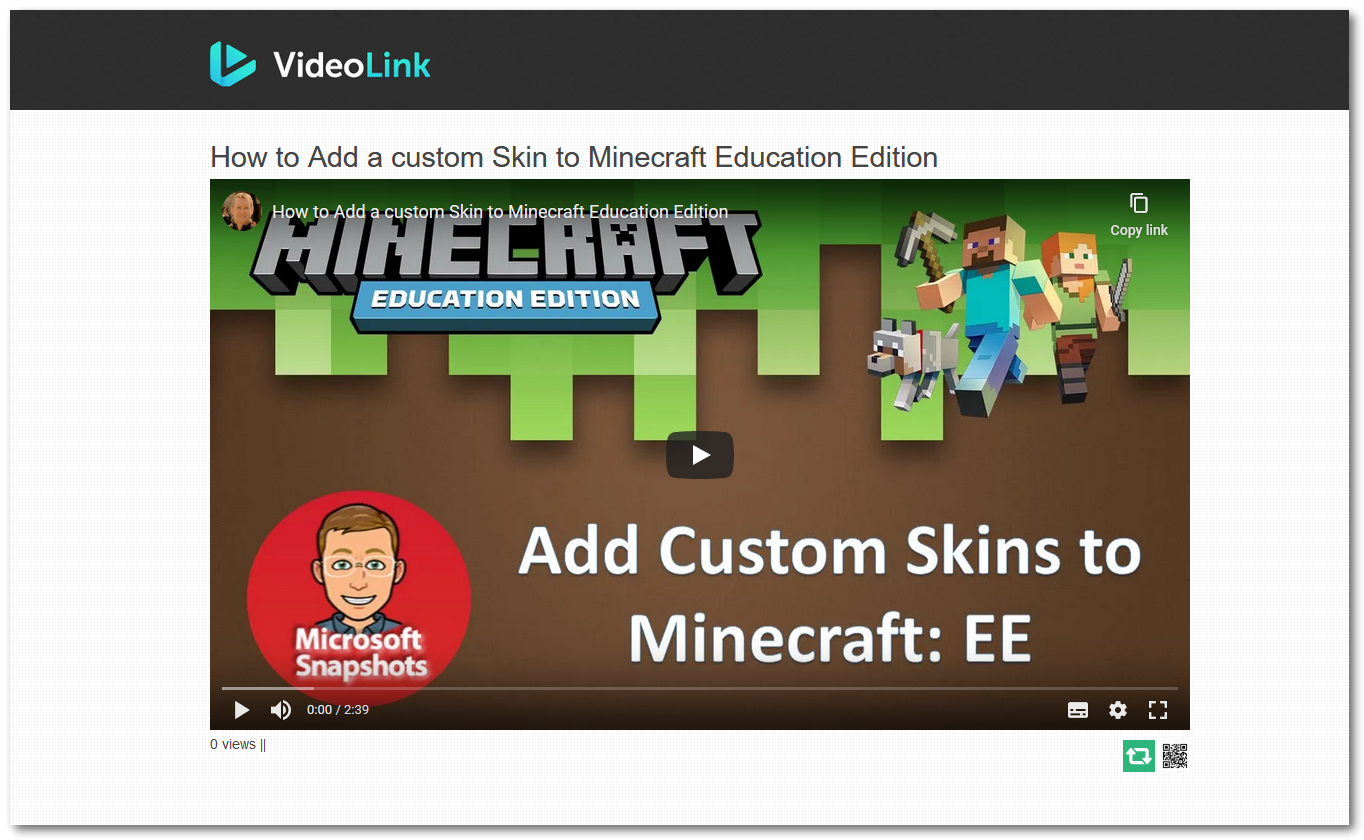
YouTube Hack 6 – Use Video.Link to create a safe watching experience

I love this hack. Use https://video.link to create a family/student friendly YouTube video link to share with your students. This will enable them to simply watch the video you are sharing, without all the other recommended videos which could lead them away from your intended content.

  • open the video on YouTube and copy the URL from the browser address bar
  • go to https://video.link and paste your copied YouTube URL into Video.links video field, click Generate Link
  • from the next screen, copy the new URL and share the link with your Students
  • you can see below the Video.Link viewer removes all the distractions

Youtube hacks for teachers video link viewer


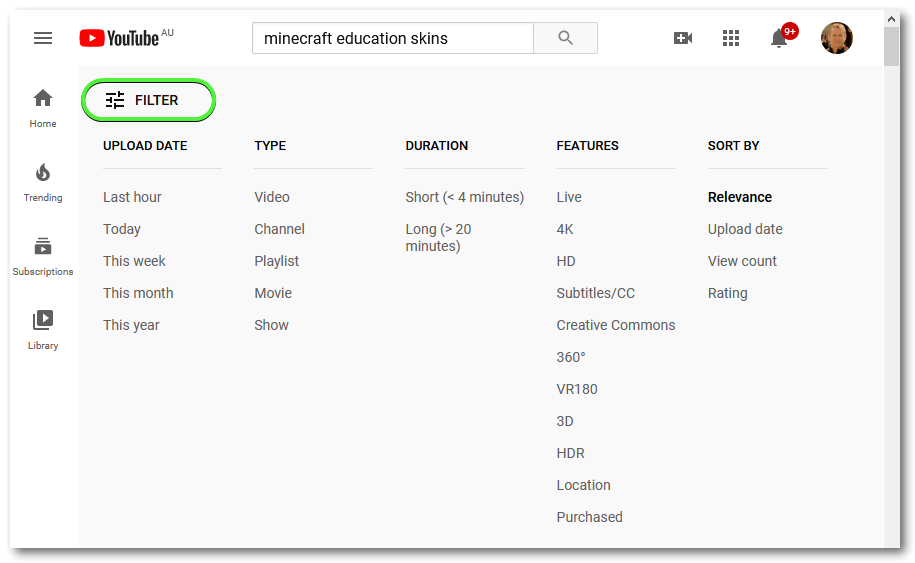
YouTube Hack 7 – Use Filters to make an advanced search

After searching for a video use the Filter button to refine your search. This will (hopefully) enable you to find just the video that you are wanting.

  • open YouTube and enter your search term
  • once the search is complete click Filter
  • choose from the presented options to refine your results

youtube hacks for teachers refined search filters


YouTube Hack 8 – Keyboard shortcuts

When you’re using YouTube a lot – make use of the Keyboard for easy control.  Here are some of my most common keyboard shortcuts:

  • Press F – to go Fullscreen, press again to return
  • Press Spacebar – to Play and pause the video
  • Press Left and Right Arrows – to skip forward and backward 5 seconds in the timeline (use J and L to skip 10 seconds at a time)
  • Press M – to Mute or Unmute the video’s audio
  • Press Up and Down arrows – to Increase or Decrease the audio volume
  • Press Shift-N – move to the next video in the playlist you are watching
  • Press Home – return to video start
  • Press End – go to video end


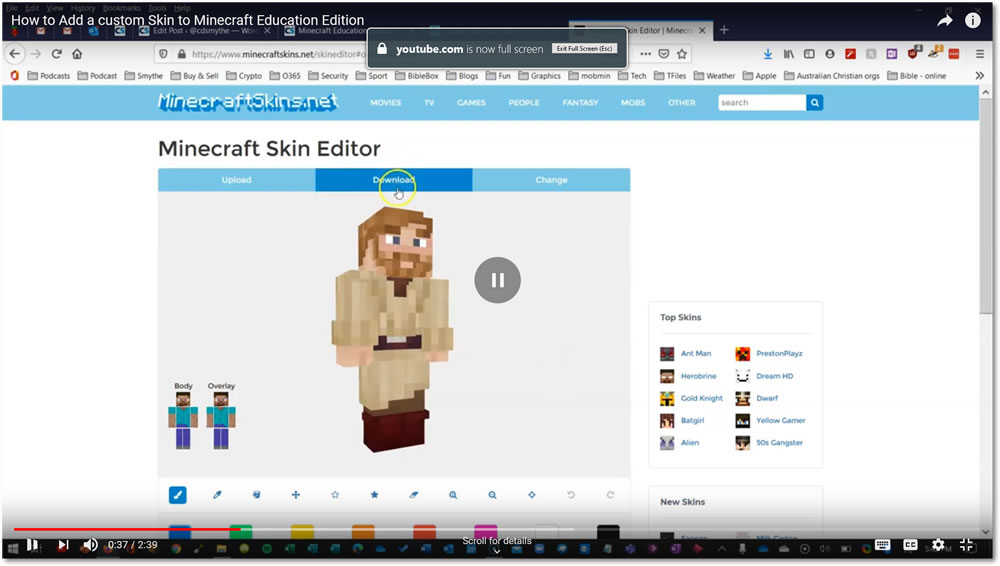
YouTube Hack 9 – Create a Link which opens the video in Full Screen

This is also useful for keeping students focused. Create a link to share which when clicked will open the video in Full Screen mode.

  • Open the YouTube video you want to Share
  • copy the URL from the address bar – eg. https://www.youtube.com/watch?v=zBmc0MwqRBc
  • modify the URL by adding _popup after the word watch and before the ? in the address eg. https://www.youtube.com/watch_popup?v=zBmc0MwqRBc
  • copy your new link and share with your students

Youtube hacks full screen link


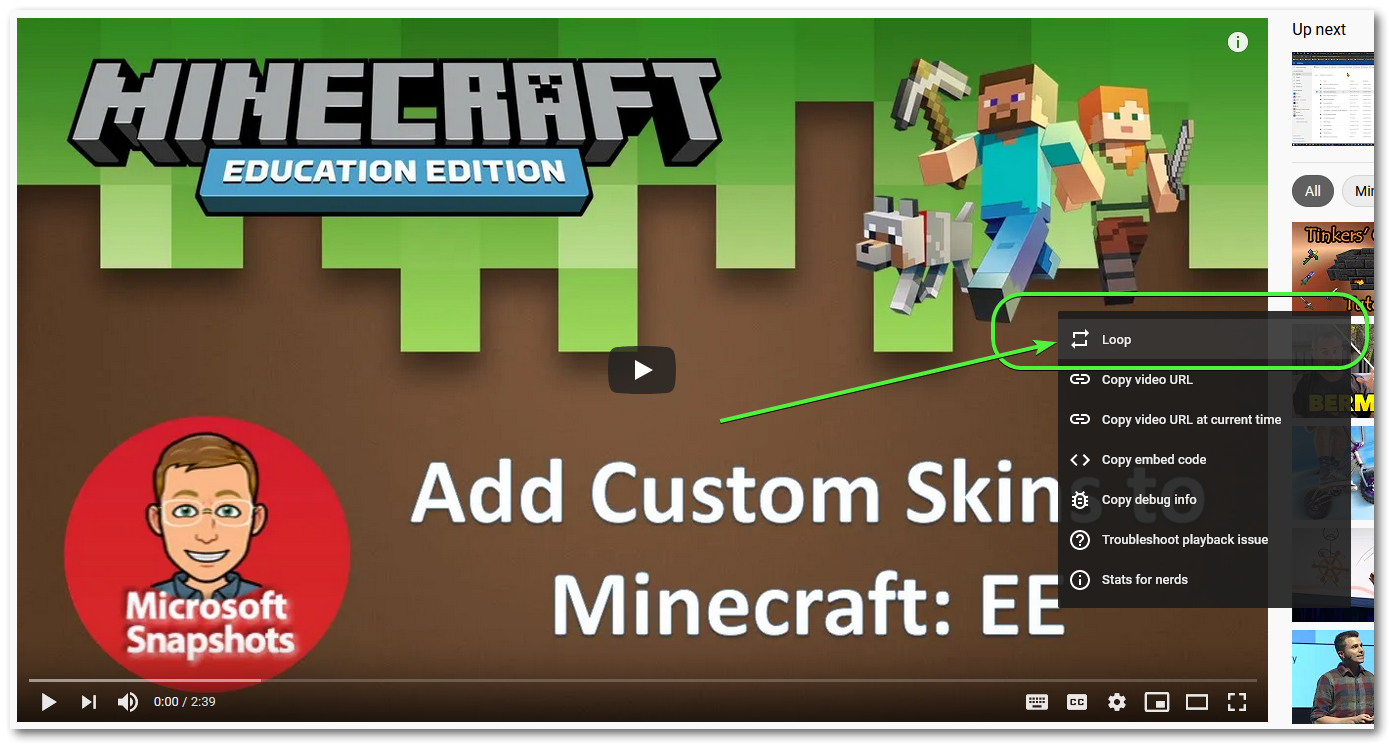
YouTube Hack 10 – Loop a video for repeated playback

This is a good one for videos you want playing in the background – especially at events.

  • Open the YouTube video you want to Loop
  • Right Click the video and choose Loop Video from the options

Youtube hacks for teachers loop video


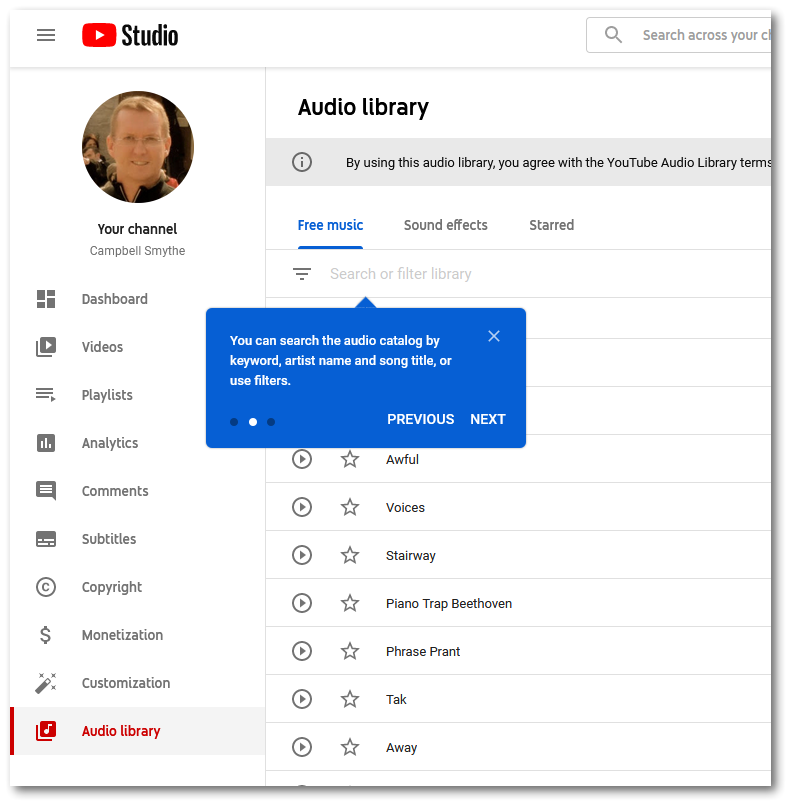
YouTube Hack 11 – Access Free Audio from YouTube’s Audio Library

Kind of a Hack in that it’s not well known. But there is absolutely oodles of audio you can download free to use.

  • Open YouTube and go to the YouTube Studio section (follow the link to YouTube Studio under your profile picture)
  • Click the Audio Library link from the Left Menu
  • find, select and download any audio for your project

Youtube hacks for teachers audio library


buy surface pro 7
Sync Google Calendar with Microsoft Teams Calendar

Sync Google Calendar with Microsoft Teams Calendar

Our organisation splits collaboration and productivity apps between Office 365 and Google Suite. Email and Calendar is in Google, yet we use Microsoft Teams and SharePoint to collaborate and all the Office apps to create. This results in core information and communications not being available within apps in either suite – aka pain in the ass. Here is how I used Microsoft Flow to copy events from my work Google Calendar to the Calendar in Microsoft Teams (my work Office 365 account) so I can see events in Microsoft Teams.

Because we use Teams heavily to collaborate on Tasks and documents, and also communicate using Chats and Teams Posts, I wanted the Calendar in Microsoft Teams to have the events there that are booked in my Google Calendar. Mainly so I had quick access to it from Teams, but also so my Availability Status in Teams reflected Busy or Available based on my Calendar events.

How to sync Google Calendar with Microsoft Teams

I used the Microsoft Flow Template here:

https://australia.flow.microsoft.com/en-us/galleries/public/templates/50229a20493811e6bf53611364194d1a/google-calendar-to-office-365-calendar/

  1. Connected my Work Google Calendar and Work Office 365 Calendar to Microsoft Flow
  2. Edited the Flow settings:

Microsoft flow to sync google calendar and office 365 calendar

Now when an Event is created in Google Calendar it is copied across to the Calendar in Microsoft Teams (my Office 365 Calendar).

I’m a bit frustrated that this doesnt actually sync with Google – if an event is modified or deleted that event in Teams Calendar isn’t affected. BUT this is something I can live with until we logically move Email and Calendar into Office 365.


How to add a Class Bitmoji to Microsoft Class Teams that your Students Can See

How to add a Class Bitmoji to Microsoft Class Teams that your Students Can See

Class Bitmojis have become super popular since teachers are providing a more blended learning experience for their students.  A Class Bitmoji is simply just a graphical image, usually a PowerPoint or a Google Slide which contains a number of images hyperlinked to the resources that the teacher wants to make available to their students.


Examples of Class Bitmoji below.

What is a Class Bitmoji

The advantage of creating a Class Bitmoji is that it provides a more graphical and fun space for students to access classwork and resources. Especially for junior students who can respond to images and icons a lot quicker than lists of text links.


What is a Bitmoji?

Bitmoji is an app available for free on mobile devices. Download to your phone or tablet and then create a Bitmoji character using facial features, clothing, and bodies – to look like you. Once created you can choose different poses using that created Bitmoji character to represent yourself. You can copy and post those images into your phones messaging apps.  Install the web browser plugin to Edge or Chrome and you can copy those images into any of your computer apps like PowerPoint, Word etc.

Get Class Bitmoji

What is a Class Bitmoji?

A Class Bitmoji is simply a scene you create with hyperlinked objects and then you add a Bitmoji of yourself as the teacher. There are many different tools and methods available to create an image containing hyperlinks but PowerPoint is probably the easiest to use, has the most features and is easy to update when stored in OneDrive.  So we will use PowerPoint to create our Class Bitmoji.


Step One – Open PowerPoint and Start Creating your Class Bitmoji

  • Open PowerPoint and add a Blank Slide, then save the PowerPoint into your personal OneDrive
  • Now click Insert > Pictures and choose Online Pictures
  • Do a search for Room Background, and choose an image and click Insert
  • Resize the image to fit your PowerPoint Slide

Class Bitmoji background

  • Now your background is in, start to add other images representing your classroom
  • Some ways PowerPoint makes this easy
    • Insert > Pictures – choose from Online, Stock Images (images, icons, people, stickers) or images on your computer
    • Insert 3D Models – choose from your computer or from PowerPoint’s collection of resizeable, rotatable 3D Images (some are even animated)
    • Insert WordArt
    • Insert SmartArt and Charts
  • I have gone ahead and added – a Whiteboard, chair, poster quote, Roman coins and bookshelf using Online Pictures search (use the “transparent filter” when searching)
  • I added some stock 3D Models – animated globe, books, TV, % symbol, laptop
  • I added some logos for digital tools our students use – Wakelet, SeeSaw, Wheelers e-books and Orbit library catalogue
  • I added a Text box to the whiteboard with major events this week
  • I added a Bitmoji I made of myself and chose the waving pose

Class Bimoji with Powerpoint

Step Two – Add Hyperlinks to your Class Bitmoji

Now you have your Class Bitmoji PowerPoint slide images where you want them it is time to add hyperlinks to each object you want to be “clickable”.

For each of the Objects you want to be a Hyperlink:

  • In your web browser open the webpage you want students to get to
  • copy the URL (web address) from the Address Bar (eg. https://www.wakelet.com)
  • In PowerPoint left click your object (make sure its the only object you select) and on your keyboard press the CTRL and K keys (this will open a pop up box ready for you to paste the URL address in)
  • paste your URL and click OK
  • repeat for all objects you want hyperlinked

Class Bimoji with Powerpoint and Microsoft teams

Step Three – Share your PowerPoint

Now from OneDrive we will create the link we need to share our Class Bitmoji inside the Microsoft Team. This can be quite tricky so bear with me. The key is getting the correct URL for adding to Microsoft Teams. Microsoft generates different URLs depending on where and how you share the PowerPoint file.

  • In OneDrive set the Sharing on the PowerPoint file so your class can Read it from your personal OneDrive.
    • Right click the PowerPoint file and select Sharing – then change the sharing options to Anyone with the Link Can View (or those in your Organisation can view) click Apply
  • Now right click on your Class Bitmoji PowerPoint file and choose Open In PowerPoint Online
  • your Class Bitmoji PowerPoint will open in your default web browser
  • edit the URL in the browser Address Bar, deleting everything after action=
  • and replace the deleted text with embedview, then click Enter
  • so now my URL looks like this
    Bitmoji classroom into Microsoft teams show view online embedview
  • it is this URL which we need to copy and paste into Microsoft Teams
  • from the browser tab copy the full URL then open Microsoft Teams, to your Class Team

How to add Class Bitmoji to a Microsoft Class Team

  • In your Class Team, add a new Tab and choose Website
  • Change the name of the Tab to whatever you want Students to see
  • Paste your modified link that you copied from Notepad
    Class Bimoji with Powerpoint and Microsoft teams

Now when students open your Class Team and click on the Class Bitmoji tab, they will be presented with your hyperlinked class image!

Class Bimoji with Powerpoint and Microsoft teams


How to make changes to your Class Bitmoji

This is the beauty of saving the Class Bitmoji PowerPoint in your OneDrive. You can simply open it from OneDrive and make your changes. The Class Bitmoji in your Class Team will automatically reflect those changes as you save them.  Just open the Class Bitmoji PowerPoint and make whatever changes you need. Create different Class Bitmoji depending on the time of the Year or what the learning focus might be in your class. Have some fun.


Also embed your Class Bitmoji in SharePoint

If your school is also using SharePoint you can embed your Class Bitmoji there. On your Class Page, add the Embed webpart, paste in your modified URL (the one you added embedview to earlier) and save.  Again – any changes you make will automatically update here when you edit your Class Bitmoji from OneDrive.

Class Bimoji with Powerpoint and Microsoft teams


OneDrive: Where to find those Files that were Shared with you

OneDrive: Where to find those Files that were Shared with you

Our staff are so much more familiar now with using OneDrive but some still search their emails to find the links to Shared Files and Folders.

With OneDrive you can sync files that have been shared with you to File Explorer in the same way that you can sync files from SharePoint and Microsoft Teams.

Here’s how.


Using your Web browser login to Microsoft OneDrive

Click the Shared link, then Shared with You

OneDrive Shared with You

Double Click the Folder icon for the Folder of Shared Files you want to Sync in File Explorer (in my case the folder below is named “Shared”)

The Folder will open in a new browser tab and you will now see the Sync option on the Menu bar.

Click Sync and that Shared Folder will now be available in File Explorer (Win) or Finder (Mac).

OneDrive shared files sync file explorer

buy surface pro 7
Microsoft Teams – How to make a File Read Only in the Team’s Files Section

Microsoft Teams – How to make a File Read Only in the Team’s Files Section

By default when you add a File to your Microsoft Team’s File section – it becomes editable by all your Team Members. There are times when you dont want everyone to edit that file, only read it.

So here is how you can add a file to Teams and make it Read Only.

(Related Post: Click here to see my guide on creating a Read Only Folder in Teams)

How to Create a Read Only File in Microsoft Teams Files Section

First open up your Microsoft Team and click the Files Tab
Click the Open in SharePoint button

Add a read only file to microsoft teams

In SharePoint, click the Upload > Files then browse for your selected File

upload read only file to sharepoint


Now hover over the File and click the More Options ellipses (3 vertical dots) and then click Manage Access

managa eaccess files in sharepoint read only teams


Click the drop-down to change Team Members permissions and select Can View so the File becomes Read Only for Members. Changes will save automatically

read only file teams

This will set the Permissions on that File so that Team Owners only are able to edit the File, but not Members.

If you found that Tip useful, please share with someone else!

YouTube Channelhttps://youtube.com/channel/UCRpmmEBtbXNbUUKsIlfGHUQ

buy surface pro 7