Minecraft: Education Edition – How to add a custom skin on Apple iPad
Every gamer wants to have their own player skin – here’s how you can set your custom skin in Minecraft Education Edition using an iPad.
Minecraft Education Edition – set a custom skin on an iPad
What you will need:
- iPad
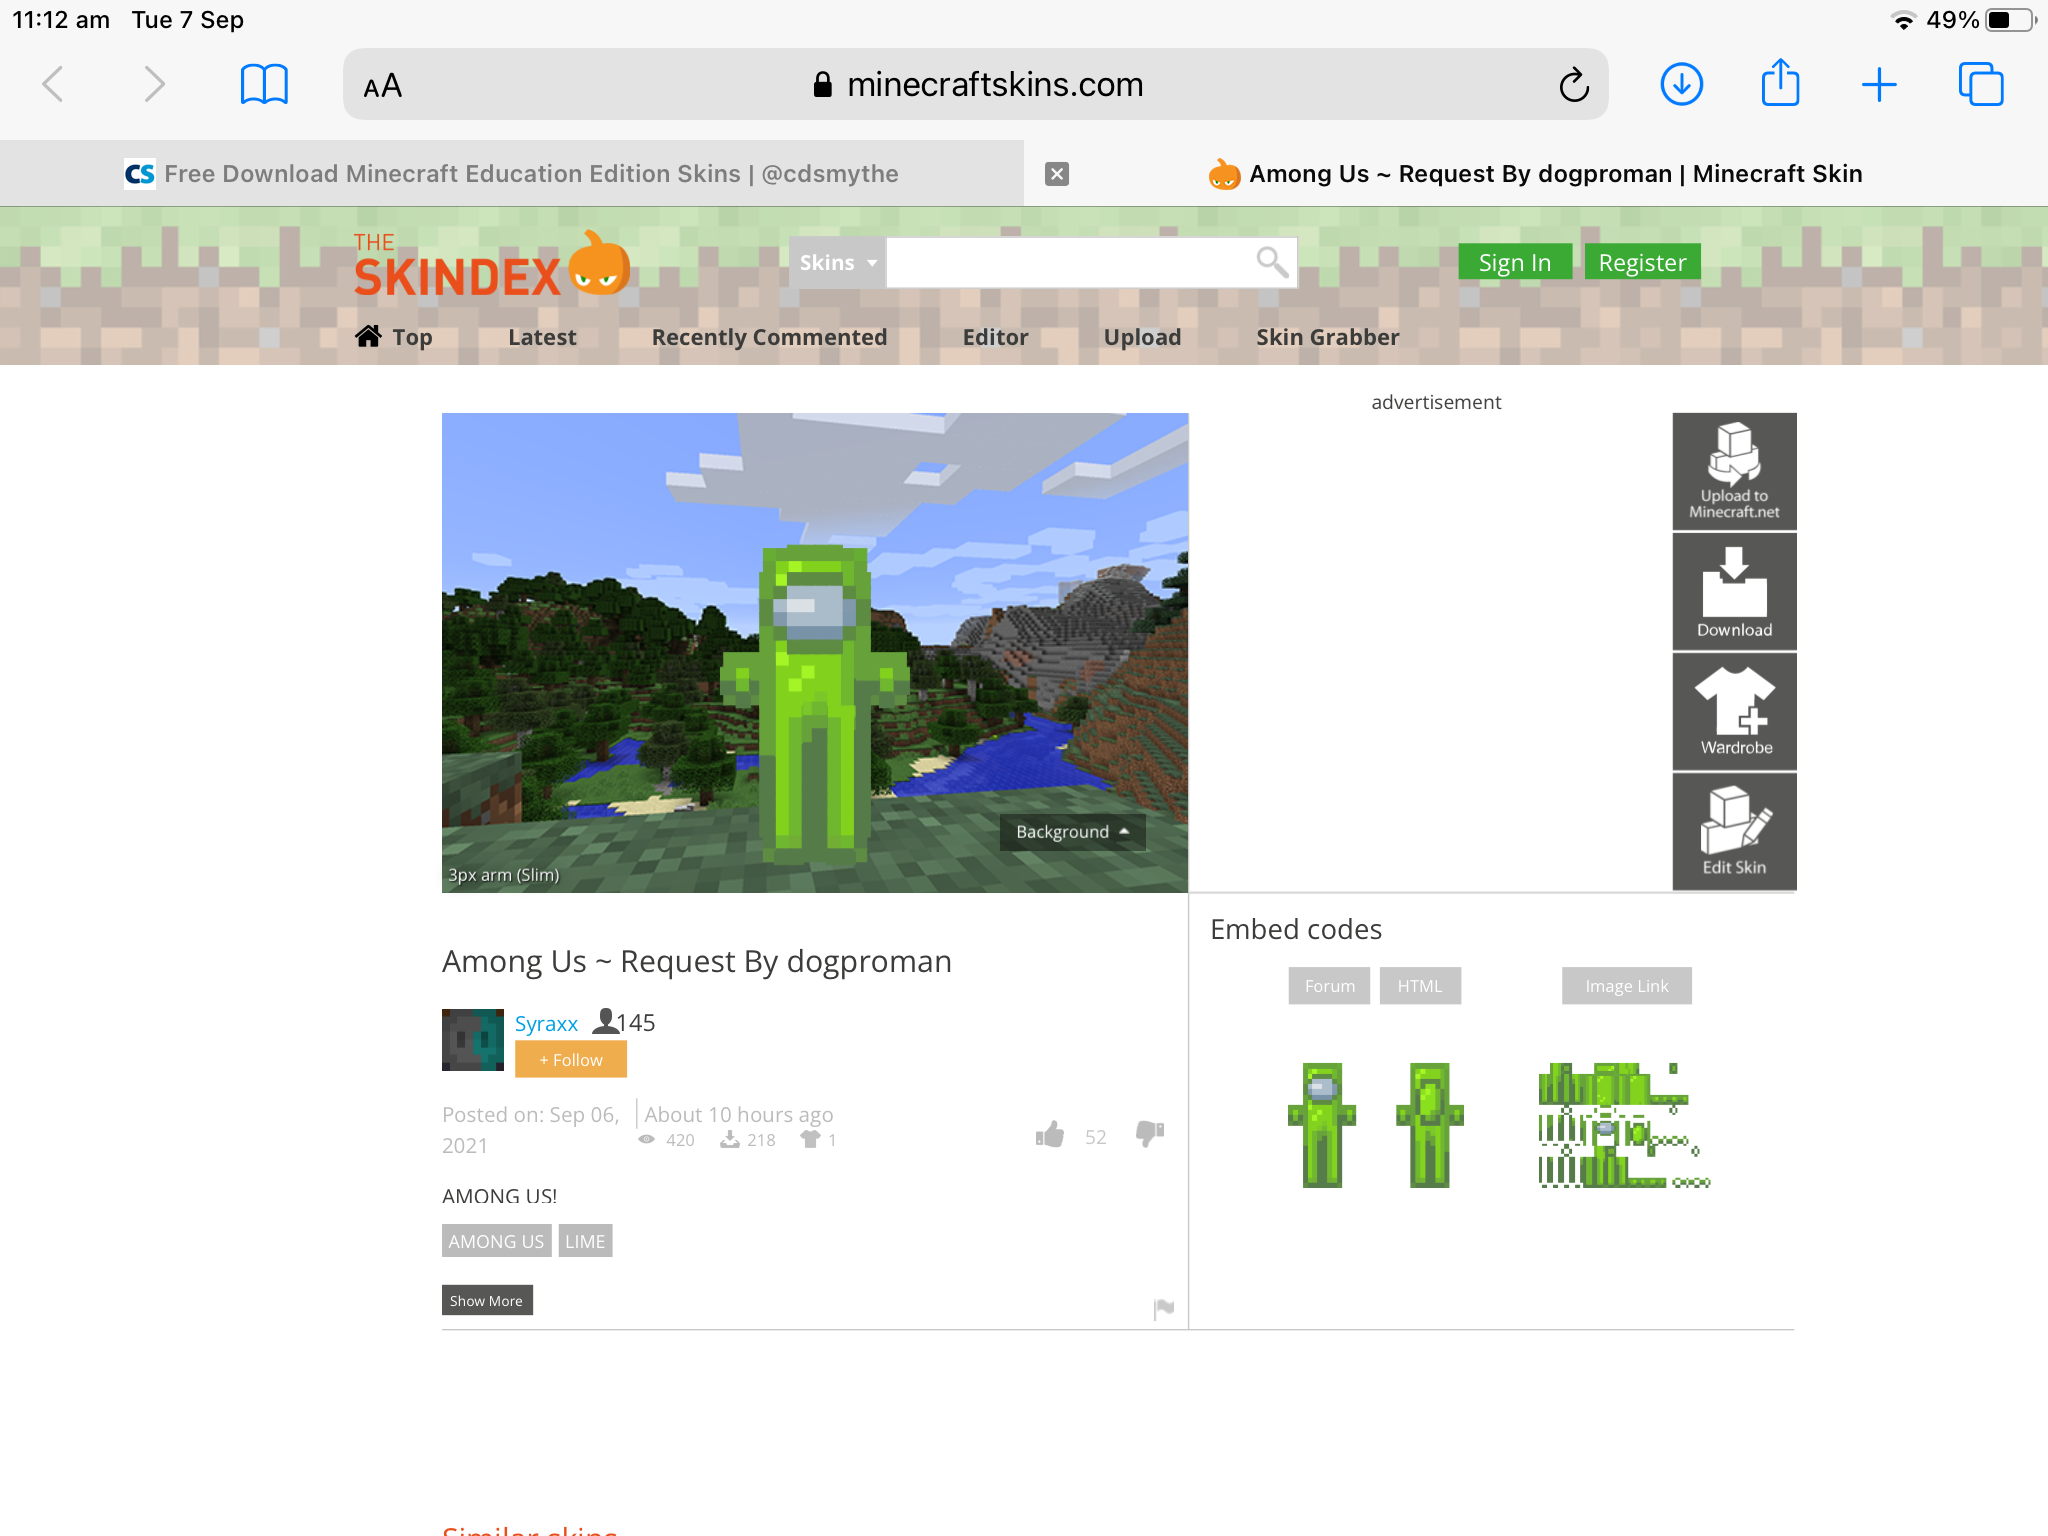
- a PNG file of a Minecraft skin (download free from Skindex) for this demo I’m using the green Among Us
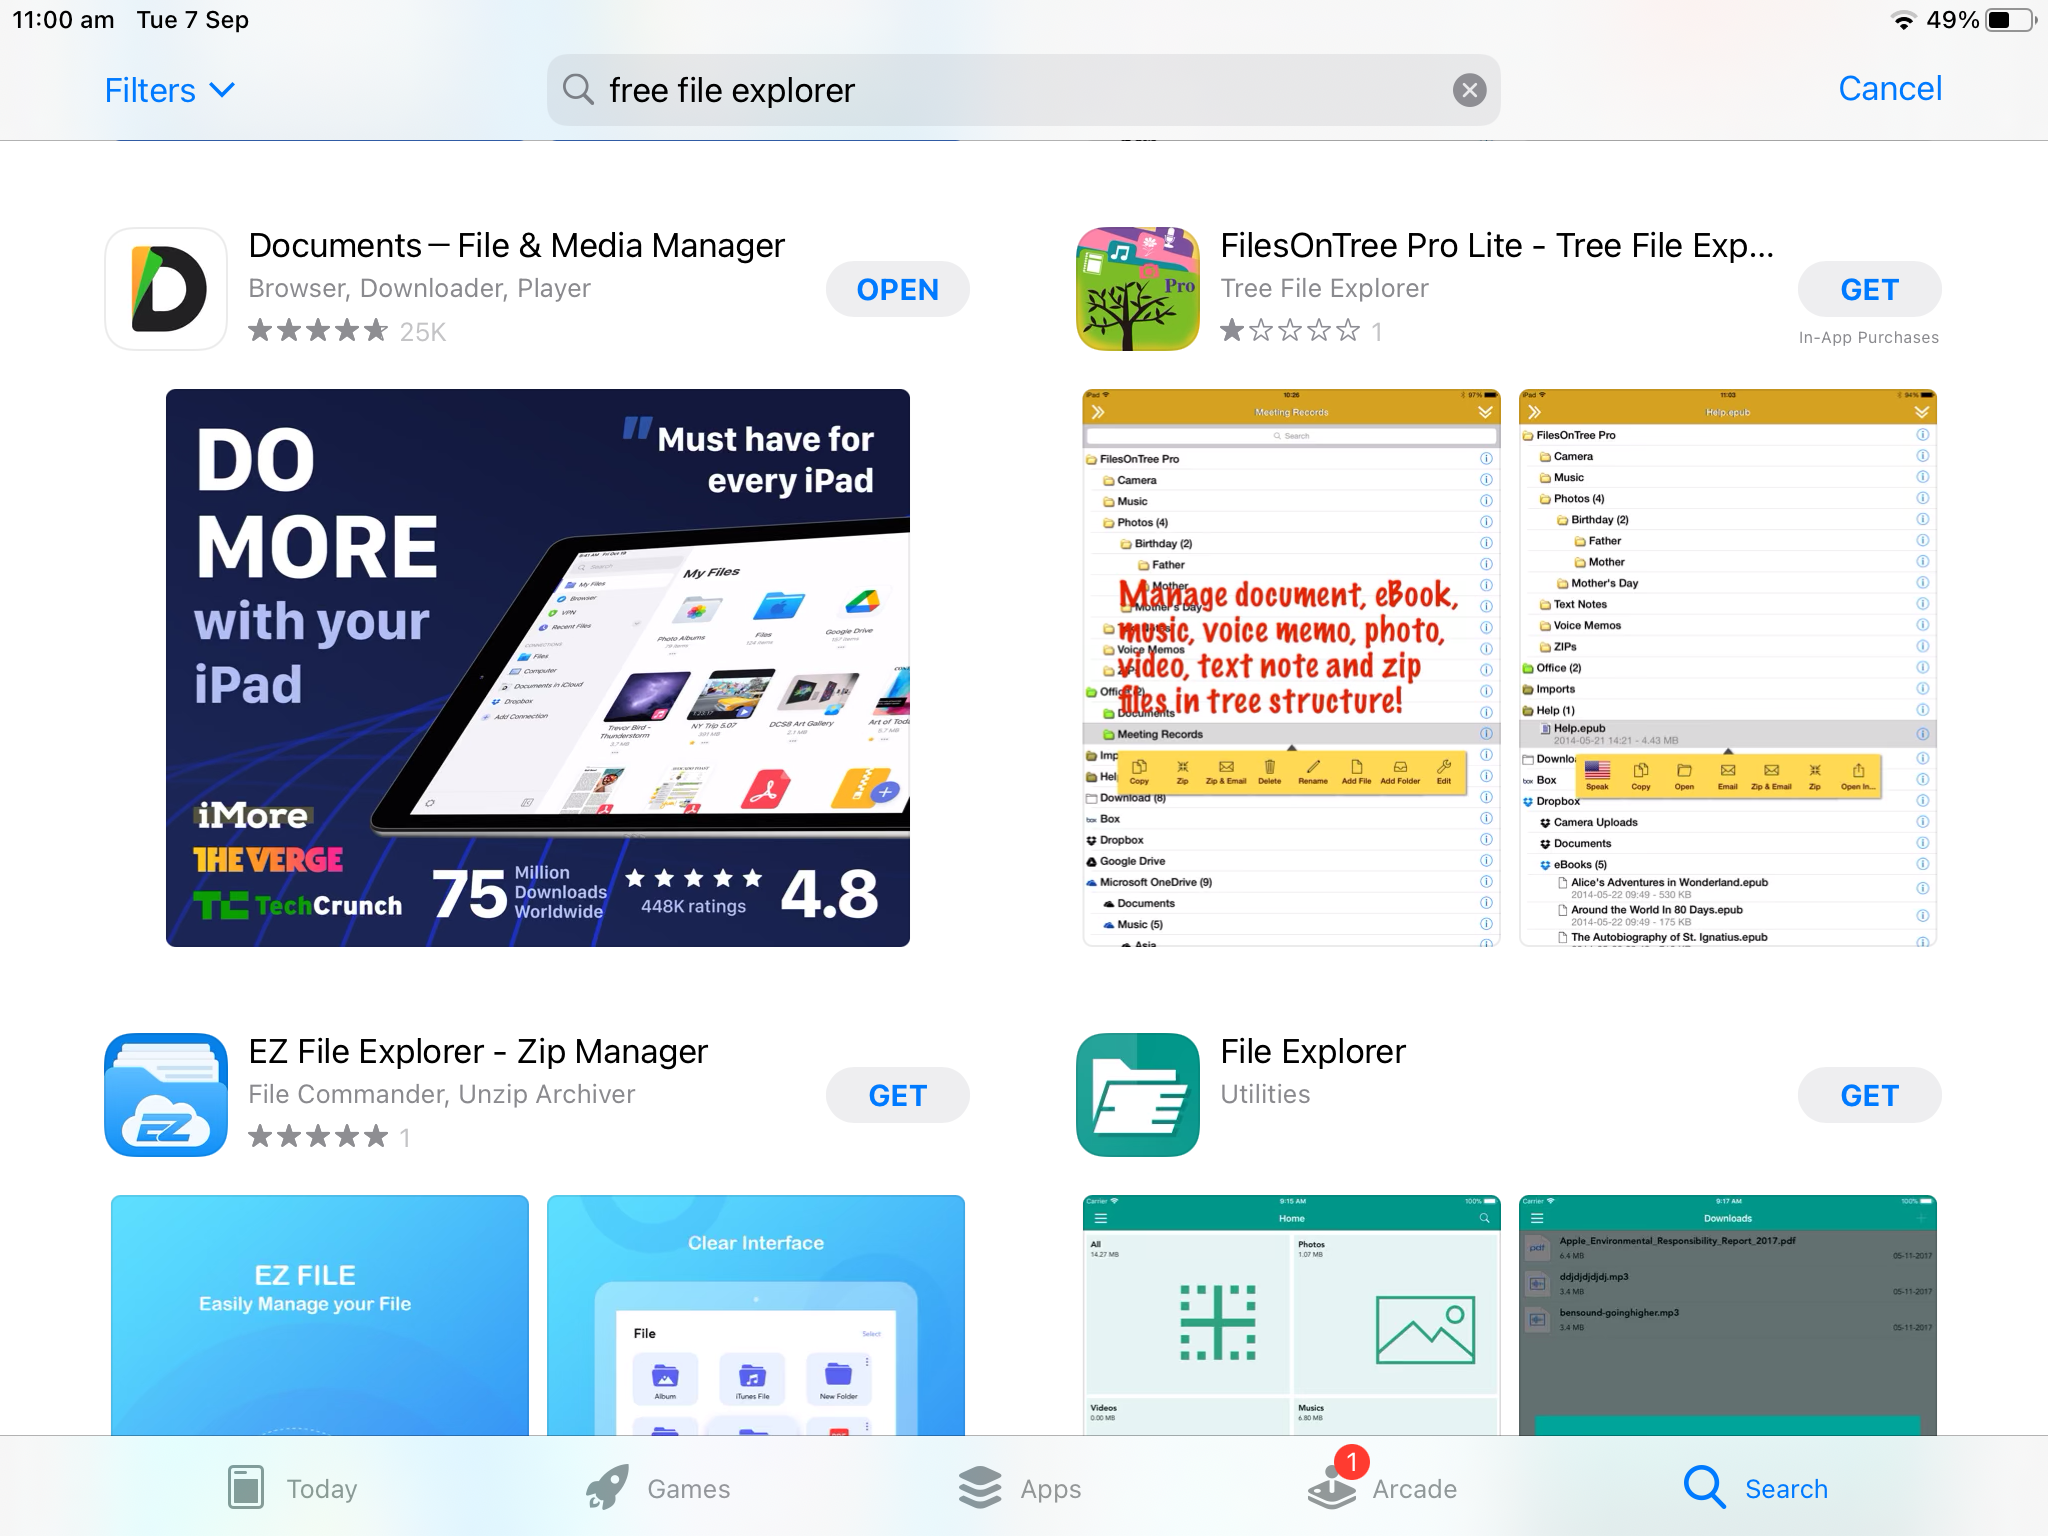
- app – Documents (download and install to your iPad)
Installing Custom Skin on iPad – Minecraft Education Edition
from the App Store install the app – Documents – File & Media Manager
Go to Skindex and choose a skin to download – save the download to your iPad
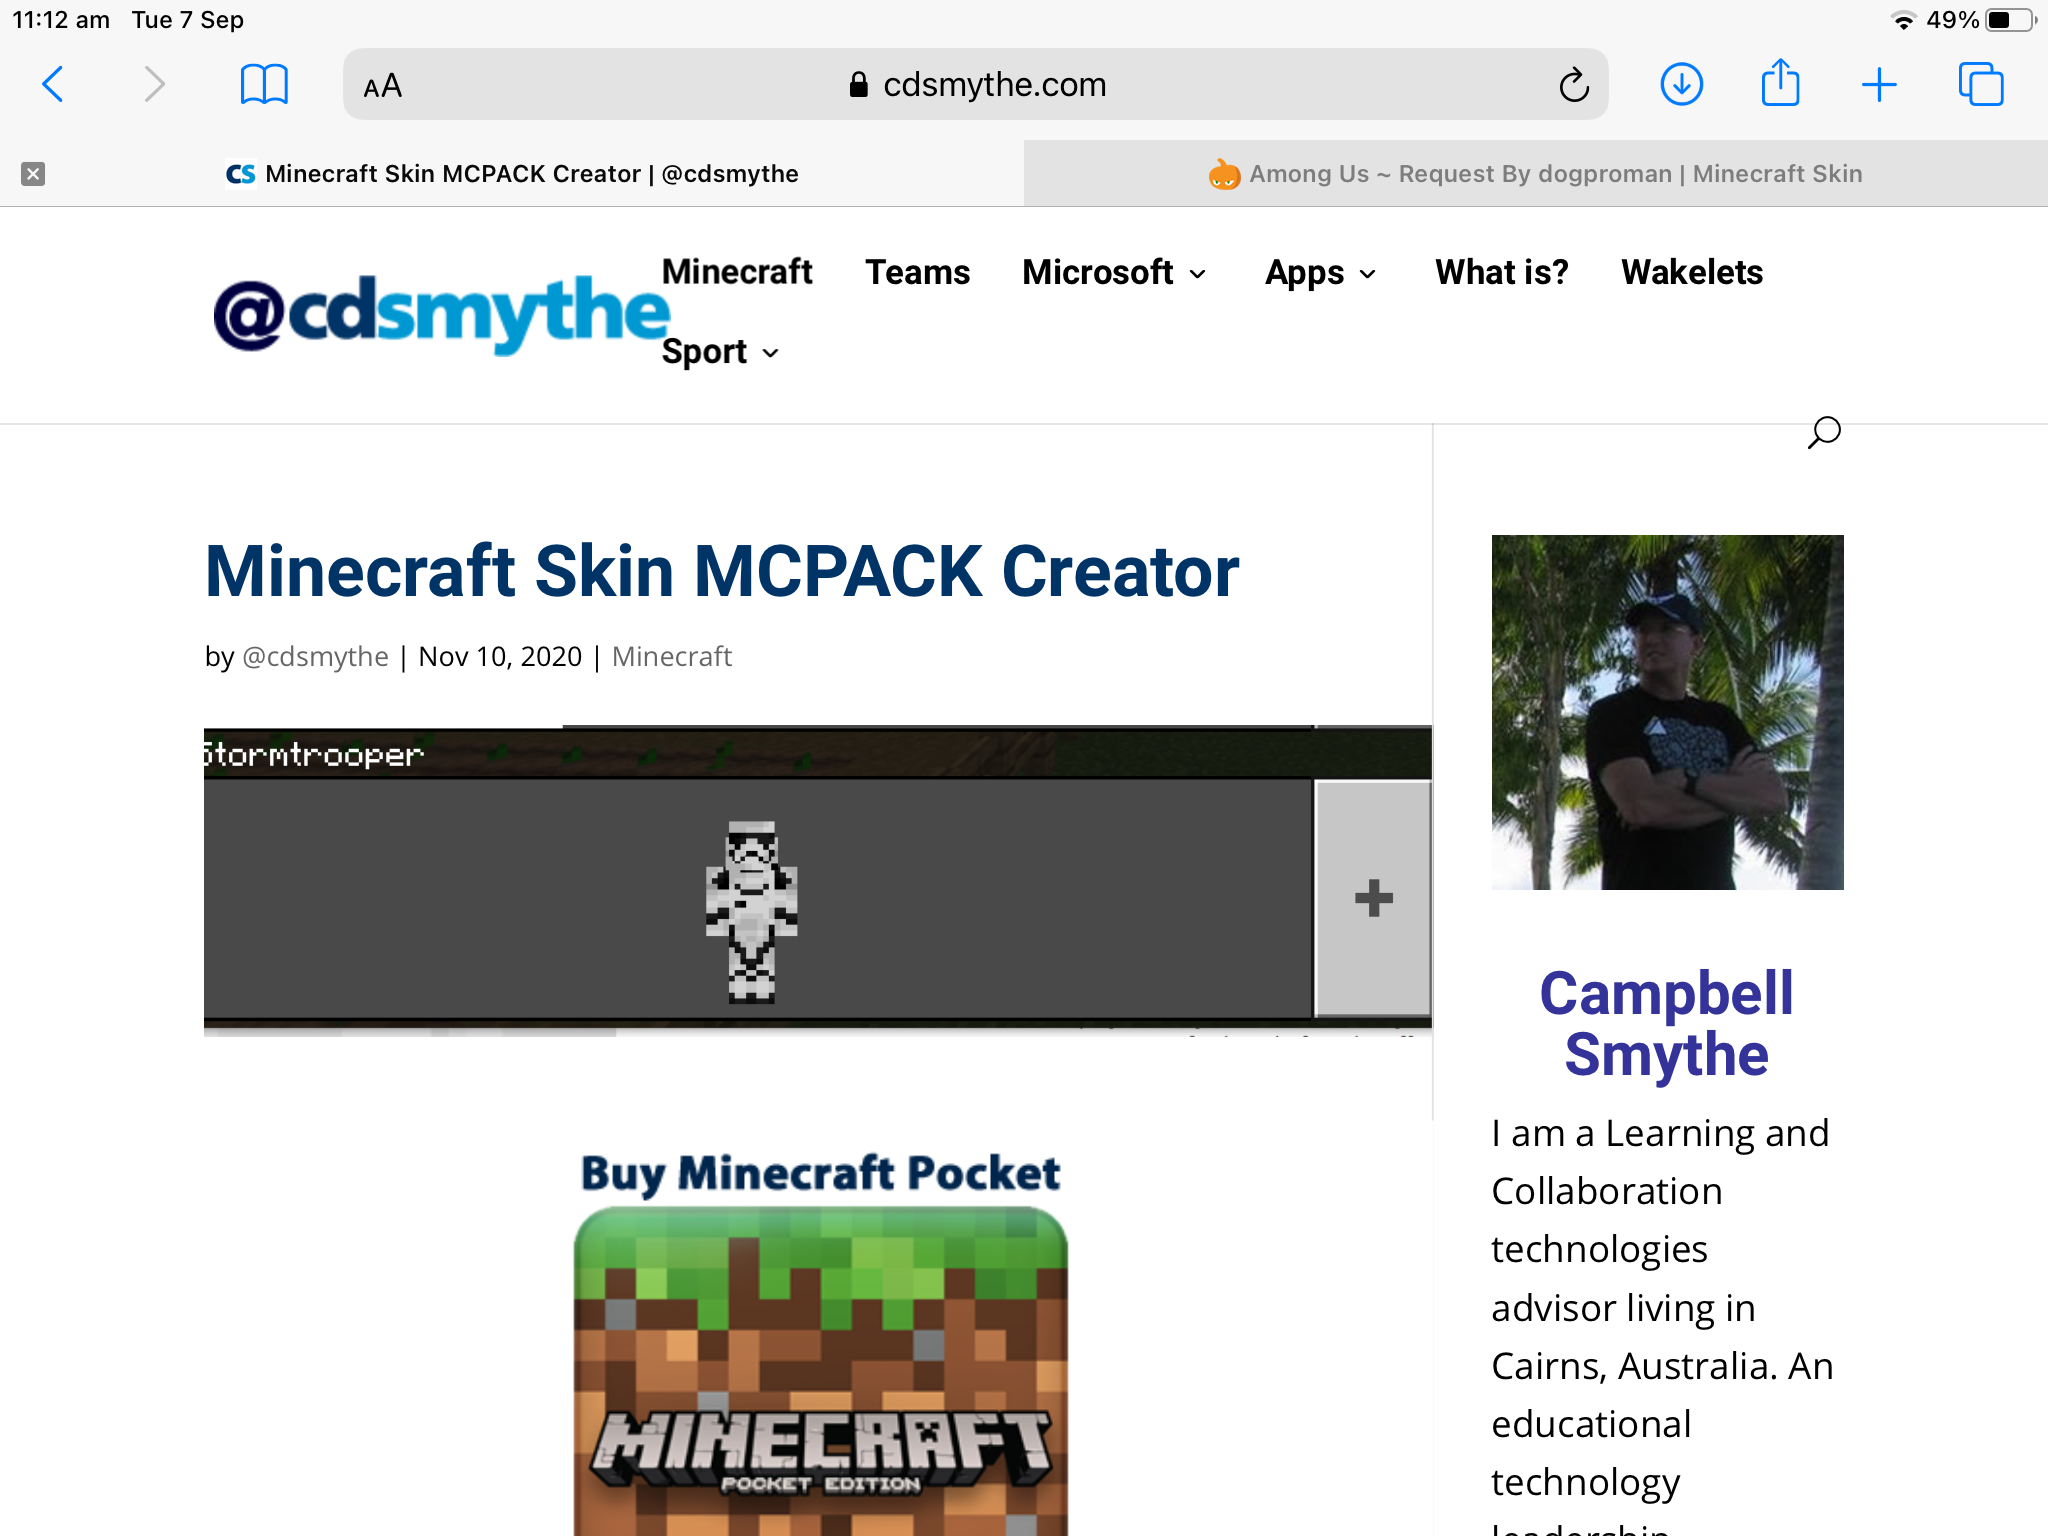
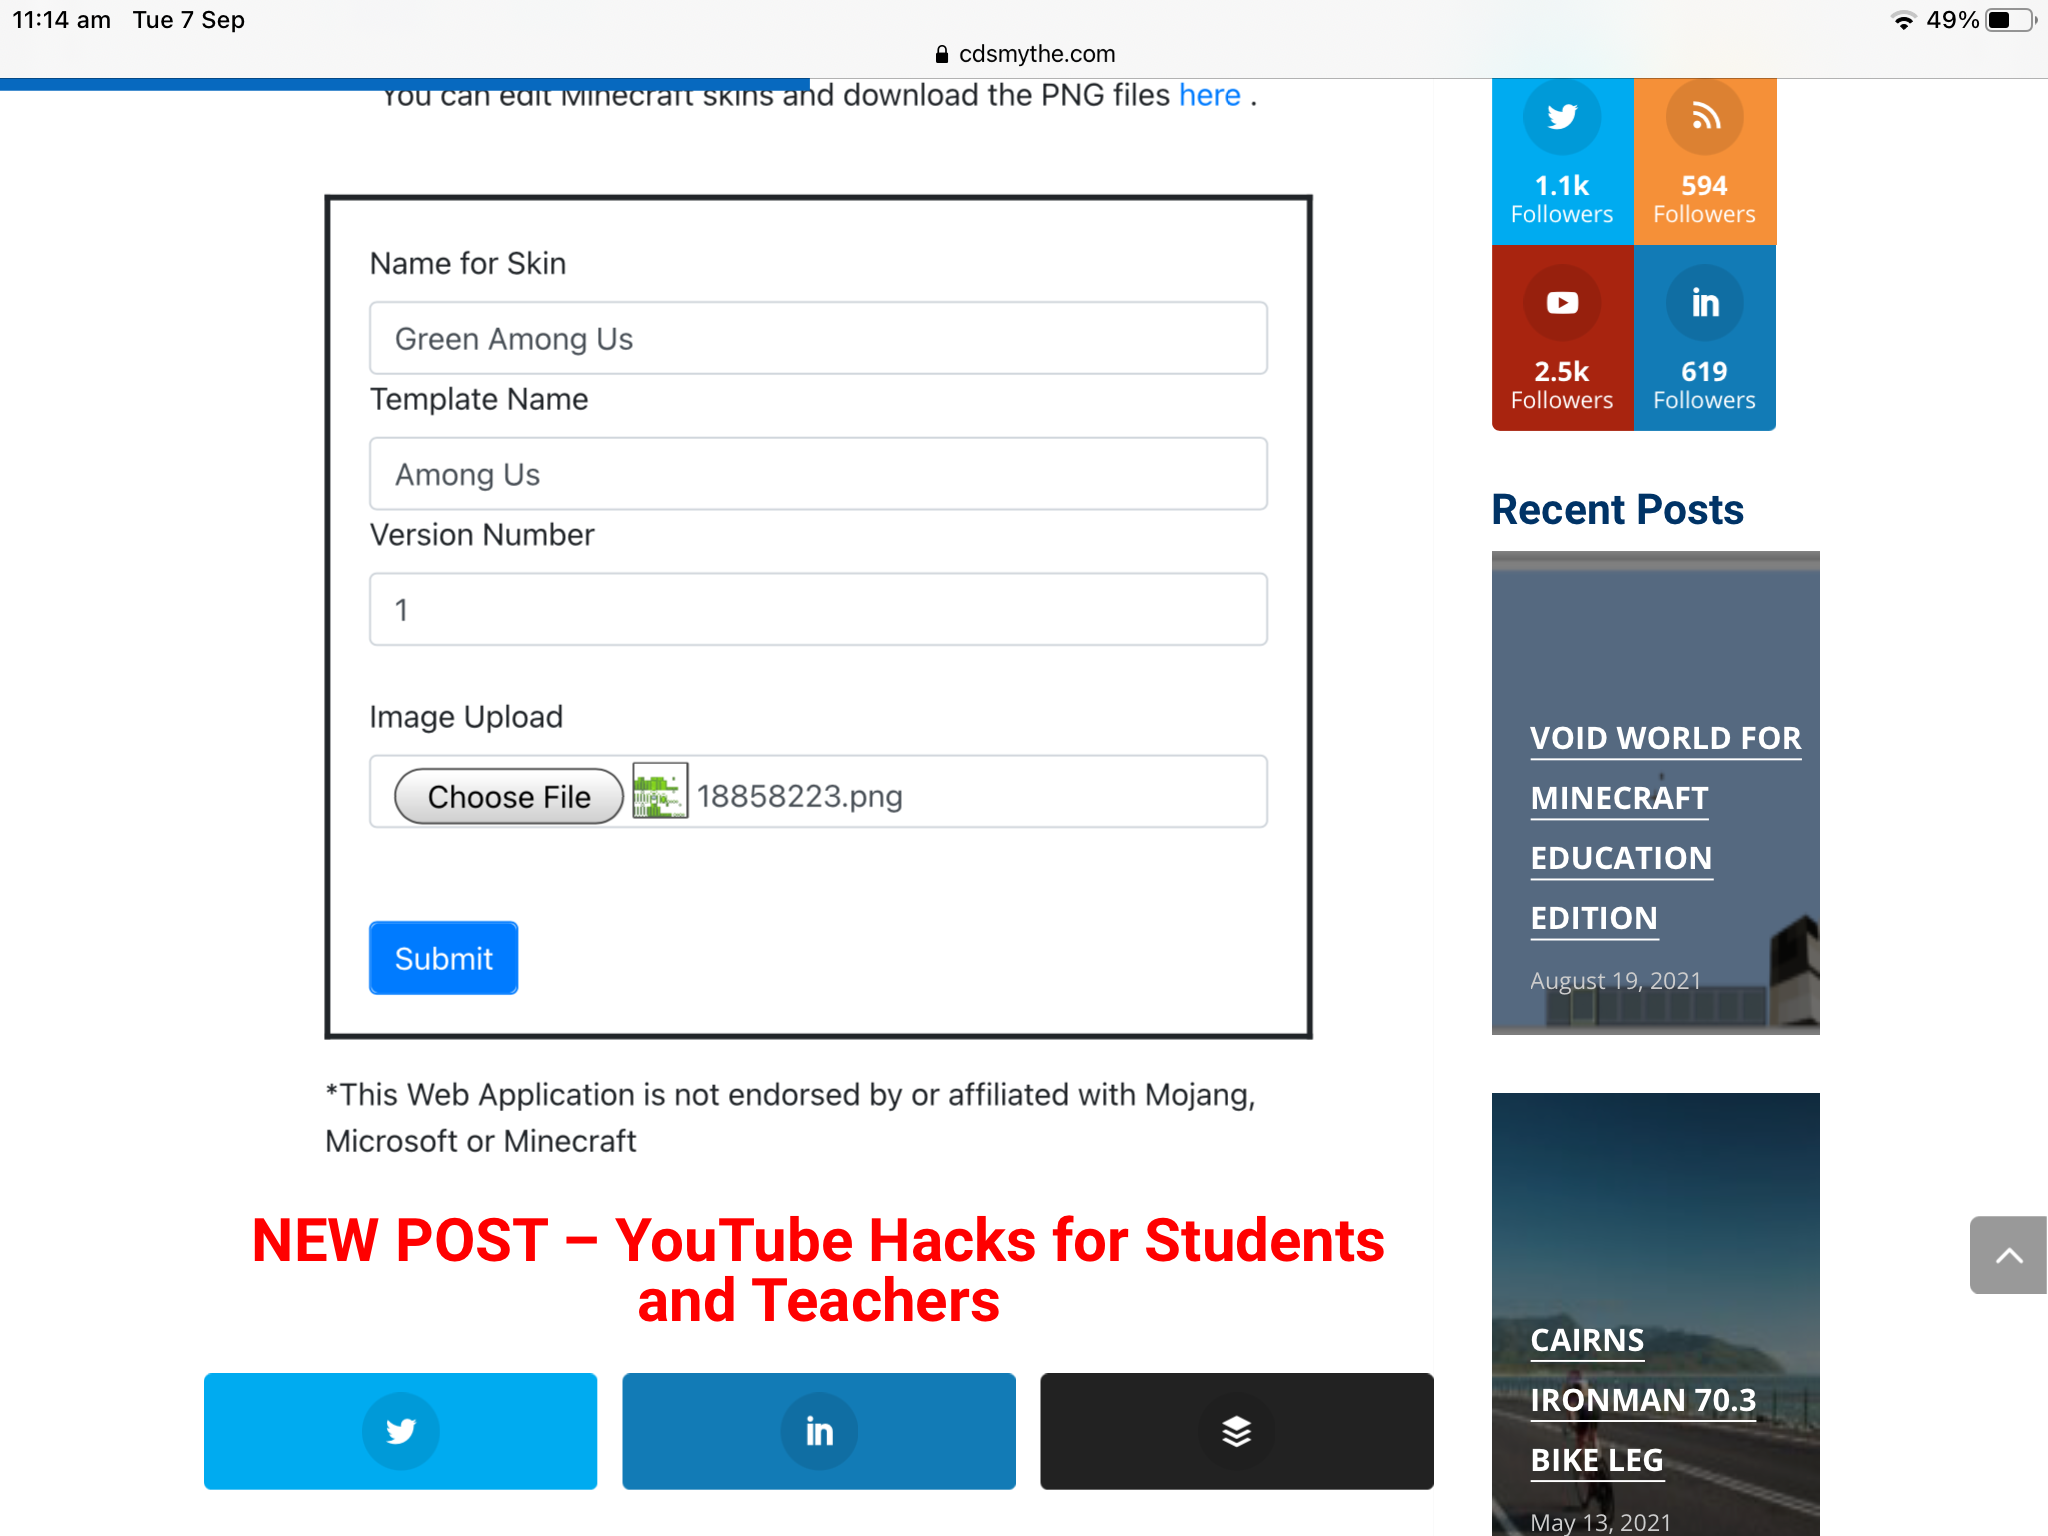
Complete the mcpack creator Form
– Name for Skin – just what you want to call it eg. Green Among Us
– Template name – just any name for the pack eg. Among Us
– Version number – any number eg. 1.0
– Browse to and upload your downloaded Skin png file from Skindex
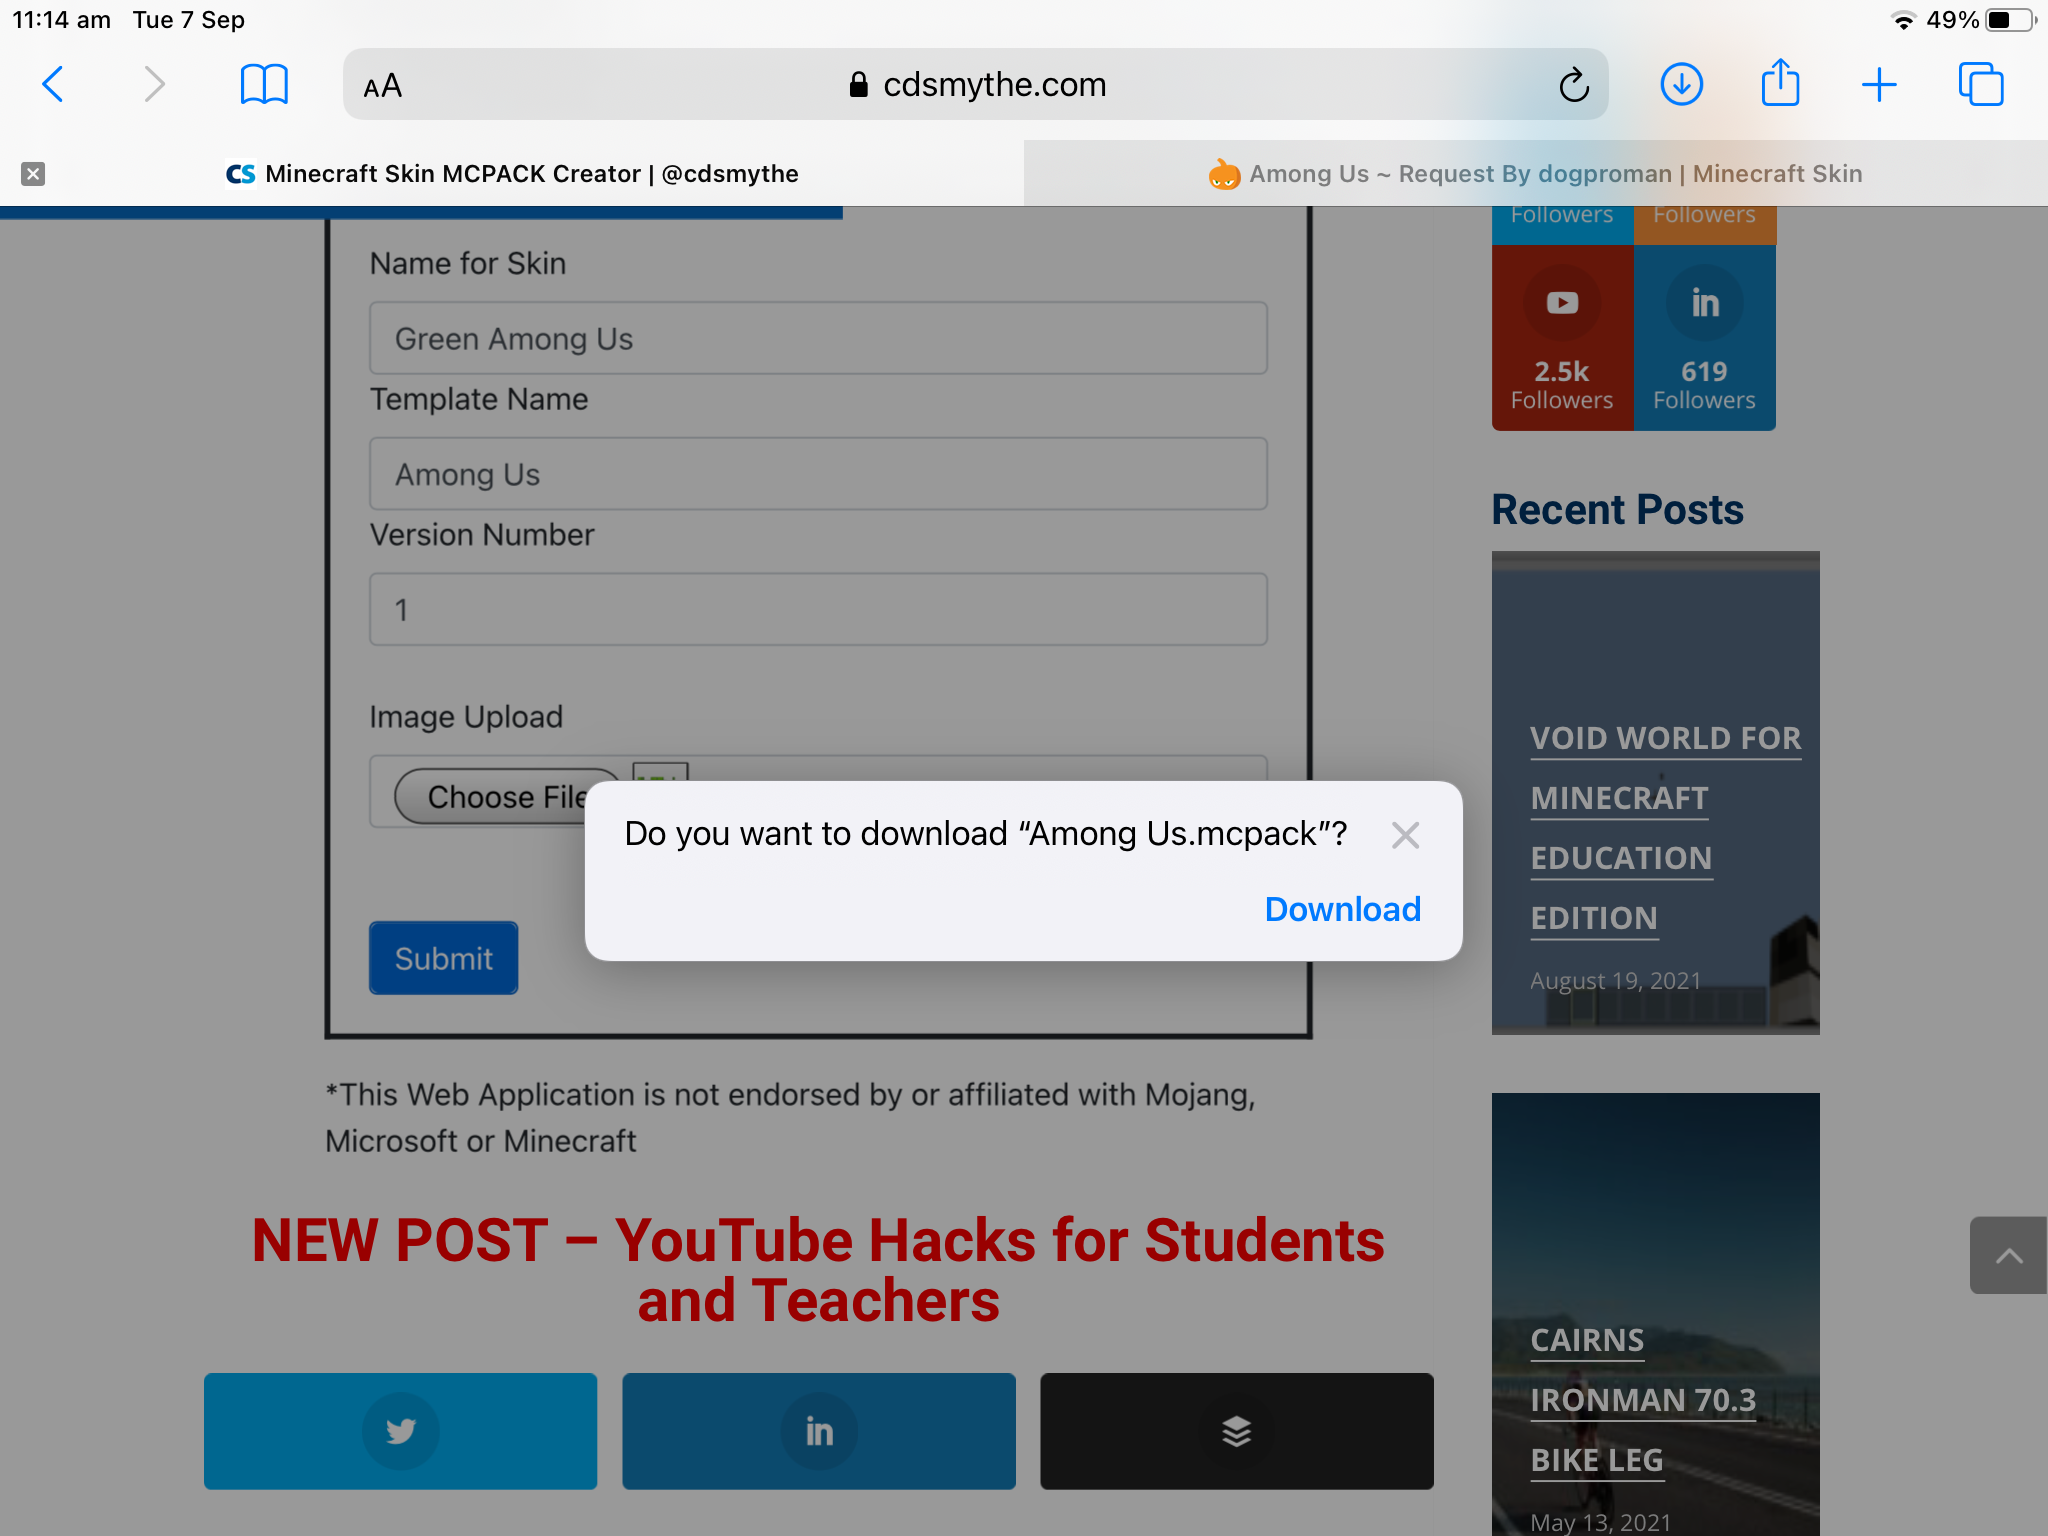
The MCPACK creator form will create the mcpack and offer it to download – save this to your iPad
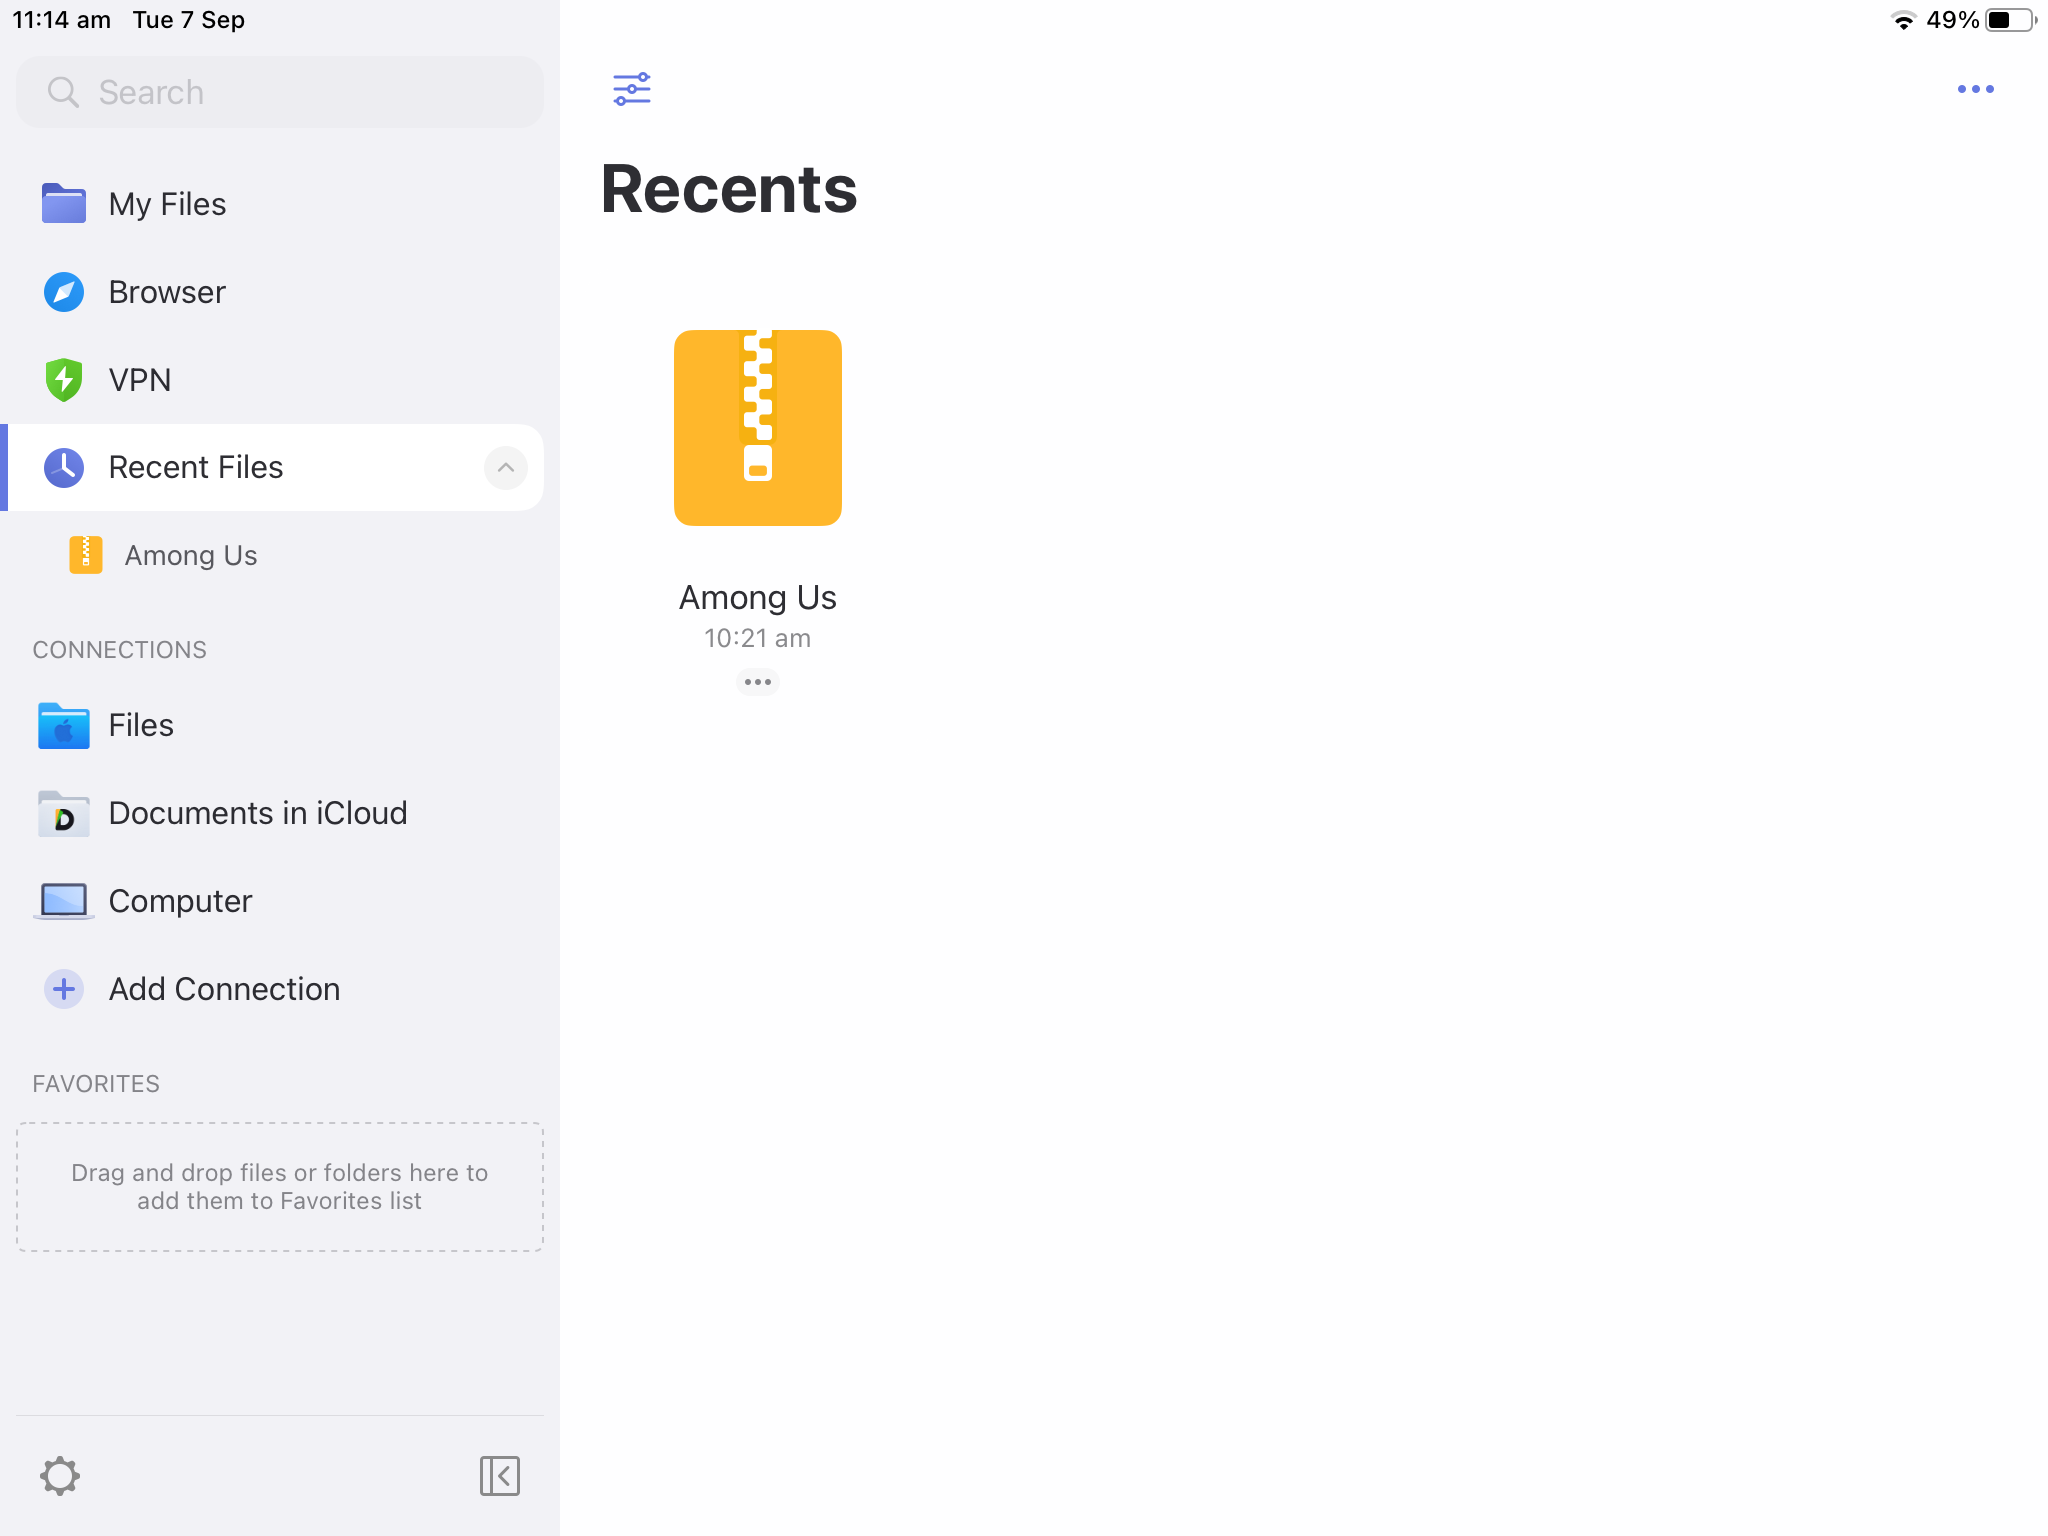
Open the Documents app and browse to where the recent downloaded MCPACK file is saved
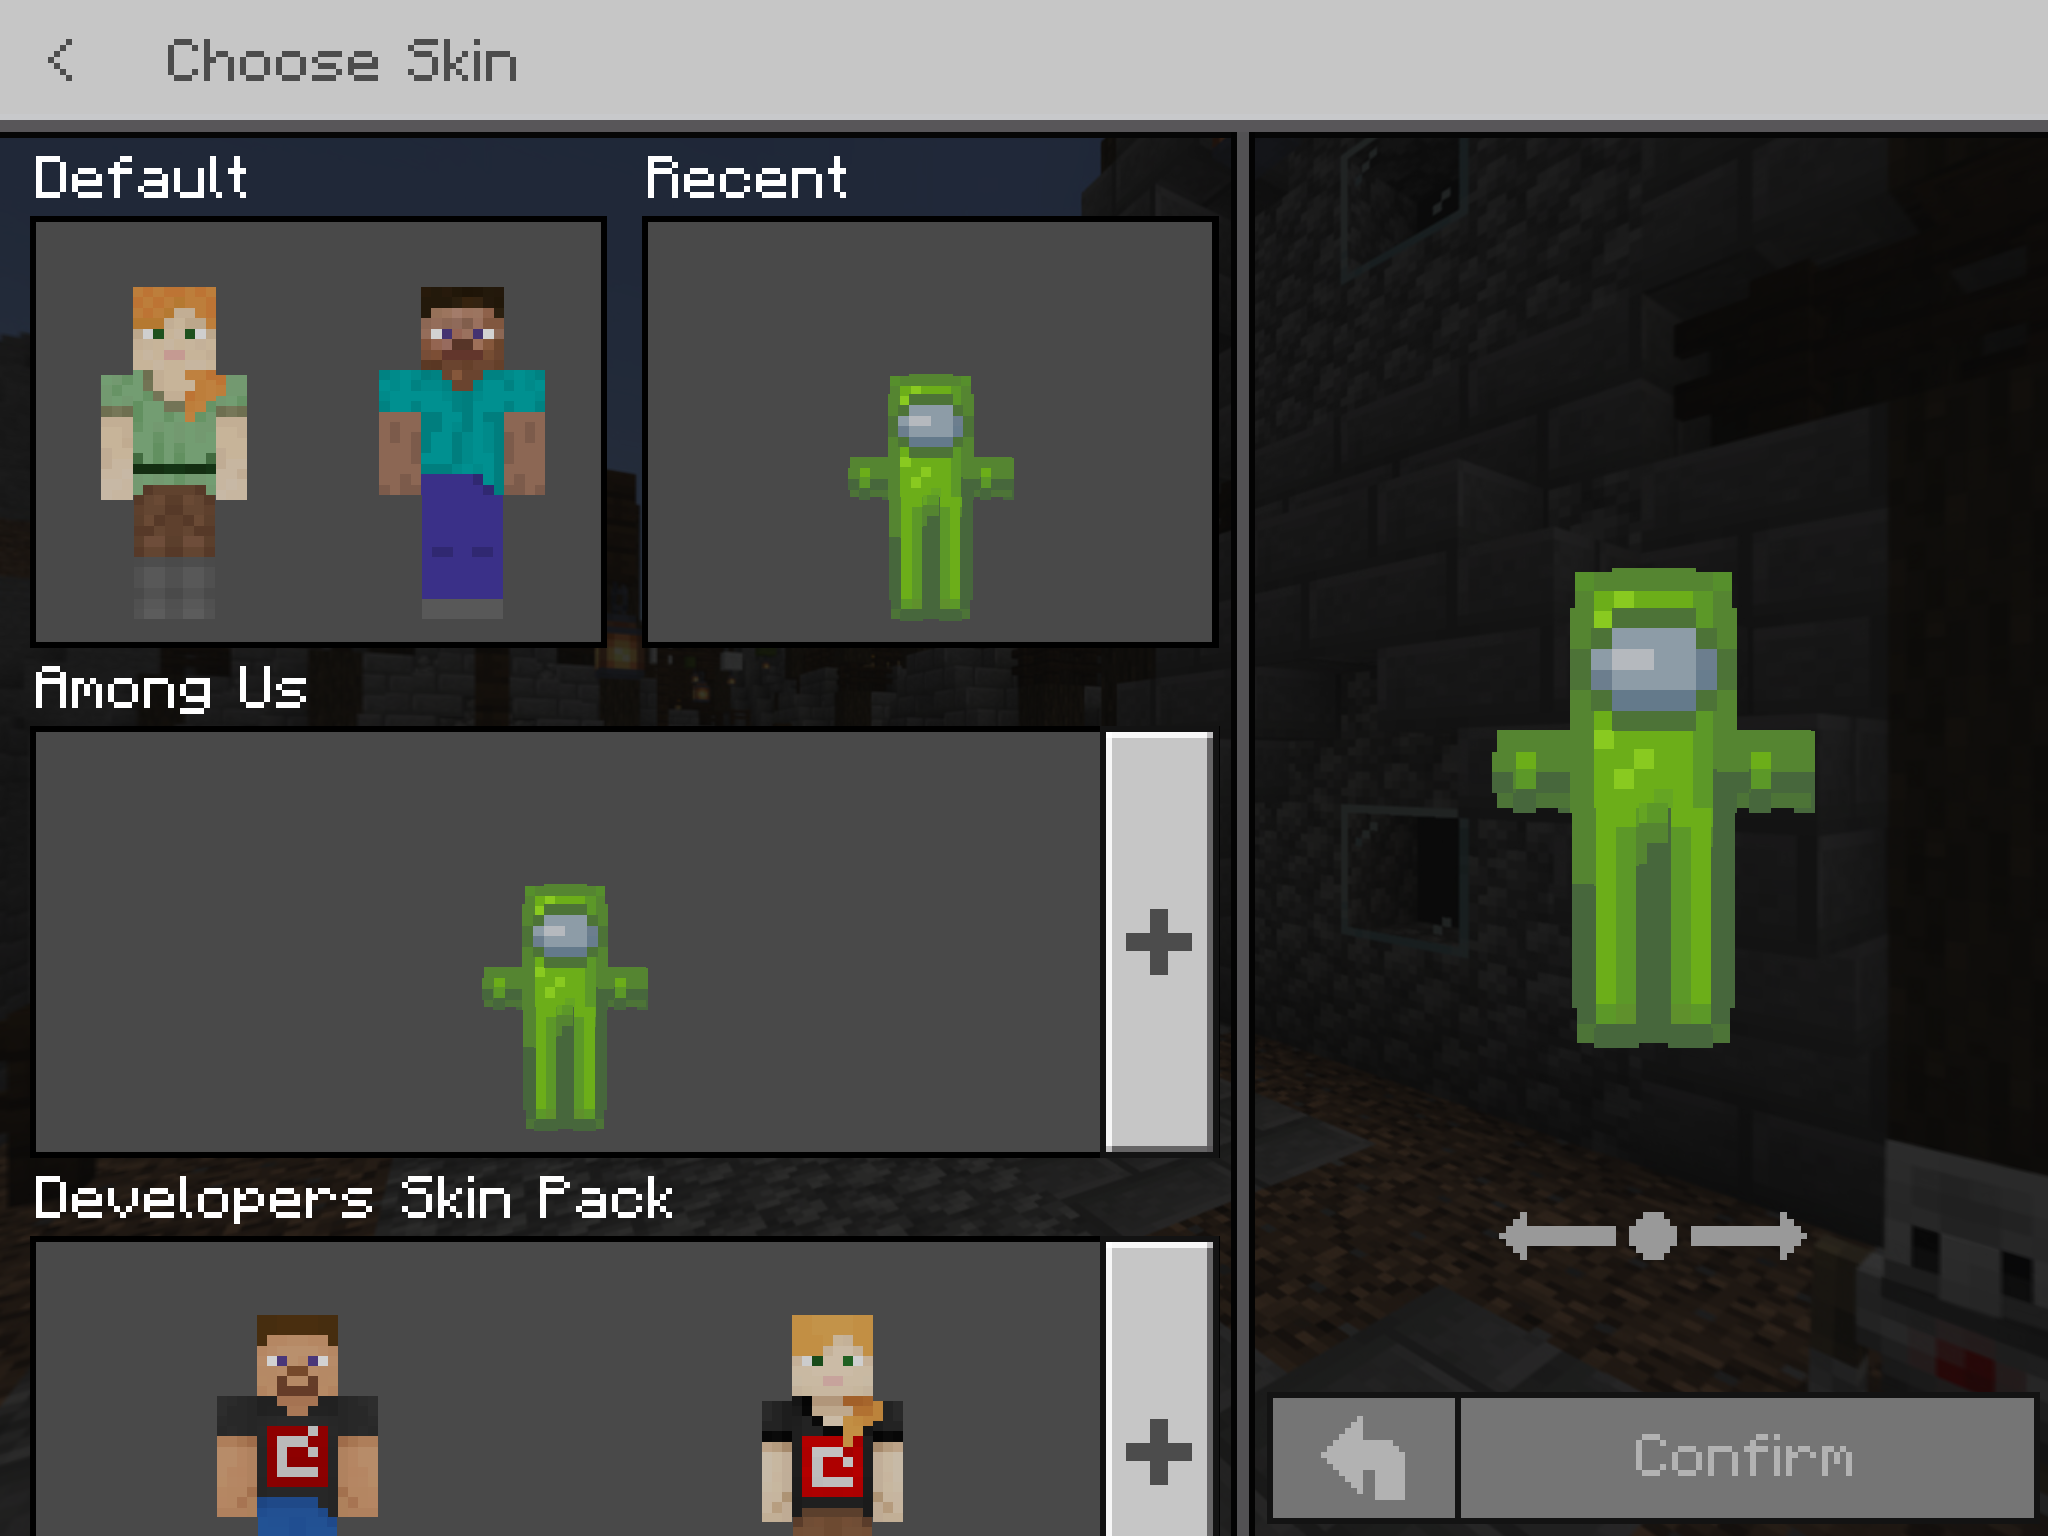
click the Open in another app link and choose Minecraft Education Edition
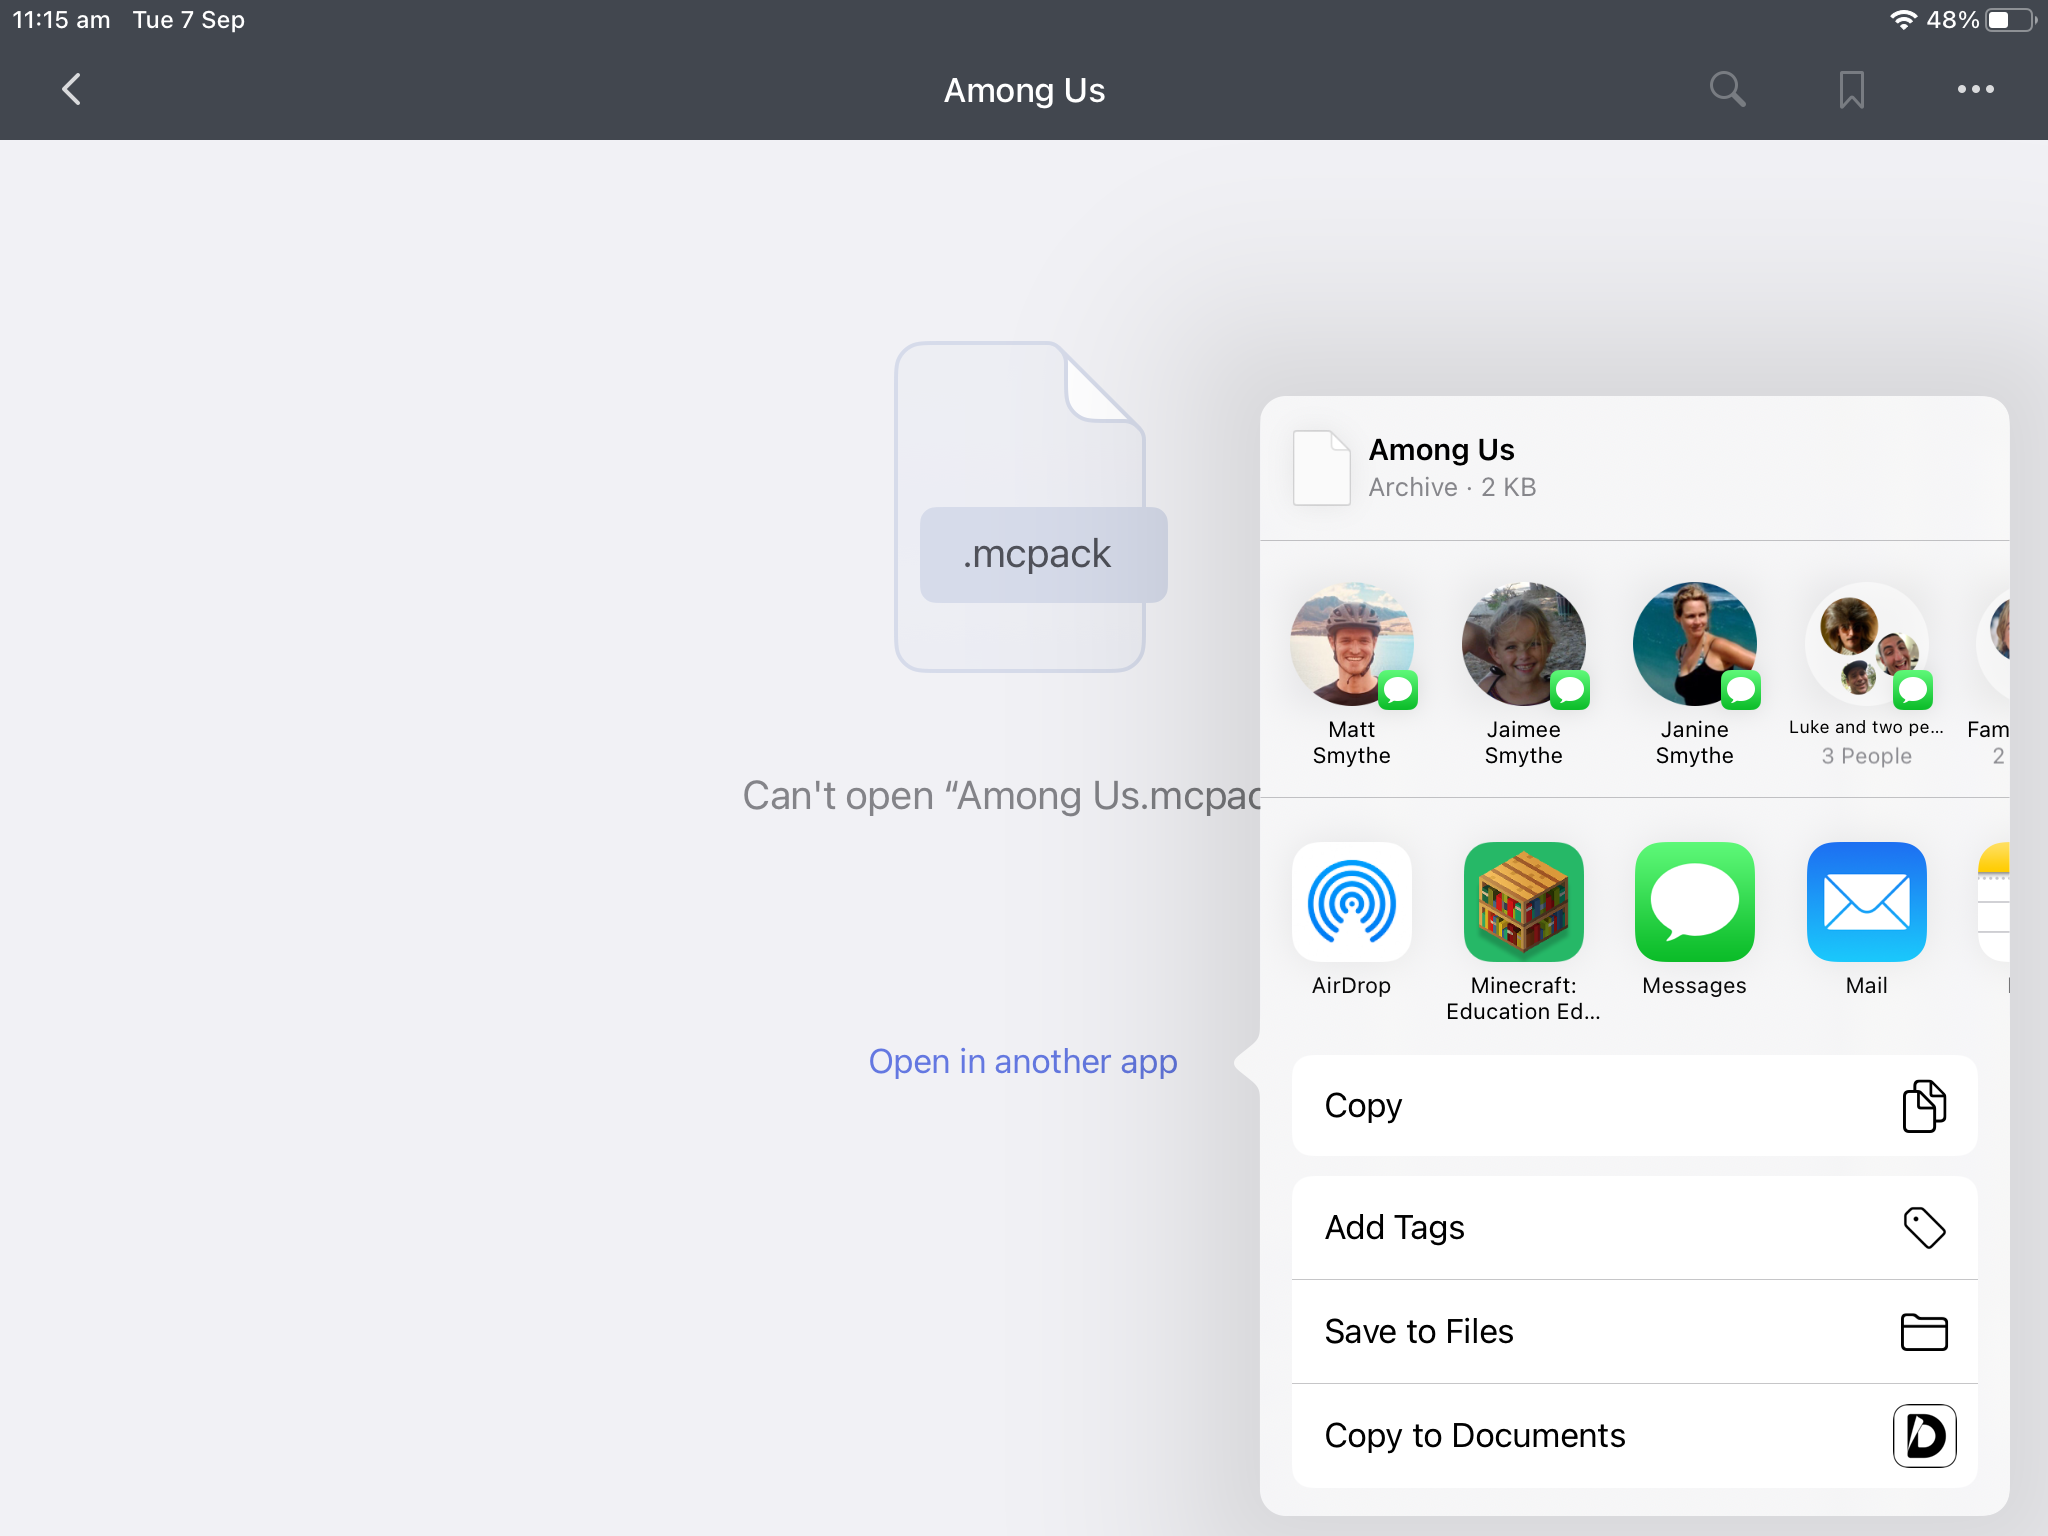
Minecraft Education Edition will open on your iPad and Import your custom skin into the game