SharePoint – Site Pages trick to convert Pages to News Posts and News Posts to Pages

SharePoint – Site Pages trick to convert Pages to News Posts and News Posts to Pages

Changing the promoted state of SharePoint Pages and News Posts

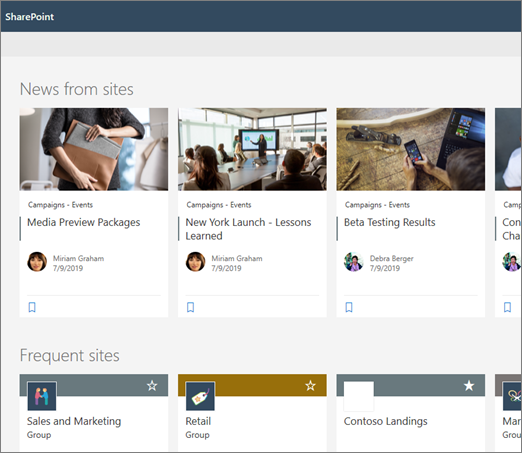
I needed a solution which would make it easy for our intranet team to make changes to the Promoted State of Pages and News Posts in SharePoint.

We needed to quickly convert Pages to News Posts from the Site Pages Library, but also to change some News Posts promoted in error by intranet authors back to Pages.

In the Site Pages library, there is a Promoted State column. Depending on the value stored in this column, you can identify whether it is a site page or a news post. The relationship between the Promoted State value and page type is as follows.

 Promoted State and Page Type

        • 0            Site page
        • 1            News Post not yet published
        • 2            News Post

Once a page is created as news post, it cannot easily be demoted to a site page because the Promoted State column is read only.

Forget about creating views to show the Promoted State of a Page – doesn’t work, you cant edit the cell the promoted state is in.


Here’s how to set it up:

  1. In the Site Pages library view click Add column
  2. click Show or Hide columns
  3. choose Promoted State
  4. click Apply


Now format the Promoted State column so we can add the code to change the SharePoint News Post back to a standard SharePoint Page.

  • Hover of the heading of the Promoted State column
  • select Column Settings
  • select Format this column
  • on the formatting pane that opens select Advanced mode

Delete the default code displayed in the formatting box shown above and paste the code shown below there.

Select all the code shown below then Paste into the Advanced formatting box

{
“$schema”: “https://developer.microsoft.com/json-schemas/sp/v2/column-formatting.schema.json”,
“elmType”: “div”,
“style”: {
“flex-wrap”: “wrap”,
“display”: “flex”,
“flex-direction”: “row”
},
“children”: [
{
“elmType”: “div”,
“txtContent”: “=if(@currentField == 0 ,’0 : Page’ , if(@currentField == 1, ‘1 : News (Unpublished)’ , if(@currentField == 2 , ‘2 : News Post’,”) ) )”,
“style”: {
“box-sizing”: “border-box”,
“padding”: “4px 8px 5px 8px”,
“display”: “flex”,
“border-radius”: “16px”,
“height”: “27px”,
“align-items”: “center”,
“white-space”: “nowrap”,
“overflow”: “hidden”,
“margin”: “4px 4px 4px 4px”,
“border”: “1px solid”
},
“attributes”: {
“class”: “=if(@currentField == 0 ,’ms-fontColor-themePrimary ms-borderColor-themePrimary ms-bgColor-white’ , if(@currentField == 1, ‘ms-fontColor-themePrimary ms-borderColor-themePrimary ms-bgColor-themeLighter’ , if(@currentField == 2 , ‘ms-fontColor-white ms-borderColor-themePrimary ms-bgColor-themePrimary’,”) ) )”
}
},
{
“elmType”: “div”,
“style”: {
“font-size”: “18px”,
“cursor”: “pointer”,
“padding”: “10px”,
“border-radius”: “50%”,
“display”: “=if(@currentField == 0 , ‘none’ ,”)”
},
“attributes”: {
“iconName”: “MoreVertical”,
“class”: “ms-fontColor-themePrimary ms-bgColor-themeLighter–hover”
},
“customCardProps”: {
“openOnEvent”: “click”,
“directionalHint”: “rightCenter”,
“isBeakVisible”: true,
“formatter”: {
“elmType”: “div”,
“txtContent”: “Demote (Change to 0:Page)”,
“style”: {
“padding”: “10px 20px 10px 20px”,
“cursor”: “pointer”
},
“attributes”: {
“class”: “ms-bgColor-themeLighter–hover”
},
“customRowAction”: {
“action”: “setValue”,
“actionInput”: {
“PromotedState”: “0”
}
}
}
}
},
{
“elmType”: “div”,
“style”: {
“font-size”: “18px”,
“cursor”: “pointer”,
“padding”: “10px”,
“border-radius”: “50%”,
“display”: “=if(@currentField == 2 , ‘none’ ,”)”
},
“attributes”: {
“iconName”: “MoreVertical”,
“class”: “ms-fontColor-themePrimary ms-bgColor-themeLighter–hover”
},
“customCardProps”: {
“openOnEvent”: “click”,
“directionalHint”: “rightCenter”,
“isBeakVisible”: true,
“formatter”: {
“elmType”: “div”,
“txtContent”: “Promote (Change to 2:News Post)”,
“style”: {
“padding”: “10px 20px 10px 20px”,
“cursor”: “pointer”
},
“attributes”: {
“class”: “ms-bgColor-themeLighter–hover”
},
“customRowAction”: {
“action”: “setValue”,
“actionInput”: {
“PromotedState”: “2”
}
}
}
}
}
]
}

Now that you have the Site Pages list view showing the Promoted State column you can see the options available to convert Pages and News Posts.

Simply click the more options dots next to the Promoted State and choose to Demote or Promote the Page or News Post

Last step – Remember to Republish your page!

SharePoint – Site Pages trick to convert Pages to News Posts and News Posts to Pages

SharePoint – convert a News Post back to a standard Page

Why would you need to change a SharePoint News Post back to a SharePoint Page?

In our company intranet we have times where people create Pages and then take up SharePoint’s offer to Promote their Page by making it a News Post. While this sounds good – we don’t want every page becoming a News Post and appearing in various News Feeds across different Microsoft 365 apps.

In the Site Pages library, there is a Promoted State column. Depending on the value stored in this column, you can identify whether it is a site page or a news page. The relationship between the Promoted State value and page type is as follows.

 Promoted State and Page Type

        • 0            Site page
        • 1            News page not yet published
        • 2            News page

Once a page is created as news page, it cannot easily be demoted to a site page because the Promoted State column is read only.

Forget about creating views to show the Promoted State of a Page – doesn’t work, you cant edit the cell the promoted state is in.

I had to find a way to convert a SharePoint News Post back into a SharePoint Page.  It wasn’t easy. But I managed to get some help from one of the dozens of forums I went through trying to solve this.


Here’s how to set it up:

  1. Start by creating a new view in your SharePoint Site Pages library – base it on All Items and call it All News Posts
  2. In the view click Add column
  3. click Show or Hide columns
  4. choose Promoted State
  5. click Apply


Now format the Promoted State column so we can add the code to change the SharePoint News Post back to a standard SharePoint Page.

  • Hover of the heading of the Promoted State column
  • select Column Settings
  • select Format this column
  • on the formatting pane that opens select Advanced mode

Delete the default code displayed in the formatting box shown above and paste the code shown below there.

Select all the code shown below then Paste into the Advanced formatting box

{
"$schema": "https://developer.microsoft.com/json-schemas/sp/v2/column-formatting.schema.json",
"elmType": "div",
"style": {
"flex-wrap": "wrap",
"display": "flex",
"flex-direction": "row"
},
"children": [
{
"elmType": "div",
"txtContent": "=if(@currentField == 0 ,'0 : Page' , if(@currentField == 1, '1 : News (Unpublished)' , if(@currentField == 2 , '2 : News','') ) )",
"style": {
"box-sizing": "border-box",
"padding": "4px 8px 5px 8px",
"display": "flex",
"border-radius": "16px",
"height": "27px",
"align-items": "center",
"white-space": "nowrap",
"overflow": "hidden",
"margin": "4px 4px 4px 4px",
"border": "1px solid"
},
"attributes": {
"class": "=if(@currentField == 0 ,'ms-fontColor-themePrimary ms-borderColor-themePrimary ms-bgColor-white' , if(@currentField == 1, 'ms-fontColor-themePrimary ms-borderColor-themePrimary ms-bgColor-themeLighter' , if(@currentField == 2 , 'ms-fontColor-white ms-borderColor-themePrimary ms-bgColor-themePrimary','') ) )"
}
},
{
"elmType": "div",
"style": {
"font-size": "18px",
"cursor": "pointer",
"padding": "10px",
"border-radius": "50%",
"display": "=if(@currentField == 0 , 'none' ,'')"
},
"attributes": {
"iconName": "MoreVertical",
"class": "ms-fontColor-themePrimary ms-bgColor-themeLighter--hover"
},
"customCardProps": {
"openOnEvent": "click",
"directionalHint": "rightCenter",
"isBeakVisible": true,
"formatter": {
"elmType": "div",
"txtContent": "Demote (Change to 0:Page)",
"style": {
"padding": "10px 20px 10px 20px",
"cursor": "pointer"
},
"attributes": {
"class": "ms-bgColor-themeLighter--hover"
},
"customRowAction": {
"action": "setValue",
"actionInput": {
"PromotedState": "0"
}
}
}
}
}
]
}

Now that you have a list view showing the Promoted State column filter it to show items with Promoted State of 1 or 2 so you can only see news Posts.

Simply click the more options dots next to the Promoted State and choose to Demote the Page to 0 – (Standard SharePoint Page)

Last step – Remember to Republish your page!

sharepoint news post convert to page

Thanks to Tetsuya Kawahara for the solution – Github