Skin pack Creator for Minecraft
Game players love creating and customizing their character skins – their appearance. This guide shows you how you can customize your appearance in Minecraft: Education Edition.
If you want to do this on your iPad see the guide HERE
If you want to make a skin with Slim features use the app HERE
Minecraft Education Edition requires you to create a MCPACK file which contains all the files required for your custom Minecraft skin. The PNG image file and a couple of JSON files. Matt’s work means you only need to have the PNG image and his online tool will create the JSON files and package those with your image into the MCPACK file required by Minecraft.
So now only a couple of steps are needed – lets get into it.
Step 1 – Create your Custom Minecraft Education Edition Skin
- go to The Skindex – create, edit and download the PNG file required for your new custom Minecraft skin
- (you can go to any site that has PNG files of skins, also see https://mcpedl.com/)
Step 2 – Create the MCPACK File
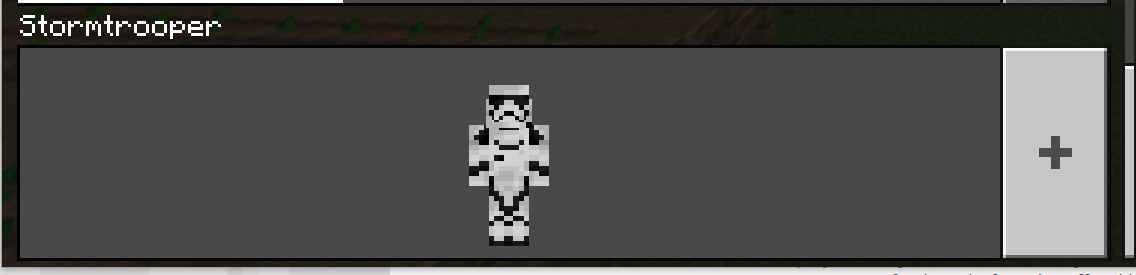
- Follow this Link and complete the Form (example below)

- Complete the Form with the Name of your Skin, Name of your Skinpack and a Version number for your Skinpack (can be any number)
- Browse to your custom skin PNG file and select
- If you want to add more Skins to your skinpack click the Add another Skin button.
- Save the generated MCPACK file containing everything for Minecraft Education Edition to your computer
- double click the file which will trigger opening Minecraft Education Edition and the import of your new custom skin will happen automatically or open Minecraft Education Edition and choose to Import the MCPACK file.
After your MCPACK Skinpack file is imported it appears in the Skins section of Minecraft Education Edition for you to select