Updated: November 24 2020
In Minecraft you are able to click the Hangar on the Home page and choose a different “Skin” for your character. Your Skin – is what you look like in Minecraft. When you click the Hangar you will see a number of Skin Packs available from which you can select a new Skin for your Character.
Check Out – YouTube Hacks for Students and Teachers 2021
But it’s not easy to import new Skins into Minecraft: Education Edition to select from. A Skin Pack requires three JSON files to exist along with the PNG image files of the Skins. There are free online Minecraft Skin makers available like – Minecraft Skins – where you can create and download the PNG image. But I cant find anything to easily generate the JSON files needed. For this example I’m not going to work with the Slim character skins.
This guide takes you through the process of creating a Skin Pack and importing it into Minecraft: Education Edition.
Step One – get template files and images
Gather Resources to Create your Skin Pack
You’ll need the following to create your own Skin Pack for Minecraft: Education Edition
- A short name for your skinpack
- two PNG image files for the actual skin textures you want to use – check out Minecraftskins.net
- Two unique Version 4 UUID numbers – generate these from UUIDgenerator.net
- Three files to edit:
- manifest.json
- en_US.lang (or en_UK.lang depending on the Language you have set to use in Minecraft: Education Edition)
- skins.json
Download an Example and a Template set of these files to customise for yourself from here
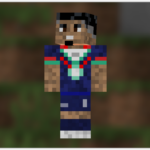
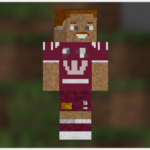
Below I will show you how to edit the Template files and use the Example files as my intended skin pack. So I will end up with a Skin Pack titled – Smythe Example Skin Pack, which contains two skins called HanSolo and Stormtrooper.
Step Two – Edit Files
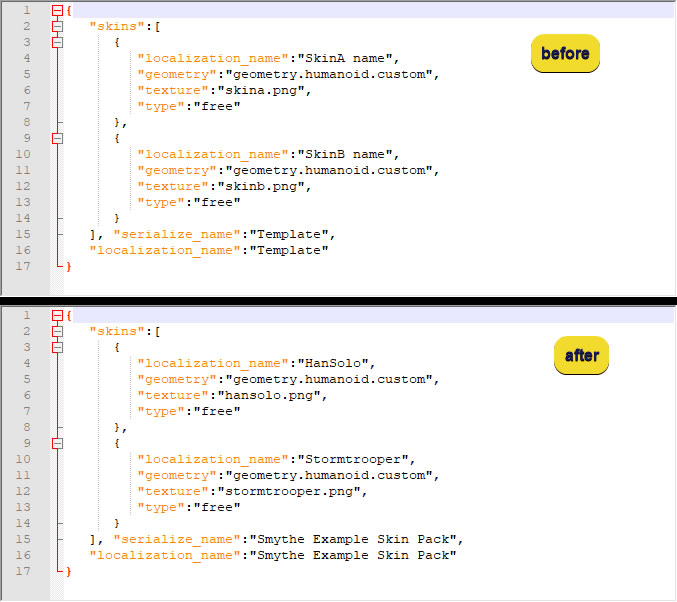
Edit: skins.json
Open from the template pack – skins.json
Replace all the following text variables (including the brackets) with your names
- SkinA name = change to your first skin name
- skina.png = change to your first skin filename
- SkinB name = change to your second skin name
- skinb.png = change to your second skin filename
- Template = change to your Skin Pack name
Edit: en_us.lang
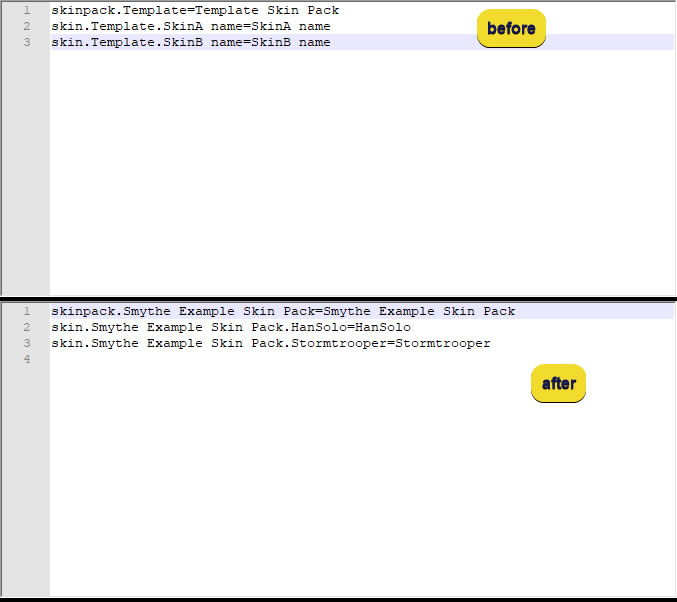
Open from the template pack – en_us.lang (assuming that’s the Minecraft Language setting you’re using)
Replace all the following variables (including the brackets) with your names
- Template = change to the name of your skin pack
- SkinA name = change to your first skin name
- SkinB name = change to your second skin name
Edit: manifest.json
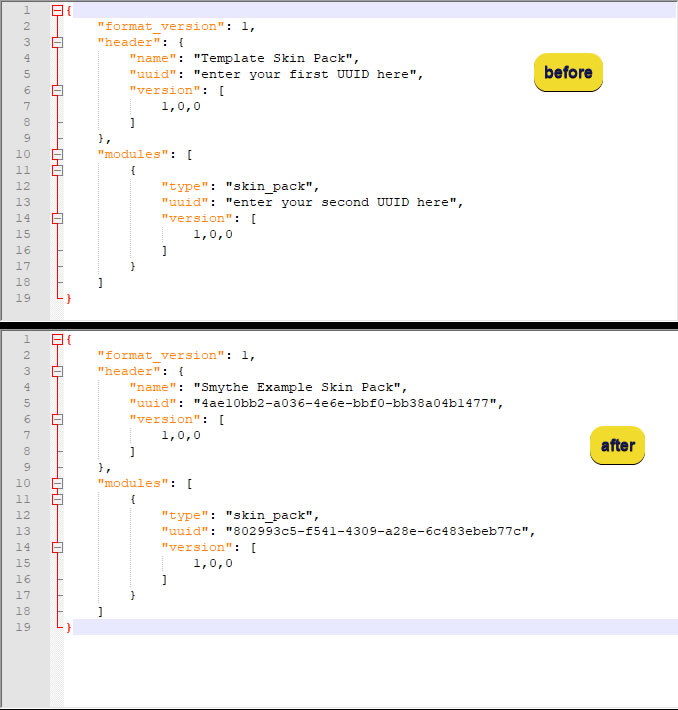
Open from the template pack – manifest.json
Replace all the following variables (including the brackets) with your names
Visit uuidgenerator.net to generate two unique UUID number for this file
- Template = change to the name of your skin pack
- first UUID = generate UUID 1 from uuidgenerator.net using version 4 UUID
- second UUID = generate UUID 2 from uuidgenerator.net using version 4 UUID
Step3 – Create .mcpack file and install in Minecraft: Education Edition
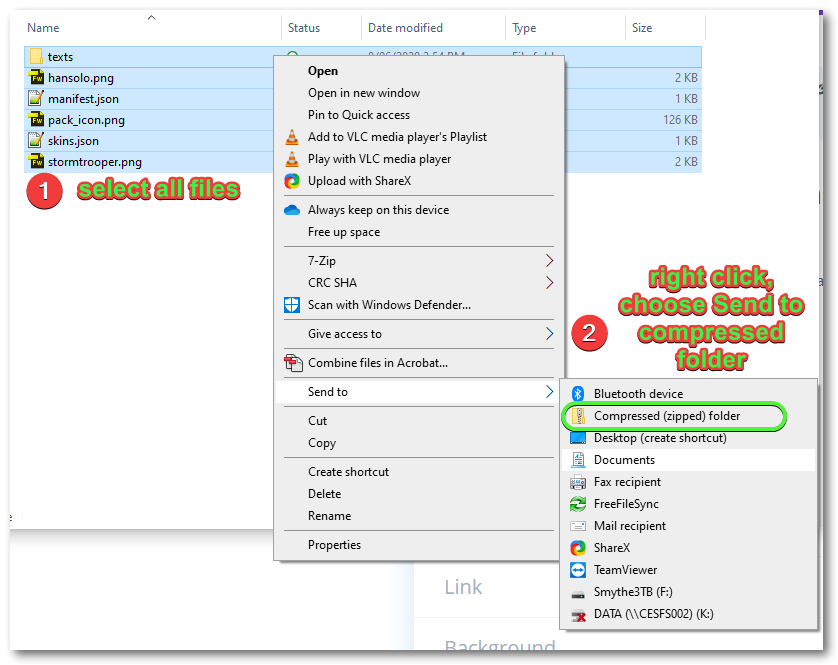
Now that you have all your files ready, you need to create a compressed file to import into Minecraft: Education Edition
- Select all the Files in the template folder
- Right click and choose – Send to compressed (zipped) folder
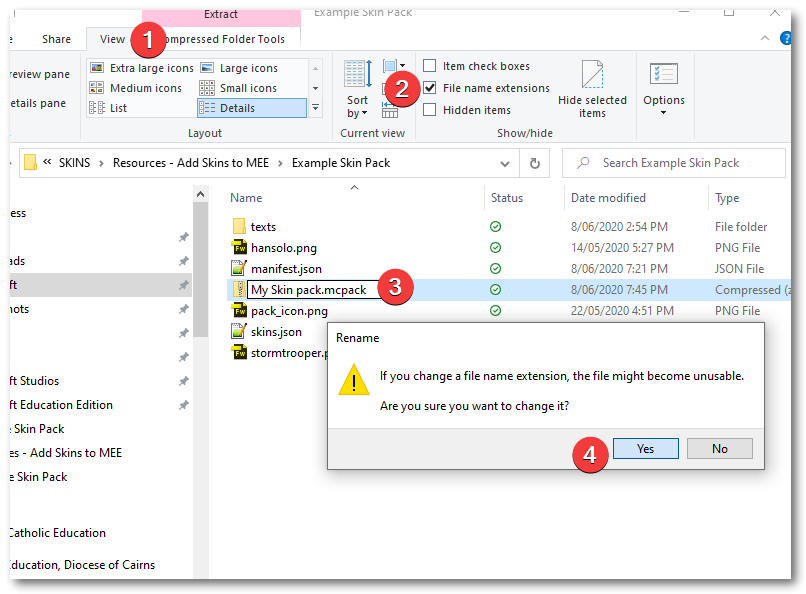
Change the compressed file type from zip to mcpack
- In File Explorers View tab,
- make sure File Name Extensions is selected,
- change the zip text to mcpack
- click YES on the warning popup to accept the change
To install your Skin Pack into Minecraft: Education Edition:
- Open Minecraft: Education Edition
- Browse in File Explorer to your skin pack mcpack file and double click it. This will start the import into Minecraft:EE
Additional Notes
If you want to add more Skins to your Pack:
- en_us.lang – add additional lines
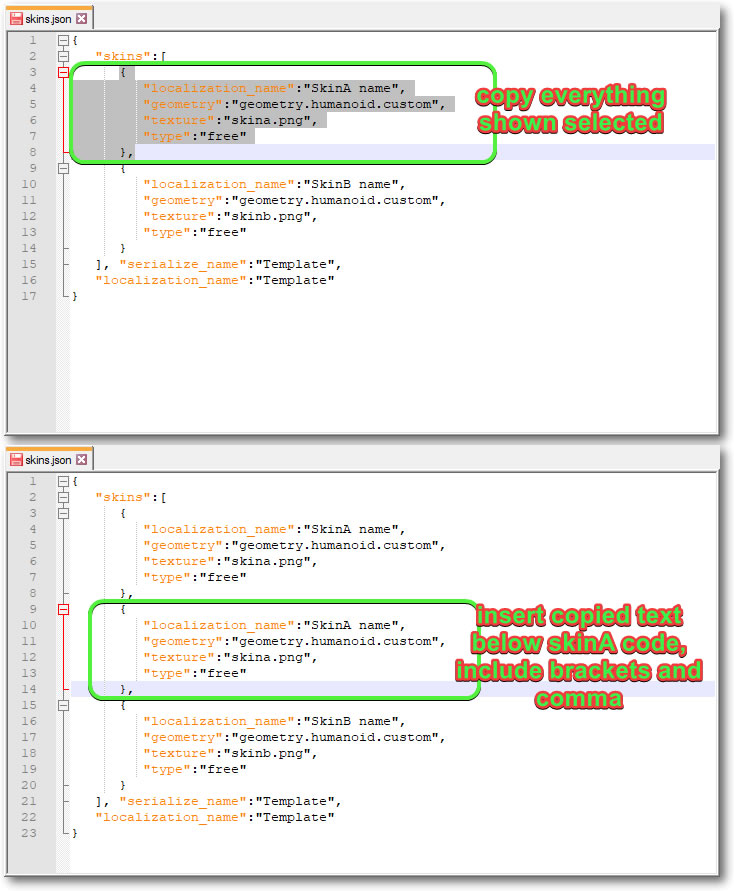
- skins.json – copy and paste the code section for SkinA and edit accordingly with skin name and file name
Designing Skins?
- download Blockbench – https://blockbench.net/downloads/
