By default when you add a File to your Microsoft Team’s File section – it becomes editable by all your Team Members. There are times when you dont want everyone to edit that file, only read it.
So here is how you can add a file to Teams and make it Read Only.
(Related Post: Click here to see my guide on creating a Read Only Folder in Teams)
How to Create a Read Only File in Microsoft Teams Files Section
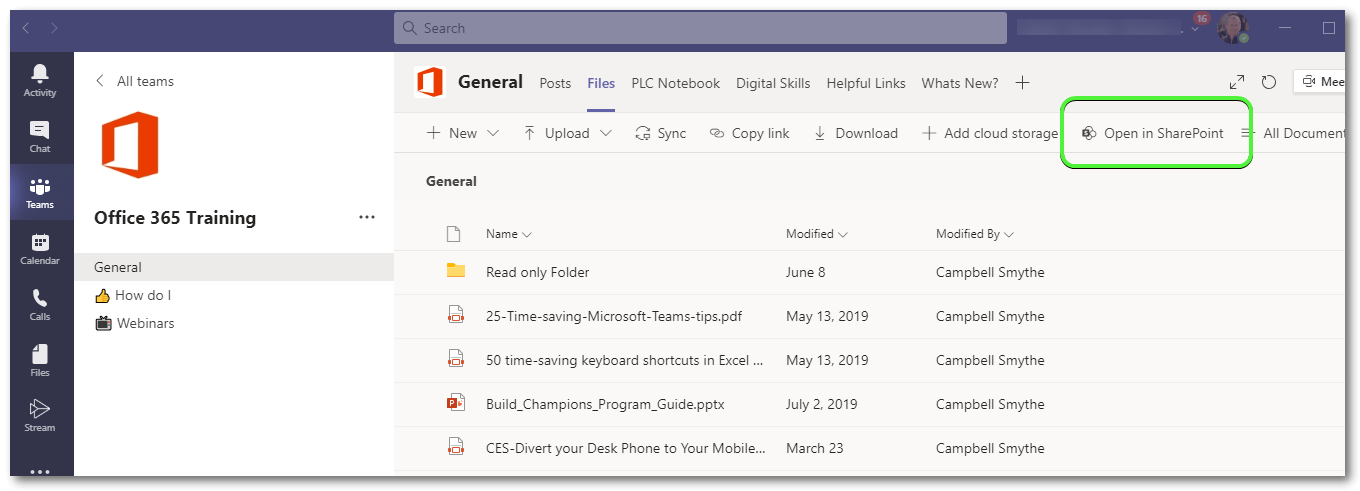
First open up your Microsoft Team and click the Files Tab
Click the Open in SharePoint button
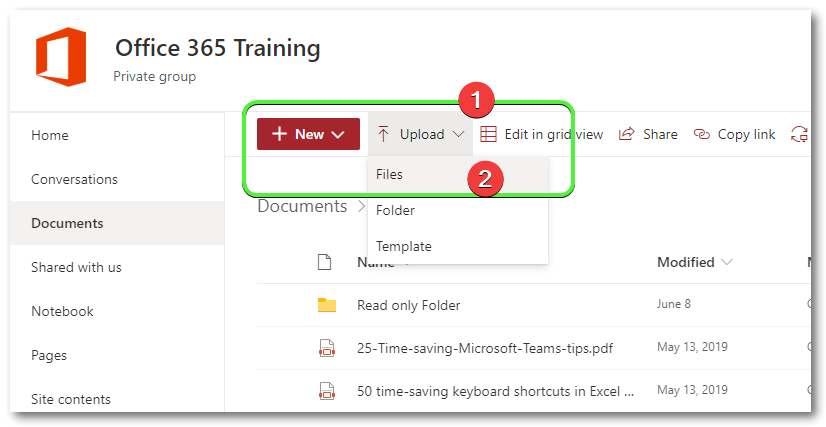
In SharePoint, click the Upload > Files then browse for your selected File
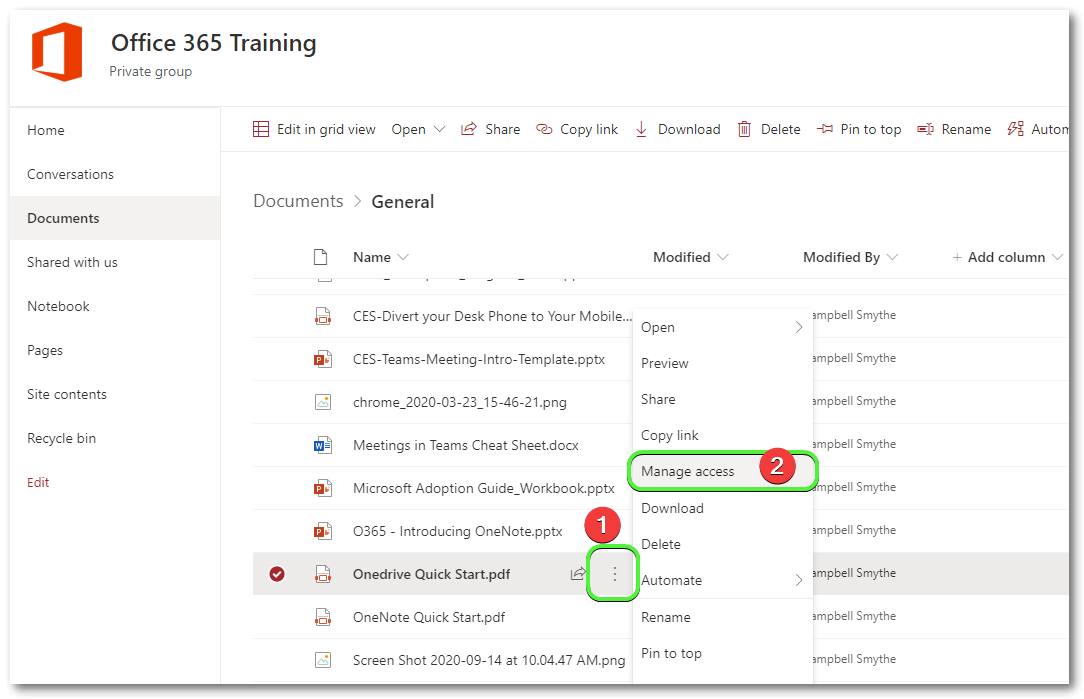
Now hover over the File and click the More Options ellipses (3 vertical dots) and then click Manage Access
Click the drop-down to change Team Members permissions and select Can View so the File becomes Read Only for Members. Changes will save automatically
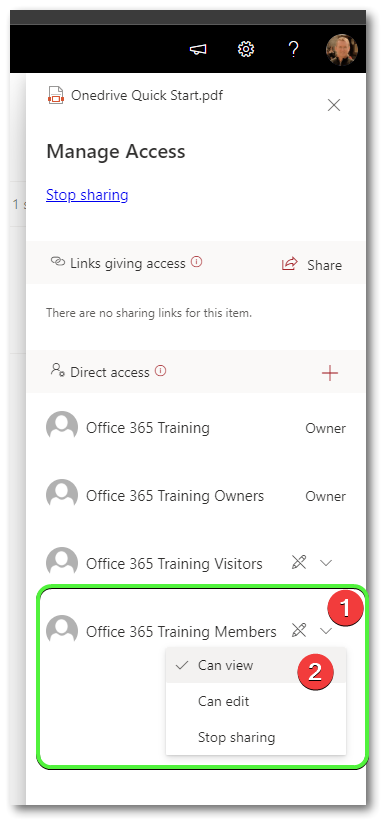
This will set the Permissions on that File so that Team Owners only are able to edit the File, but not Members.
If you found that Tip useful, please share with someone else!
YouTube Channel – https://youtube.com/channel/UCRpmmEBtbXNbUUKsIlfGHUQ
