You’ve heard of VR right? Virtual reality – the experience (at the moment) of viewing a movie which is presented through a headset in a way that you can look around as though you are in the setting. With headphones and sound you can start getting tricked that it’s more real than it is…..
Google Cardboard is a low cost, cheap as kitset you can buy which enables you to use your smartphone and some folded up cardboard to create a VR Headset, download some VR apps, and get into some virtual reality.
So once your cardboard headsets arrive you just put them together, download a few VR apps and off you go.
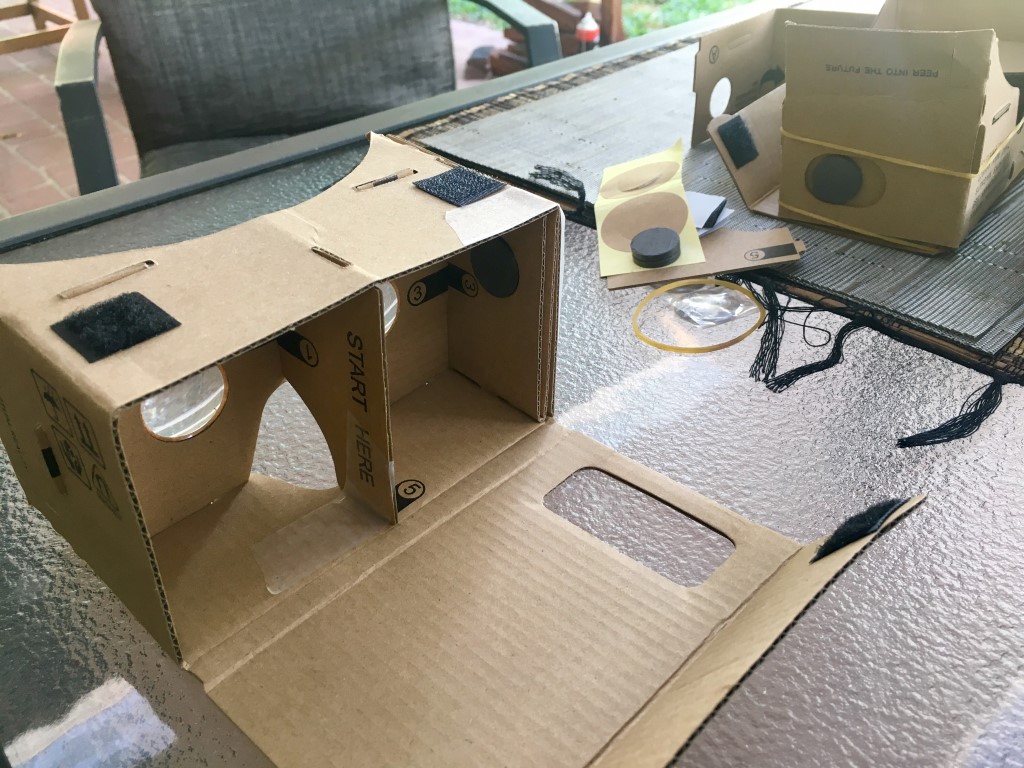
Well, it took me about 30 minutes to put the first cardboard goggles together – Because they were missing a piece! Once I realised that I requested a refund from the seller and in about 10 minutes had the other set build.
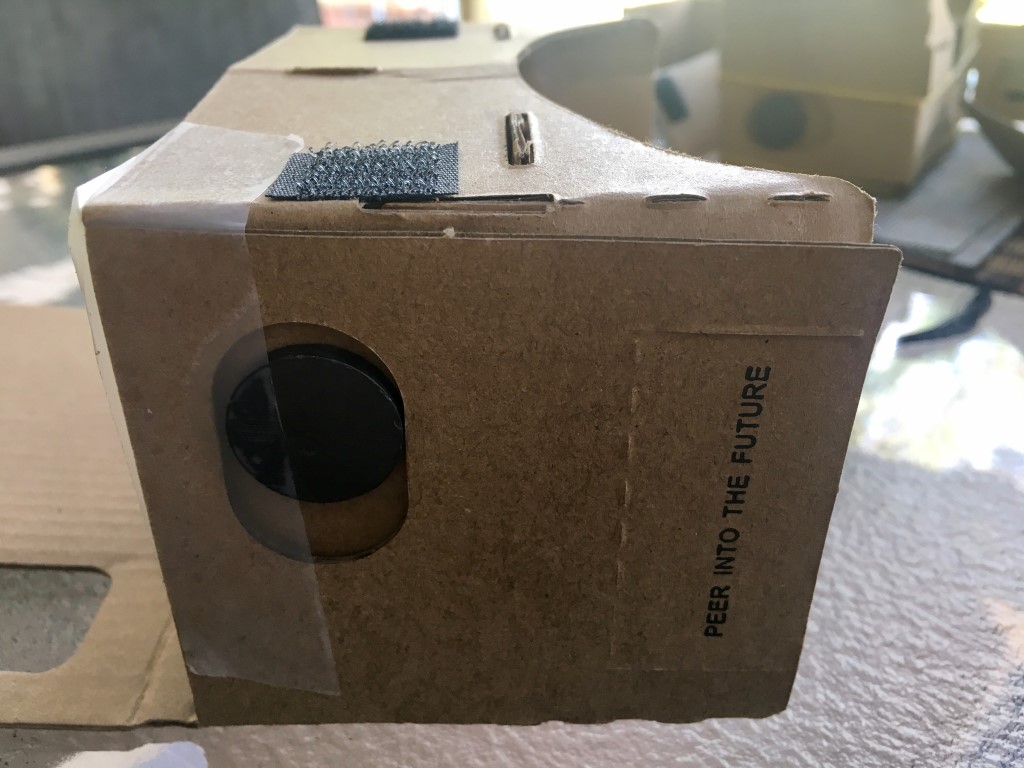
One thing that puzzled me was the magnets that came with it. I had no idea what the heck they were for. Google. Turns out the magnets work with the phone’s magnetometer to act as a button with the headset, so head movements can act like button taps.
And lets be honest here – its $2 worth of cardboard so don’t expect anything amazing. Make some modifications with a bit of sticky tape and rubber bands where you need to!
How does Google Cardboard VR work?
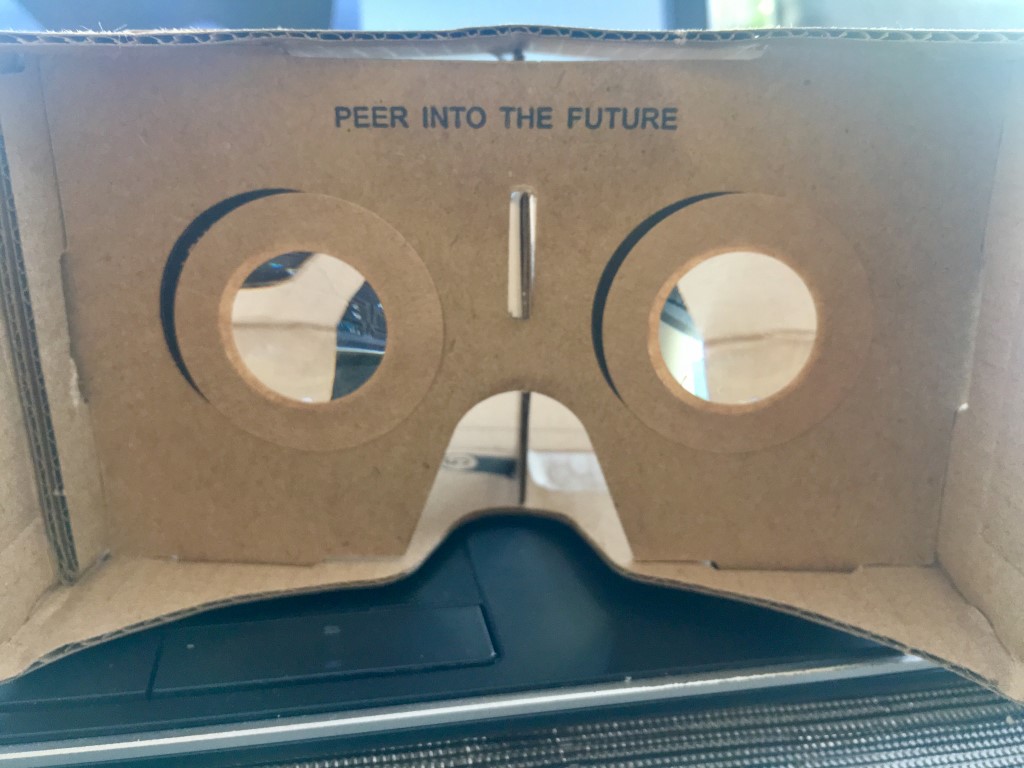
Google cardboard works by putting your phone the right distance away from your eyes so that the lenses can focus it – and with the split screen viewing the image takes on a 3D appearance. Think Viewmaster if you grew up when I did. But movies…..
Developers have made a bunch of apps containing or linking to movies to give you a taste of Virtual reality using Google cardboard – or other VR headsets.
It’d be wrong not to look at the Google cardboard app itself. It’s got a few of the same demo’s as Within mentioned below, but is a good introduction to using the Cardboard VR system.
Virtual Speech VR lets you choose different settings to practice public speaking in. Public hall, Boardroom or interview – plus expect more to come. There are options to animate the audience so there is some natural movement and background noise as well. Fairly realistic looking Im sure it could help someone with a really speaking anxiety to get more used to speaking in public.
Nivral offers a growing list of VR apps – the first, InMind VR lets you experience a scientific-educational activity where you travel inside a human brain on a rollercoaster-like ride zapping bad neurons! This VR app is probably a good starter one where users get a taste of many of the expected VR experiences. There’s also InCell VR…
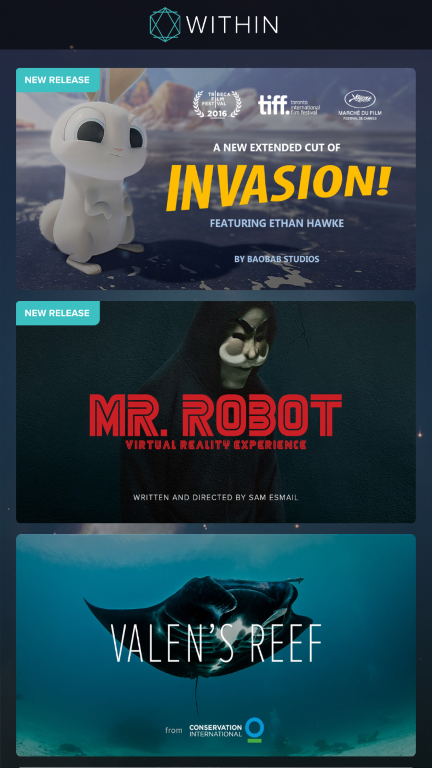
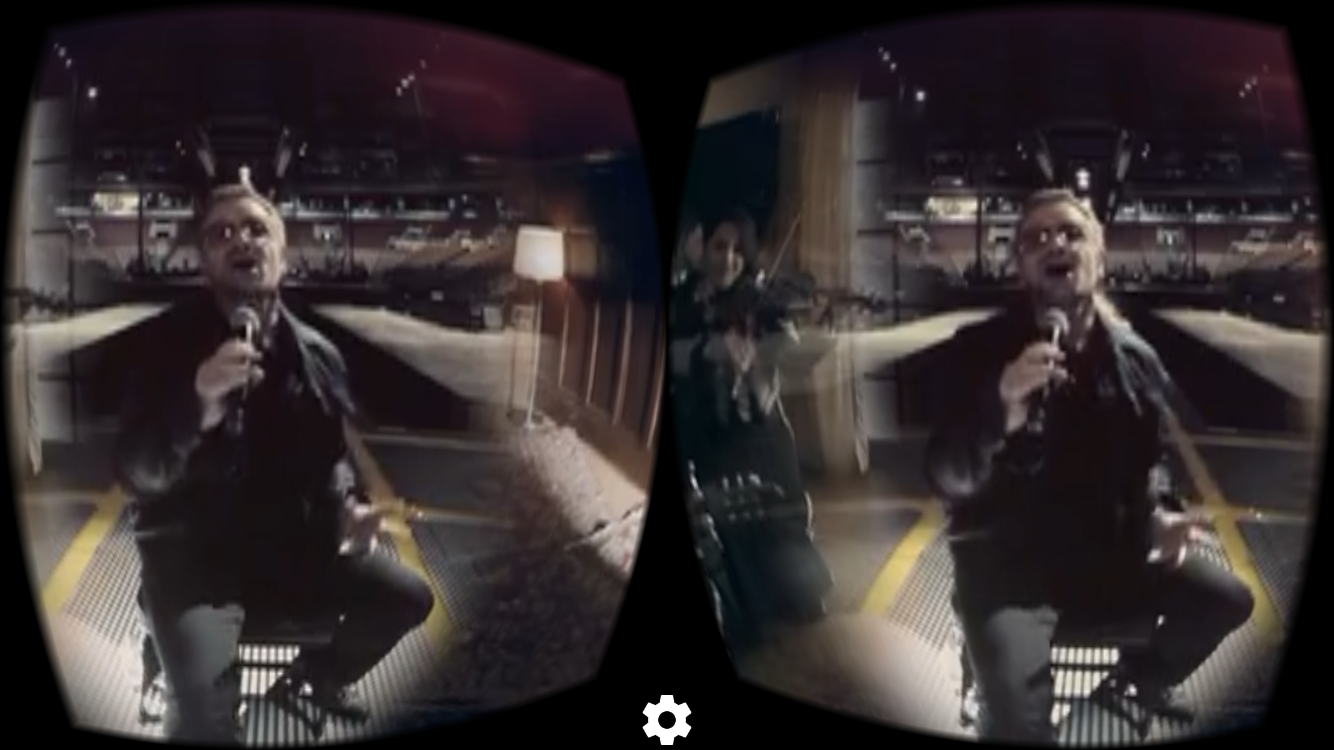
Within VR provides a series of short VR movie experiences, some of which can also be found in Youtube’s 360 Video Hub. Some cool movies here and easy app to use. What attracted me most of all was U2’s 360 VR version of Song for Someone!
Yeah Im also a sucker for Star Wars. You may already have the Star Wars app on your phone, and inside that you’ll find Jakku Spy which is a VR activity. There’s a lot to download, but this may be the VR you’re looking for. Use the force in your role as a Resistance fighter.
BONUS VR APP TIP!
I realised after publishing this post that I hadn’t included the compulsory Rollercoaster VR app!
Check out Rollercoaster VR by Fibrum, which has cool scenes including jungle and water. Fun times. But you only get 4 free rides, then its $2.99……..
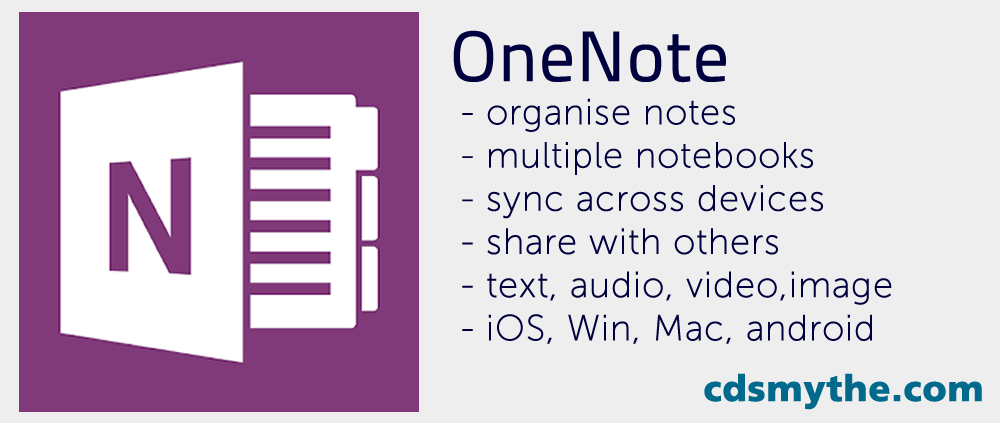
OneNote is a notetaking tool included in Microsoft Office and now available on your web browser or as a mobile app for android and iOS. When using Onedrive you can sync it across computer and mobile devices to record notes which can include text, images, audio, video. Notes are organised into Sections of a Notebook. You can setup any number of Notebooks.
Introductory video from Office 365 (1:16)
My Use of Onenote
Ive been using Evernote Premium since it came out around 2008/2009 and still use it for my personal notes on various devices.
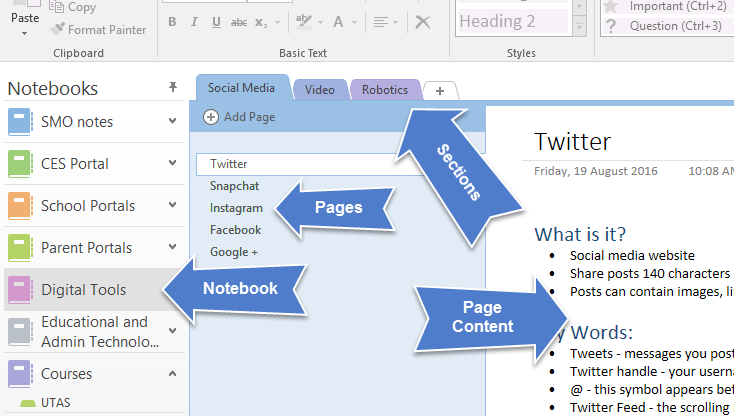
But I started using Onenote in 2016 for work and it’s now my main tool outside of email. Onenote is software from Microsoft which enables me to create digital Notebooks which can contain Sections, each section can be made up of any number of Pages.
Pages can contain, Text, Images, recorded Audio or Video, and are saved instantly as I work. I can move Pages between Sections or Sections between Notebooks. I can even share Notebooks with other Office 365 users.
What does the OneNote app do?
The OneNote app offers me the core features of the full desktop version of OneNote which makes it great to record notes on my iPhone or iPad when getting out the laptop is too much trouble. Because my OneNote notebook files are stored on OneDrive in the Cloud the data syncs and when other devices running OneNote are connected OneNote data is synced, so everything stays up to date.
How can I use the OneNote app?
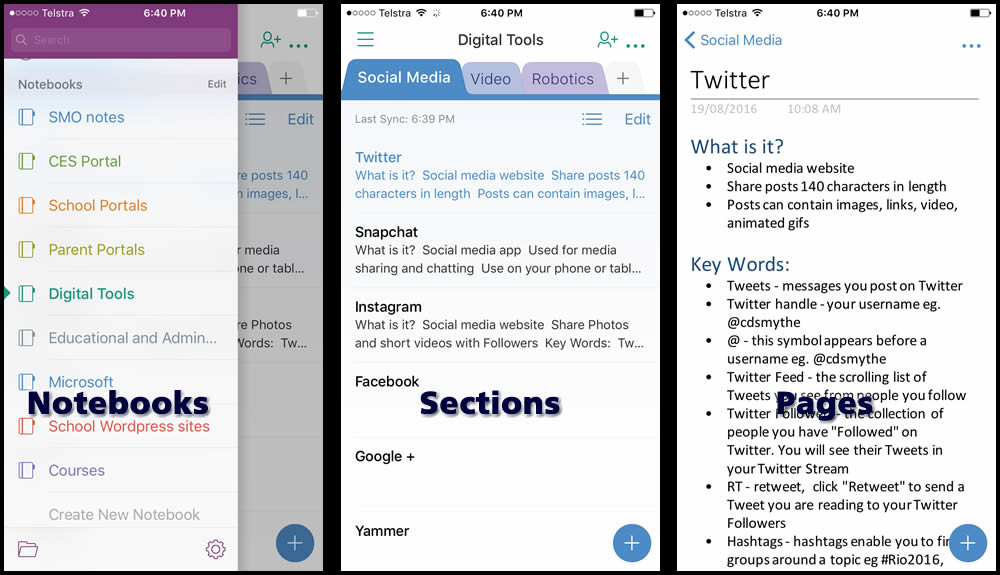
For my work I currently have around 7 Notebooks on various topics relating to my Role. Each Notebook has a number of Sections and those Sections contain Pages. For example one Notebook titled “Digital Tools” has content on various software and apps that I can share with others when they ask me what something is and how they could use it.
I have my Digital Tools notebook organised into Sections named Social Media, Video and Robotics and then each section contains relevant Pages, for example the Social Media section has pages on Twitter, Snapchat, Facebook, Instagram.
An example of a OneNote Notebook/Section/Page structure
When I open the OneNote app on my iPhone (below) I can access this notebook and its contents, but the view and features are obviously different because of the device.
OneNote Notebook, Section and Page view on iOS app
One of the great things I use a lot is the iPhone’s camera to add photos of presentation slides during a workshop or presentation. After taking the photo in OneNote you have the option to crop the image by dragging handles to the image corners – OneNote then does it’s best to align the image flat. If its a Whiteboard photo just tap the “Whiteboard” button and watch the magic happen…..
Video: OneNote iPad app (33:16)
Sharing OneNote Notebooks
Once your using OneNote with OneDrive you have the ability to share your notebooks with others. For example, my Digital Tools notebook could be shared with other educators who could then view or contribute to the notebook content depending on what level of sharing I choose. This collaboration feature enables you to use OneNote as a tool for purposes where information needs to be up-to-date and available to a group.
When sharing a Notebook you are also able to protect sections within the notebook with a password, should you not want to share the whole thing.
OneNote is a really great tool for keeping the information you need to keep, organised and synchronised on various devices. The OneNote app makes it easy to access those Notebooks on your mobile devices. If you’re a OneNote user you will value having access via the app.
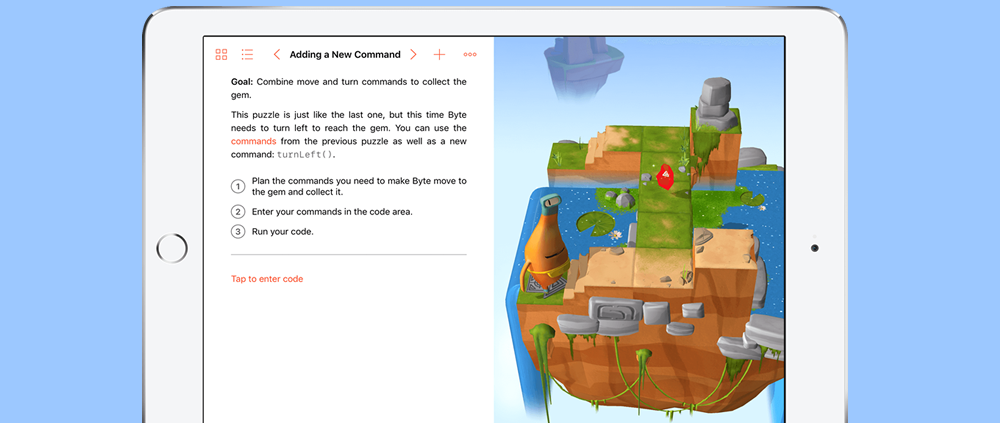
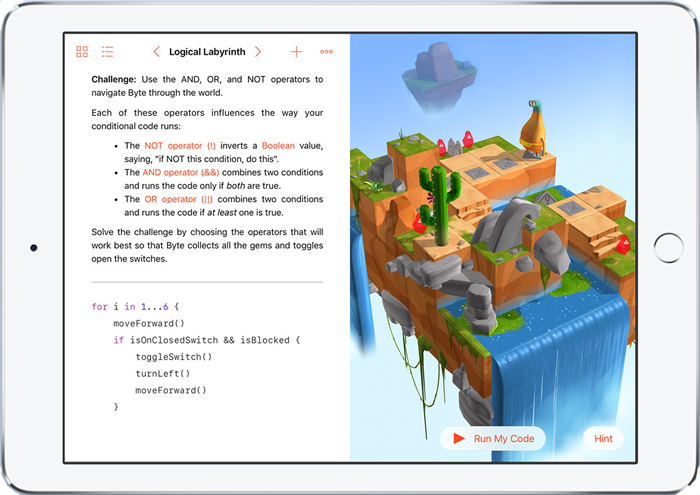
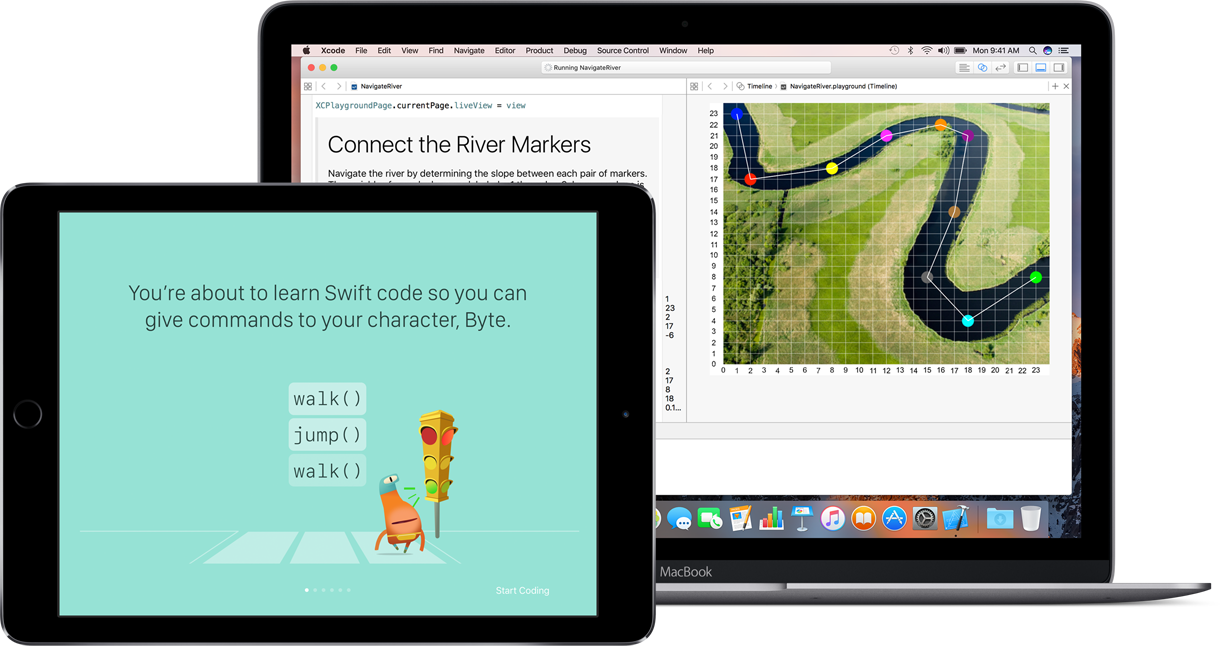
Swift Playgrounds is a coding app from Apple designed to teach kids how to code. Expect to see it available when iOS 10 is released in September 2016. It allows students to complete in-built lessons and write code to control a character named “Byte”, giving him movement and direction commands such as moveForward() or turnLeft() or jump(), to guide him through a series of puzzles to be solved in a 3D graphical world.
With Swift Playground’s split screen on the iPad as seen above, the coder can create and run the code in the left hand section, then preview it straight away on the right hand side Swift Playground’s “world view”. When you start coding the app also gives you suggested commands.
only available on iPads running iOS 10 and above (iPad Air or iPad Mini 2 are minimum)
you can share your Swift Playground’s code with others using Mail, Messages or Airdrop
record and share video of your code in action
expect new challenges to be added with app updates
code templates enable you to begin using iPad features (accelerometer, gyroscope, multi-touch) quickly and easily
Swift Playground’s code can be transferred directly to X-Code, Apple’s programming software for MacOS, WatchOS, tvOS and iOS
free app once released, available now to users on the Apple Developer program testing iOS 10 beta.
Watch a short video from Macworld introducing Swift Playgrounds (2min47)
From Apple –
“Interactive puzzles teach key programming concepts in a way that is both fun and challenging building confidence and skill. Starting with the “Fundamentals of Swift” lesson, you’ll tackle goals using the same code professional developers use every day. As you move along, more advanced concepts come into play. You’ll continually build on what you’ve learnt and create even more complex code.”
It’s an app which should be popular in iPad schools particularly because learning and writing code is so popular in education at the moment. Code writing involves students in planning, problem solving, design thinking, creativity and collaboration – core 21st Century skills schools want to see their students develop.
Blogging refers to publishing in a website on the WWW – usually a single person or small group of people would contribute posts to a Blog which would be a collection of articles around a particular topic or no topic at all. Posts are organised into categories or displayed chronologically as they are posted by the Blog Author.
This site could be classified as a blog. Blogs can give someone a voice on the internet – Bill Gates has a blog and so can you!
Video Introducing Blogs and Blogging (2:58)
Key Words:
Blog – the website where your Posts and other material or links is stored on the World Wide Web
Blogger – someone who contributes posts to a blog
Posts – series of articles making up a Blog, usually displayed in categories or chronological order
Categories – how you group your Blog Posts
Comments – messages people can leave behind after your Posts if you enable them to
Theme – the template which gives your blog it’s look and feel
Subscribers – people who subscribe to your posts receive notice when you make a new post
What can I use Blogging for?
Blogging is a great way to share your ideas or interests with others. Think about your Google search results – how often when you are searching for help on something do you end up on someone’s blog where they are answering your question?
Blogs exist for probably any topic you can think of and it can be surprising what you can find online
First place to start is to have a blogging platform to use. Once you have the platform you can customise the look and feel of it and then start adding blog posts.
There are some free blogging platforms you can look at which usually just require a signup email address before you can rock’n’roll.
Check out some of these free ones:
WordPress – WordPress sites make up a massive number of the blogs and websites on the web. Sign up at WordPress.com for a freebie and get started. This site is based on WordPress and WordPress would still be my recommended starting platform for a keen, serious, likely to continue blogger!
Tumblr – not as feature rich as WordPress but useful for simple quick updates
Blogger – a Google product which is easy to sign up for with your Google account but you never know when Google pull the plug on its products.
Google sites – similar to WordPress, Google sites are free and fairly customisable.
Weebly – WordPress like, use to build websites or blog style website
Edublogs – WordPress based but intended for use by Teachers and Educators
One of the advantages of starting with a free hosted website is that if after some time you decide you want more control with your own hosting, web domain and email addresses you can pay for your own web hosting and setup a WordPress site there.
Video: Setup a WordPress.com Blog (30:52s)
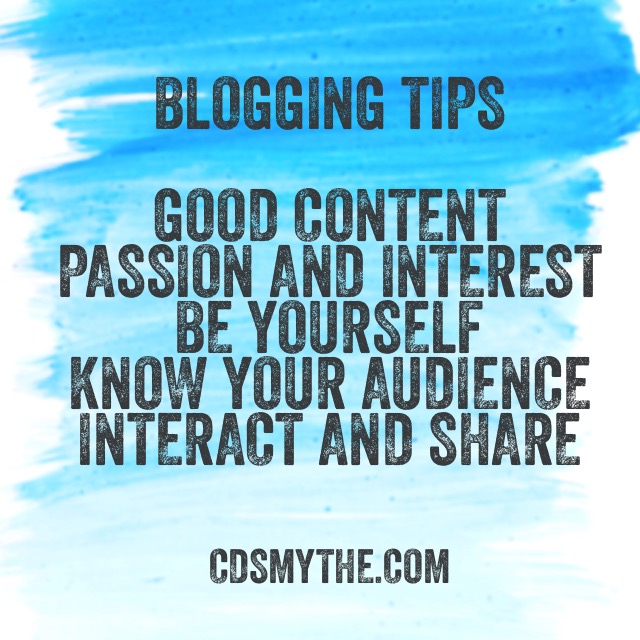
Blogging Pro Tips:
#1 MOST OF ALL – Content is the key – if what you say is rubbish that’s where people will put it and they wont come back.Don’t hesitate – if you have things you want to share and have discussion about just start blogging. Once you’re up and running you can change platforms, copy and paste or import content. But just get started!
Don’t blog for the sake of it. Blog about what your really interested in or what you believe and think is worth sharing that way it will be easy to continue doing it!
Be yourself – write your blog posts using the same language you’d use if you were talking to someone in the flesh! People get to know you through your blog so don’t be someone you’re not!
Audience – know who you are writing to – this will shape what you blog about and how you do it
Choose your blog theme and colours (and fonts) well. Your blog will be more attractive to read and revisit if it looks modern and up to date. Don’t choose colours that clash and use a minimum number of fonts.
Engage in conversation with those who comment on your Posts – be polite.
Share you posts on social media – use Twitter and Facebook to share your blog posts with others
Use share buttons on your blog to make it easy for readers to share on their networks
Use on your phone or tablet to live chat with friends or send them short video, text or audio messages which expire after a short time
Key Words:
Snap – a short video or image shared between your Snapchat friends
Friends – people you have connected Snapchat with
Stories – a series of Snaps combined to tell your “story” over a 24 hour period
Filters – easy buttons you can modify your Snaps with (including overlays)
Memories – your collection of saved Snaps
Trophy Case – snapchat awrds trophies when you meet certain achievements like: “Sent 10 Snaps”
Snapcode – your Snapchat icon – looks like a yellow ghost.
Chat – you
What can I use Snapchat for?
Send short videos, photos and text to friends which expire after time
Live Video or audio call friends
Add overlaid text, clipart or drawing to photos and video
Send Snaps to a selection of followers or save to your Story so all can view
Your Story is a collection of Snaps saved in chronological order for 24 hours which all your friends can see
Snapchat also publishes Stories from some media companies and for some special events
You can choose to enable Memories, which now saves your Snaps
Snapchat will notify you if someone takes a screenshot of one of your Snaps
How do I use Snapchat?
Install on iPhone or Android
Create an account
Start following friends and contacts
Swipe down
Click the Add Friends button
Allow Snapchat to access your Contacts
Sending Photos
Start with sending someone a Photo
tap the capture button
Click the clock to set a duration
Tap the icons top right to add: clipart, Text or to draw on the photo
Click the Send button
Choose which of your friends to send it to
Click Send arrow
Sending Video
Hold the capture button in the red circle grows as the video length does
Swipe left or right to add filters (eg. location image, time, temperature, speed, image filters or to slowdown/speedup the video)
Tap the screen to add Text
Tap the Clipart or Draw icons to add effects
Tap the speaker to mute the audio
Click the Send button
Choose which of your friends to send it to
Click Send arrow
Adding face filters to video
Long press on the face in the video
Swipe through the available filters
send
Snapchat ProTips:
You can save your Snaps to Memories and keep them
Make your Snaps interesting – what would you tell your friends about if they were there?
When adding Text, type your text then tap the T icon again to select from additional text features
When taking selfie photos Snapchat uses the screen as a front facing flash. Tap the lightning icon in the top left corner to activate
Tap the screen twice to switch from front to rear camera
Tap the screen to quickly skip through Stories
To apply more than one Filter, choose the first, then tap and hold your finger on the screen while swiping to the second filter
Secure your account with two step authentication. This means a SMS code will be sent to you when you login and out (not when you open and close) the app
Add extra Text to Snaps by creating in Notes and copying/pasting into the text box in Snapchat
Turn on Travel Mode to save data – Swipe Down > Settings > Manage > Travel Mode – turn on
When adding Friends try “Add Nearby” – if everyone opens Add Nearby they will be visible
Also, take a photo of the persons Snapcode and use that to add them
Personalise your Snapcode. Swipe down, tap the Snapcode, tap the capture button and Snapchat will capture 5 images as an animation to use in your Snapcode
Security and Privacy:
Keep default settings of who can contact you as Friends
You can Block users
Third party apps can be used by others to save Snaps they’ve received – Snapcrack
I am a Learning and Collaboration technologies advisor living in Cairns, Australia. An educational technology leadership background and experience managing a globally located information technology team, has given me wide experience in the application of digital technologies to a variety of educational and workplace contexts.
Certified Microsoft Service Adoption Specialist
Microsoft eSports Leader
Microsoft Innovative Educator
Mountain Biker and Triathlete
Former Asia Pacific Information Services Manager MAFINT