Microsoft Teams – How to Create a Read Only Folder in the Files Section

Microsoft Teams – How to Create a Read Only Folder in the Files Section

Updated: September 2020

Most of the Microsoft Teams created in our organisation are for supporting the collaboration in our professional learning communities.

In these Teams, every Team member can edit files stored in the Microsoft Team’s Files section.  But what if you just want a location to store documents which your team can’t edit for some reason?  Here’s how to setup such a folder.

How to Create a Read Only Folder in Microsoft Teams Files Section

First open up Microsoft Teams and click the Files Tab

Add a New Folder which you want to be Read Only

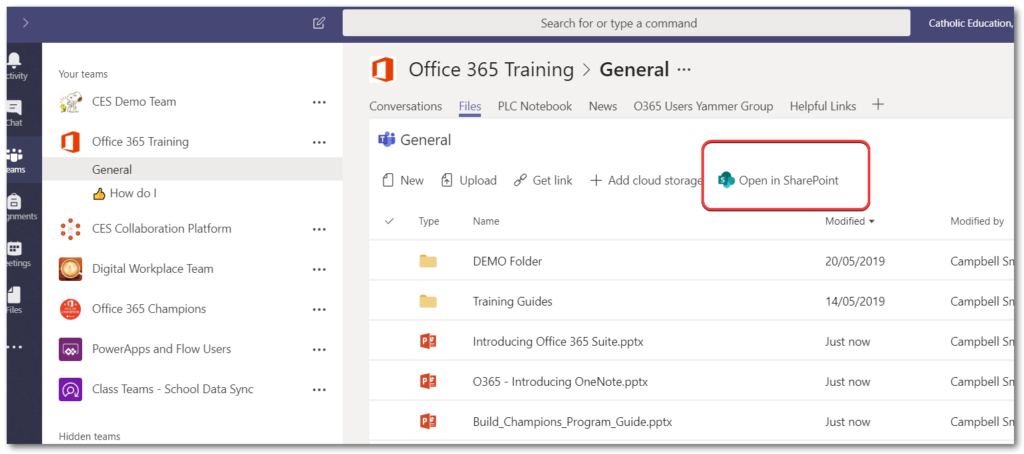
Click the Open in SharePoint button
Microsoft Teams Read Only Folder

Now in SharePoint’s view of the Folder click the settings ellipses (3 vertical dots) and click Manage Access
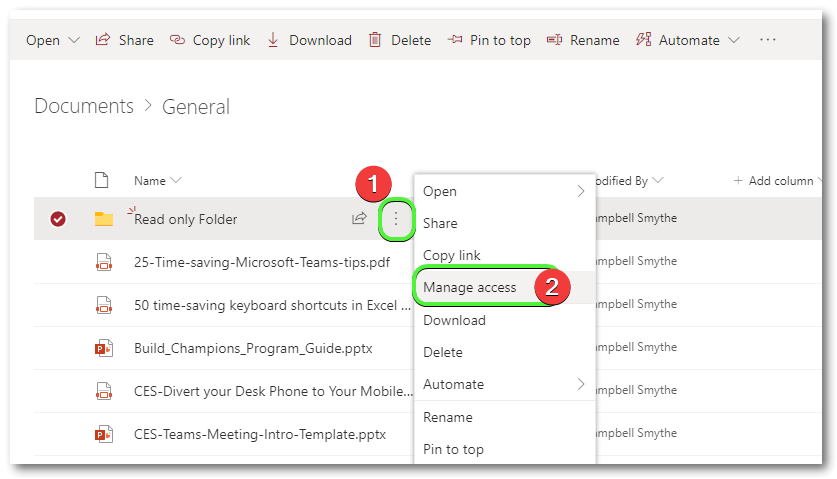
make a read only folder in Teams

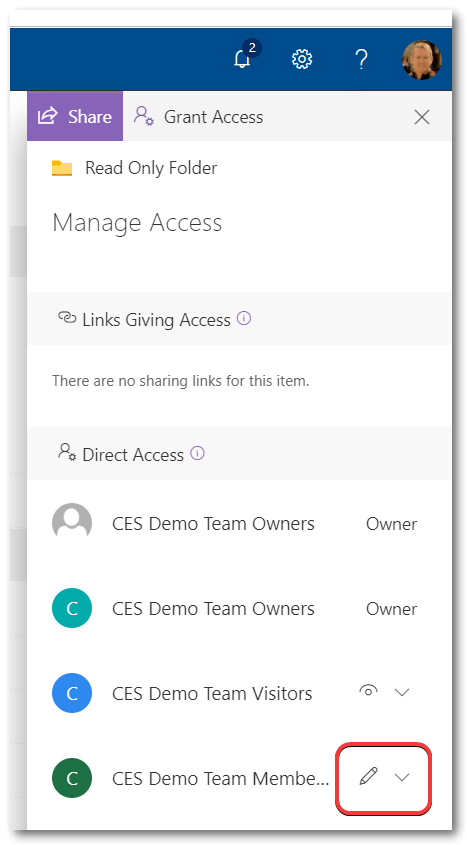
Click the dropdown to change Team Members permissions
Change the permissions for Members from Can Edit to Can View, changes will Save automatically
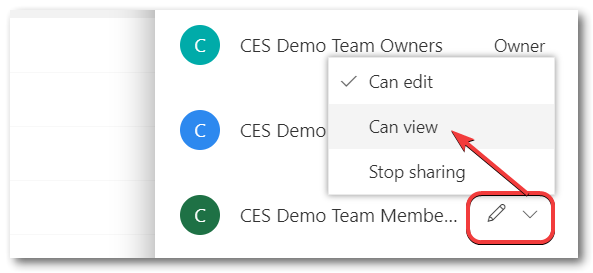
This will set the Permissions on that folder so that Team Owners only are able to edit the contents of the Folder, but not Members.

Hope that’s helpful for you – if so please consider sharing this Post with others  🙂


buy surface pro 7
Microsoft Teams – Change the Name of your Free Organisation

Microsoft Teams – Change the Name of your Free Organisation

Microsoft offers limited free access to Microsoft Teams.  Yep, you can setup Teams as an organisation for free and at the moment add up to 300 Members including yourself to Teams.

I went ahead and did this, rushed through the setup just to see if it was true……… and then a few weeks later realised that the name of the Organisation I used was not what I wanted to run with.

If you ended up in the same spot as me – here’s how I was able to change the name of the Teams Organisation.

  1. login to http://account.activedirectory.windowsazure.com/
  2. use the Office 365 account used to setup Teams
  3. click the profile picture top right and make a note of the “admin@[yourdomain].onmicrosoft.com” login address (pity you cant copy it)
  4. use that address and login to https://portal.office.com (I had to reset my password)
  5. click the Admin icon
    Change Teams organization name free
  6. Login again using the “admin@[yourdomain].onmicrosoft.com” login address
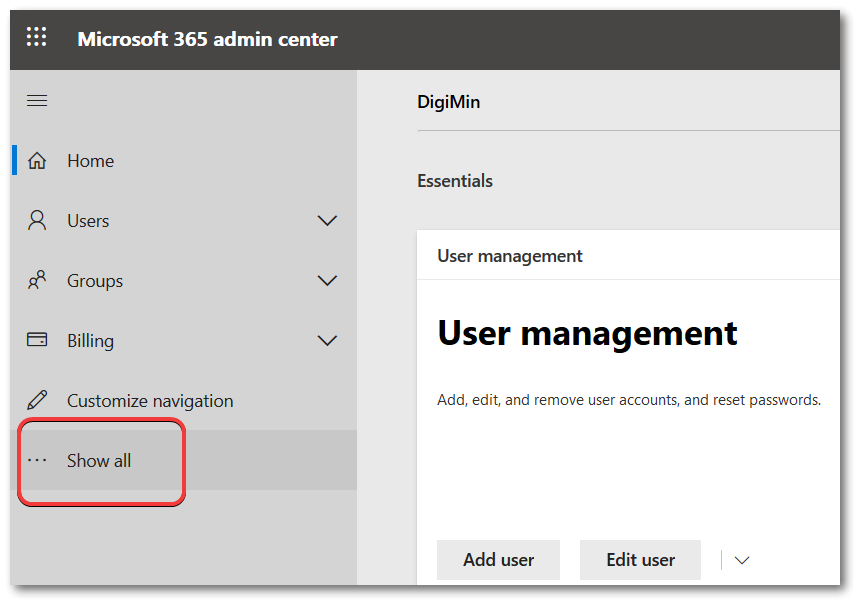
  7. click the Show All link
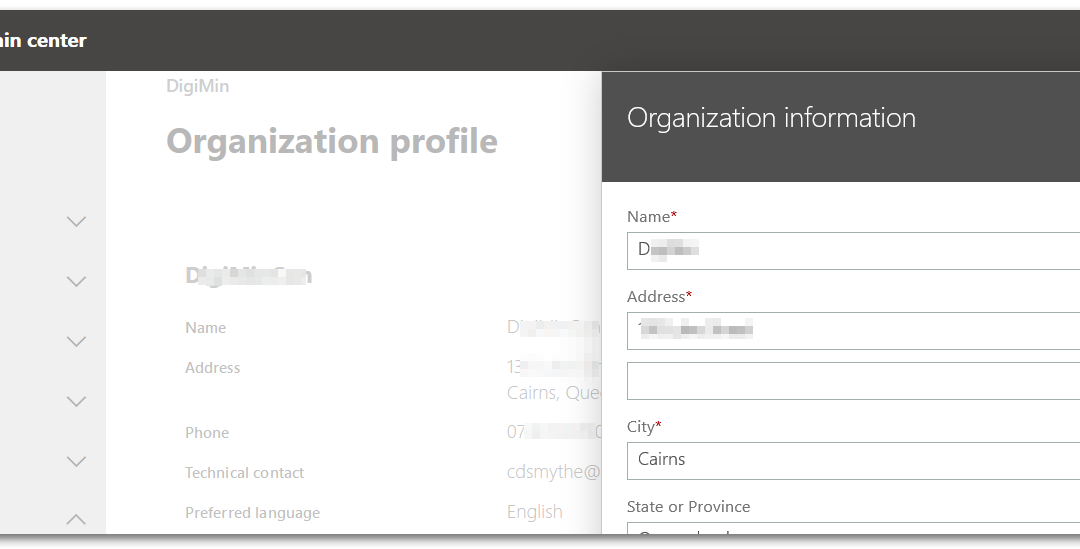
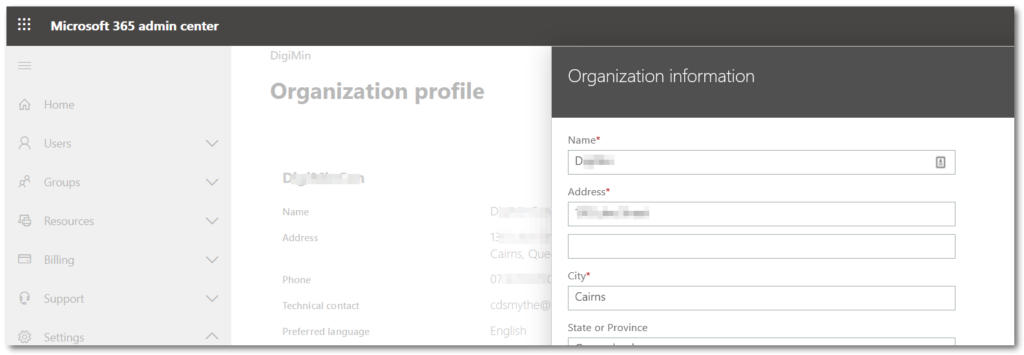
  8. click Settings and Organization Profile
  9. Next to Organization Profile click Edit and complete the form – remember to click the Save button

There you go!  If that was helpful Tweet this for someone else!  🙂


Microsoft Teams – Sync your Teams Files using OneDrive

Microsoft Teams – Sync your Teams Files using OneDrive

After you have setup your OneDrive so that documents stored in the Cloud sync with your computer, you can setup Syncing between the Files section in any of your Microsoft Teams or Portal locations.

This just gives you an easier way to access those files which may also be more efficient for you depending on how you work with files.

To setup syncing between OneDrive and your Microsoft Team:

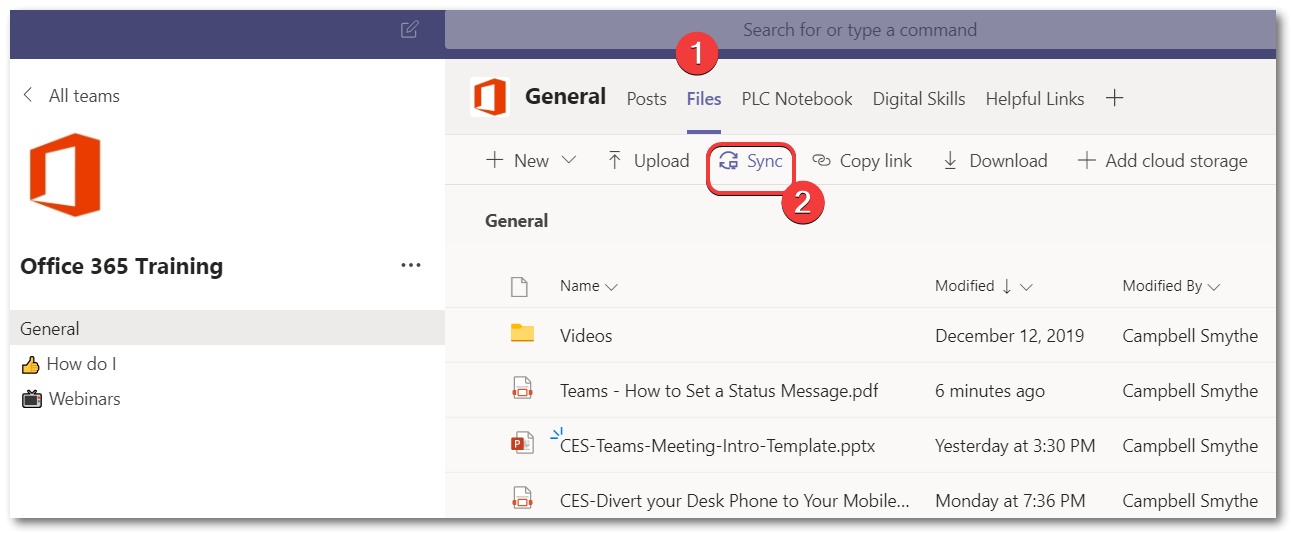
  1. Open Microsoft Teams and browse to the Team Files section
  2. click the Sync button

After setting up Sync you will be able to access the Files in your Microsoft Team using File Explorer or Finder (Mac) on your computer.

Open File Explorer and along with OneDrive – [your organisation name] – you will now see a corporate section just labelled – with the name of your organisation.

buy surface pro 7
Microsoft Teams – Pin a Chat for quicker access

Microsoft Teams – Pin a Chat for quicker access

Chat is one of the features in Microsoft Teams which gave us some quick wins when we rolled out Office 365 in our organisation. People have really taken to short messages to communicate with colleagues rather than having conversations over email.

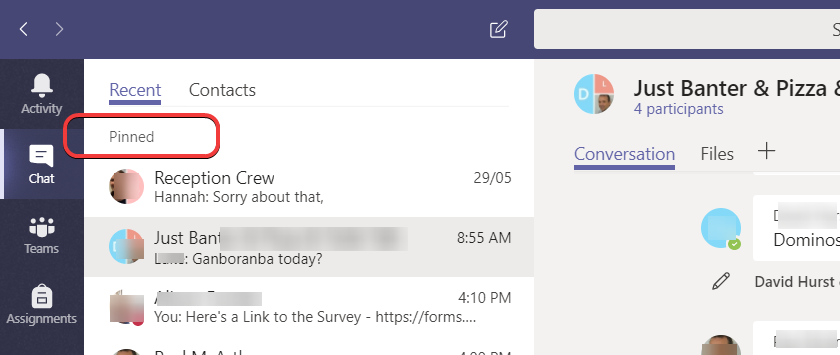
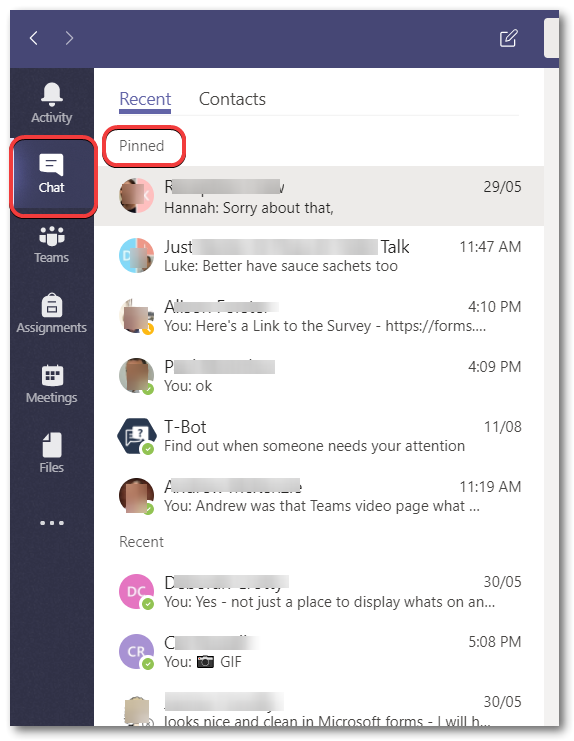
In Chat you are able to Pin a chat, making it available at the Top of your Recent list of chats.

This is a really helpful feature making it easy to go back to regular Chat Groups or individual chats.

Microsoft Teams Chat pin

To Pin a Chat in Microsoft Teams

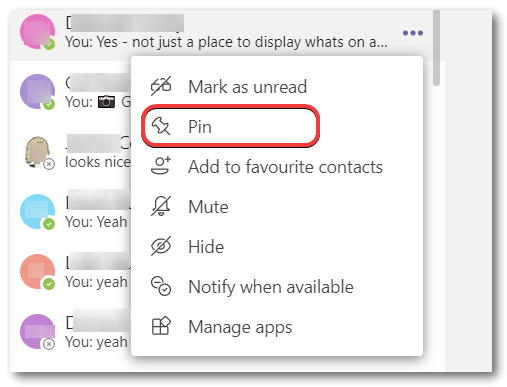
  1. Hover on the Chat message in the Recent List
  2. Click the elipses (3 dots … )
  3. Choose Pin
  4. To Unpin a Pinned Chat – simply click the elipses and select Unpin from the options

Microsoft Teams how to pin a chat message

A really simple feature which is easy to activate and helps you work more efficiently in Microsoft Teams.

Microsoft Teams – Create a Quick Poll for your Team Members

Microsoft Teams – Create a Quick Poll for your Team Members

Create a quick poll for your Microsoft Team members in the Conversations space

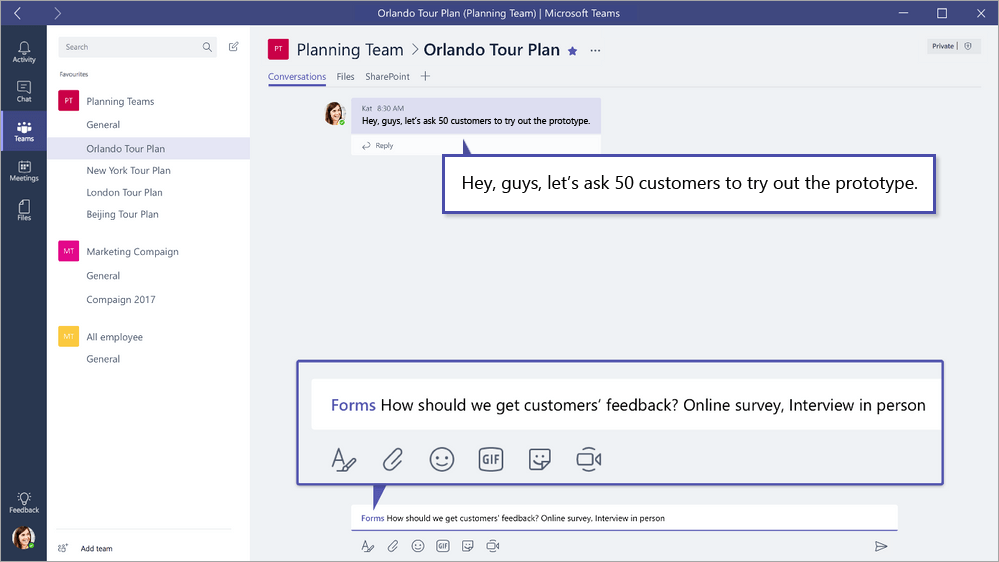
Using the Forms Bot in Microsoft Teams you can create a quick Poll to survey your Team members.

  1. In the Team’s Conversations tab, type @Forms.

  2. In the Suggestions window that appears, select Forms.

  3. Click What can I do?

  4. Click Your question? Option1, Option2.

  5. Highlight and delete the placeholder text, Your question? Option1, Option2.

  6. Then type your question, followed by the options you want members to choose from in the format shown below.

    For example: “How should we get customers feedback? Online survey, Interview in person.

Teams Poll


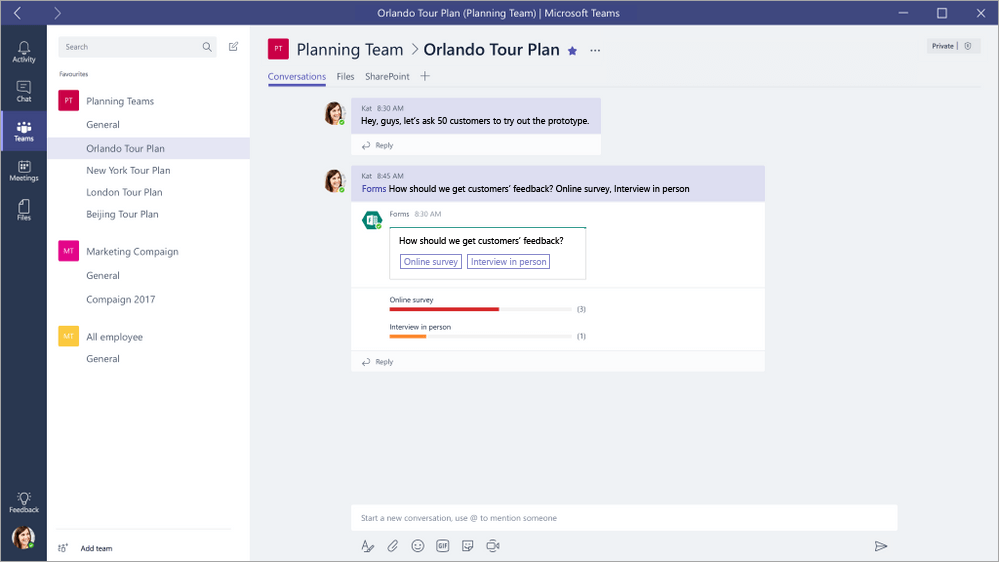
As your Team Members respond everyone can see the poll responses in the Conversation

Team members can also change their response after they have voted and they can’t see what others have selected.