Minecraft: Education Edition – How to Delete Custom Skins

Minecraft: Education Edition – How to Delete Custom Skins

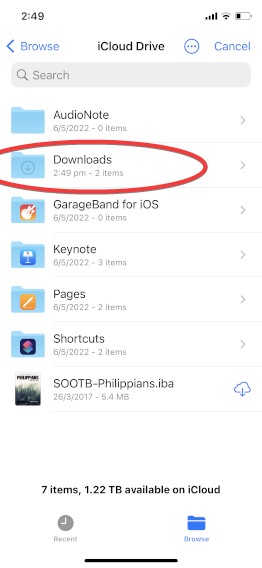
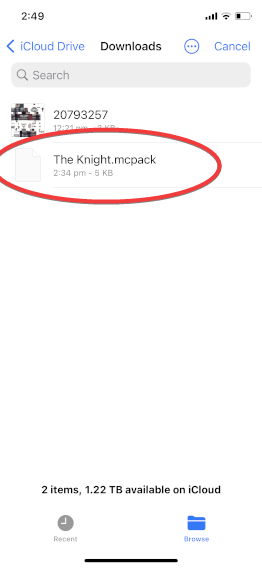
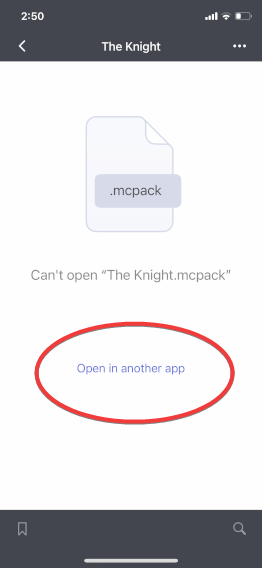
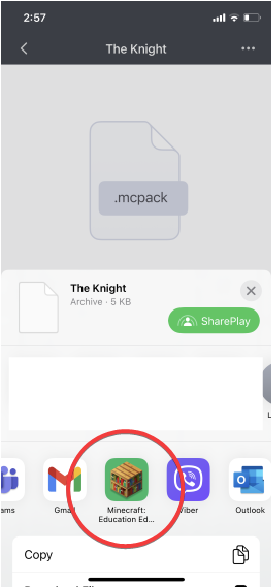
Ok so here’s how to Delete a Skin you have added to Minecraft Education Edition.

  1. Open File Explorer and click the View tab and select the Hidden Items box
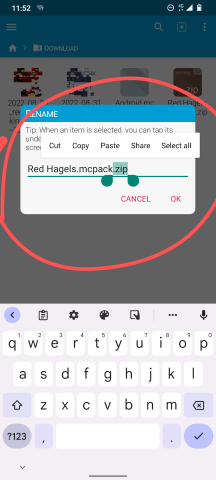
    how to delete skins from Minecraft education edition

  2. Then in File Explorer click – Local Disk (C:) – Users – [your username] – AppData – Roaming – Minecraft Education Edition – games – com.mojang – skin_packs ( for example my location is – C:\Users\csmythe\AppData\Roaming\Minecraft Education Edition\games\com.mojang\skin_packs)how to delete skins from Minecraft education edition file explorer
  3. Then simply right click the folder name for the Skin pack you want to Delete and Delete it, then Restart Minecraft Education Edition
    delete folder with skin pack minecraft education edition


Minecraft: Education Edition – What is it?

Minecraft: Education Edition – What is it?

Minecraft is an “open world” game where participants can mine resources and use them to craft things.  Minecraft: Education Edition, is a special version of the game designed for schools and available to staff and students using their Microsoft Office 365 logins.

Using Minecraft: Education Edition students can learn essential skills such as collaboration, creativity, problem solving and being a good digital citizen. Students can design and create their own simulations, scenarios and stories.

Minecraft: Education Edition offers special features for educators such as easy tutorials, classroom management tools, secure sign-in, classroom collaboration and tons of sample lessons, plus a global network of mentors and tech support. It is a well supported classroom resource.

Minecraft: Education Edition guide for teachers

Features of Minecraft – is it just a game?

Good teachers can create learning using anything. 12 months ago I saw Minecraft as a time filler. Just an online interactive space where students could build stuff from stuff.  Since finding out more about it I can see now how a teacher can use Minecraft to provide learning experiences which have students thinking creatively, strategically, engage in problem solving – and these things not necessarily from actually playing Minecraft.

Learn to Code – Code Builder is a feature in Minecraft that allows students to learn coding using tools including Code.org, Tynker, Scratch and Microsoft MakeCode. Students can use blocks of code or JavaScript to build and create in Minecraft. Minecraft Hour of Code also offers a free, one-hour introduction to coding basics.

It’s important to remember that you don’t need to be a Minecraft expert to get started. There is a fantastic course which I found really introduced me to Minecraft in the classroom and got me started with how to actually play the game. The more you get into it the more “play” seems like the wrong word, maybe “engage” would be more accurate!

The course I completed – My Minecraft Journey – is on the Microsoft Educator Centre. A source for all sorts of really great courses for educators.  My Minecraft Journey covers pedagogical, classroom management and game aspects – very helpful when getting started.

So what are some of the other features of Minecraft Education Edition?

Immersive reader – Immersive Reader is a Microsoft tool supporting learners in all Microsoft apps.  Immersive Reader supports learners in reading or translating in-game text, including character dialogue, settings and boards, with Minecraft-specific images added to the Picture Dictionary.

Chemistry Resource Pack Discover the building blocks of matter, combine elements into useful compounds and Minecraft items, and conduct amazing experiments with new lessons and a downloadable world.

Classroom Mode is a companion app for Minecraft: Education Edition that shows a high-level map view of the world, a list of all the students, the ability for a teacher to teleport students, and a chat window to communicate. Classroom Mode is provided for Educators who may want to observe student activity without being in the game, and is not needed for students to play.

Non-Player Characters An educator may create an NPC (Non-Player Character) to act as a guide for students in the game, giving instruction, providing more information, and also allowing educators to insert an active web link to additional references.

Cameras, Portfolio, and writable books An important aspect of teaching with Minecraft is being able to collect evidence of learning in the game, and being able to track student progression. The camera and portfolio features allows students to take screenshots of their work and document the development of their projects.

Chalkboards Creators can use chalkboards to communicate learning goals, provide additional information and give explicit instructions within the game. Chalkboards come in three different sizes – Slate (1×1), Poster (2×1), and Board (2×3).

Tutorial World For educators or students new to Minecraft, a tutorial world is available that will guide players on in-game navigation, crafting, and placing or breaking blocks.

Lessons Full lessons free for educators to download and use in their classroom. These lessons are available for the Education Edition only.

Secure multiplayer Enjoy multiplayer games with other users on your same Office 365 tenant, and easily join others worlds quickly and securely with pictorial “join codes”

Minecraft for educators
Minecraft: Education Edition – How to make a Star Wars Lightsaber

Minecraft: Education Edition – How to make a Star Wars Lightsaber

Who doesn’t want to play Minecraft: Education Edition without a lightsaber?!!

Are you using Minecraft’s Compound Creator?

There are a bunch of YouTube videos showing how to create a lightsaber in Minecraft: Education Edition, but I’ve found them too hard to follow and figured you would as well.

What we will go through is using Minecraft: Education Edition’s Compound Creator to craft a glow stick – which will have you looking like a genuine Jedi Knight (or Sith Lord!) with a lightsaber.

Here’s how to Create a Lightsaber in Minecraft: Education Edition

Step 1 -Add required Elements to your Inventory

Start by opening your Inventory (press the E key) and search for each of the following elements and add them to your Inventory by dragging and dropping them to a free square.

    • Carbon
    • Dye
    • Nitrogen
    • Hydrogen


minecraft education edition compound recipe lightsaber

Step 2 -Add a Compound Creator Block to your Inventory

Add to your Inventory the Compound Creator block. Search for this then drag this to an empty box in your inventory.

minecraft education edition compound recipe lightsaber

Step 3 – Place the Compound Creator block in your game

Place (right click) the Compound Creator block in your game and use the elements in your inventory to create the following three compounds by placing the required elements on the Compound Creator (drag then right click to add the required number of elements):

Polyethylene,     Hydrogen Peroxide,     Luminol

    1. Polyethylene – place 10 Carbon and 20 Hydrogen.  Drag the Polyethylene to your Inventory
    2. Hydrogen Peroxide – 2 Hydrogen and 2 Oxygen. Drag the Hydrogen Peroxide to your Inventory
    3. Luminol – 7 Hydrogen, 8 Carbon, 3 Nitrogen, 2 Oxygen. Drag the Luminol to your Inventory


Step 4 – Place a crafting Block in your game and use the following recipe to create your lightsaber

The recipe for a Lightsaber in Minecraft is:

  • Polyethylene on the 3 Left and 3 Right columns
  • Dye in the middle square
  • Luminol in the Bottom middle square
  • Hydrogen Peroxide in the top middle square


minecraft education edition compound recipe lightsaber

Close the Inventory and select the lightsaber – share a screenshot of your new skin with your friends at school but keep it a secret how you did it!!  😎
Minecraft: Education Edition – 3D Printer World – a class set of Printers

Minecraft: Education Edition – 3D Printer World – a class set of Printers

Exporting structures that have been created in Minecraft is a great way for students to re-present their work and any evidence of learning in other formats – including 3D Print. In another Post I went through how to Export structures from Minecraft as 3D Objects.

I recently attended a Microsoft Education webinar where Stephen Reid presented and in following up the resources he has created came across his 3D Printer World.  This is a world which looks and works like a 3D printer making it much easier to export a structure from Minecraft. He has also created a Class Set of Printers so the whole class can construct and export – even work together!

build on a Minecraft 3D Printer then export and print on real 3d printer
Minecraft 3D printer structure block

Students can access the world, build their structures on the grey Minecraft 3D printer platform and easily export them with the structure block already positioned. Download the 3D Print Worlds from this link – https://www.immersiveminds.com/3d-print-world

There are 2 different sized 3D Printer worlds along with the Class set so everyone can build and export together. Great idea!

Minecraft: Education Edition – How to open your Minecraft Structure with the Merge Cube

Minecraft: Education Edition – How to open your Minecraft Structure with the Merge Cube

In another post I shared how you can export structures from Minecraft: Education Edition using a Structure Block.  Now I want to show you how to view your exported structure using a Merge Cube.

When you export a structure from Minecraft it will save it as a .GLB file. You can open that GLB file up on your computer using Microsoft Paint 3D (free).

Minecraft: Education Edition show on Merge Cube 3D Paint

Once the structure is open n Paint 3D, change these settings for the best results:

  1. Click the Canvas tab
  2. Turn Show Canvas on
  3. Turn Transparent Canvas on
Minecraft: Education Edition show on Merge Cube 3D Paint

Once you have made those changes Save the image as a 3D model – with the file extension as .FBX.

  1. In Paint 3D click the Menu icon, then choose Save As
  2. Click 3D Model
  3. When the Save as window appears click the File Type drop down arrow
  4. choose the FBX file type to Save As


Minecraft: Education Edition show on Merge Cube 3D Paint

Now that you have your structure from Minecraft in the FBX file format for the Merge Cube you can upload it to the MergeEDU website.

  1. Sign in to Mergehttps://login.mergeedu.com/home  and click the My Objects button
  2. Upload your FBX file
Minecraft: Education Edition show on Merge Cube 3D Paint

You will need to use the Merge app on iOS or Android to use with your Merge cube.  If you do not have a Merge cube you can build your own using this printable Merge cube

You will also need to download the Object Viewer app from Merge
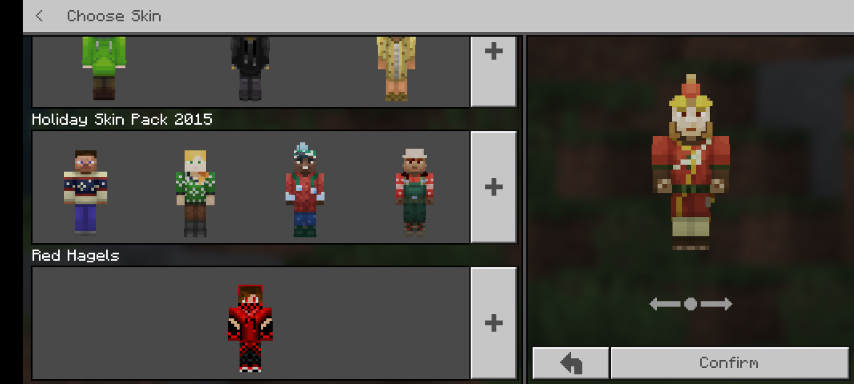
Here’s what my exported structure looks like in the Merge Object Viewer app.  The cube is just sitting on my desk…..
Minecraft: Education Edition show on Merge Cube 3D Paint